Blackadder's Scratchbuilt Thunderhawk Redux
- Thread starter Blackadder
- Start date
You are using an out of date browser. It may not display this or other websites correctly.
You should upgrade or use an alternative browser.
You should upgrade or use an alternative browser.
Fifteen Minute Paint Job:
Sidetracked as I've been with the election primaries I've missed working on my Landraider so today I bit the bullet and painted er coloured up the whole tank less the armament which is still in the mail from Australia.
Granted I did have the whole tank primed with flat black but swear to God it took fifteen to twenty minuts to paint er colour up this tank and no drying time. Of course there are pro-painters that can fault this tyro effort but you cannot beat the speed of the result.
So here's a few views you might find interesting:
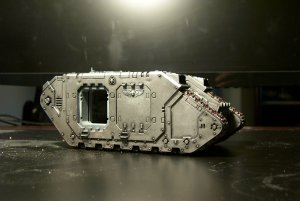
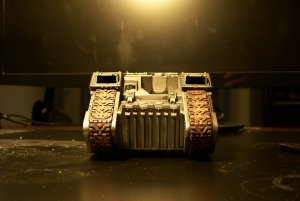
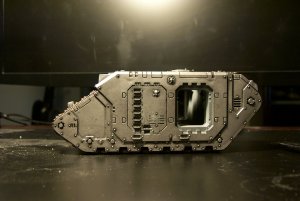
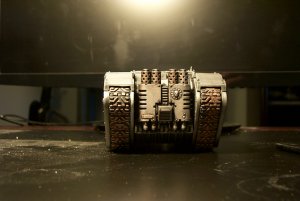
Yeah that's copper powder I put on the track as an experiment. I've had the stuff lying about for years and decided to give it a go.
Sidetracked as I've been with the election primaries I've missed working on my Landraider so today I bit the bullet and painted er coloured up the whole tank less the armament which is still in the mail from Australia.
Granted I did have the whole tank primed with flat black but swear to God it took fifteen to twenty minuts to paint er colour up this tank and no drying time. Of course there are pro-painters that can fault this tyro effort but you cannot beat the speed of the result.
So here's a few views you might find interesting:


Yeah that's copper powder I put on the track as an experiment. I've had the stuff lying about for years and decided to give it a go.
Fifteen Minute Paint Job Part Three:
Last night I masked of the entire tank and sprayed the front end with rust primer. The masking took the better part of an hour but the painting but a couple of minutes............
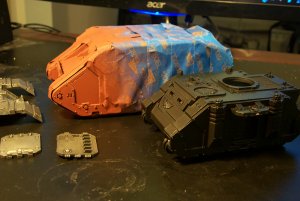
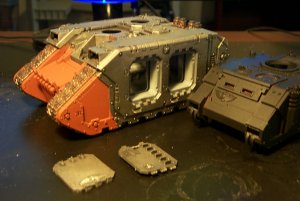
Kyrlon Rust Primer is no longer made which is a pity because it provides a deep base for reds and oranges so when dry brushing on these colours the primer provides shadow.
Last night I masked of the entire tank and sprayed the front end with rust primer. The masking took the better part of an hour but the painting but a couple of minutes............


Kyrlon Rust Primer is no longer made which is a pity because it provides a deep base for reds and oranges so when dry brushing on these colours the primer provides shadow.
Rhino Revisited:
Work has pretty much been stalled due to working on the new bath but I did manage to sneak in some painting when no one was looking.....
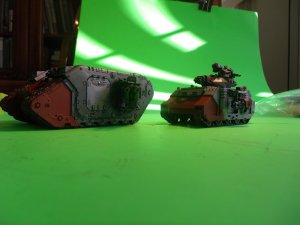
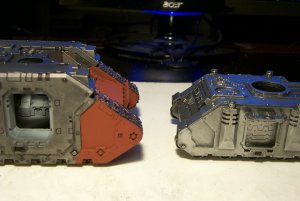
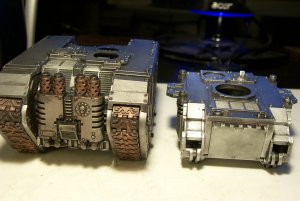
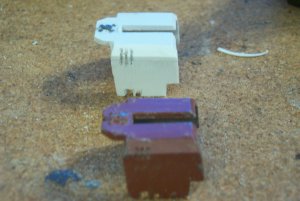
In the scrap box I found some Rhino accessories and a vintage four bogie GW Rhino which astounded me because of it's size and simplicity; we'll go into that at a later date.
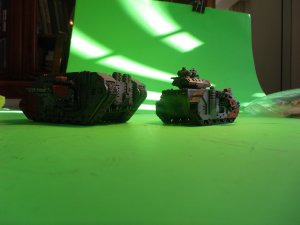
Meanwhile the current Rhino is beginning to look pretty good (IMHO) and the ugly little cuss is growing on me.

Work has pretty much been stalled due to working on the new bath but I did manage to sneak in some painting when no one was looking.....

In the scrap box I found some Rhino accessories and a vintage four bogie GW Rhino which astounded me because of it's size and simplicity; we'll go into that at a later date.

Meanwhile the current Rhino is beginning to look pretty good (IMHO) and the ugly little cuss is growing on me.

- Apr 5, 2013
- 13,876
- 10,214
- 228
Love the paint job!! Don't know what you do with primaries or if you are involved in party politics, but as an Independent, the group that will decide the election, and having known of that blowhard foul mouth jerk before I knew of the name Clinton ever existed, there never was a matter of choice. It's sad that in this great nation, the people who own it are not willing to come forward to lead. It's disgusting actually. 
Last edited:
Sorry to be so long in replying but I had other projects to work on.....
Thanks for the replies and the accolades, it's gratifying to hear.
Meanwhile.......
It's Beginning To Look a Lot Like Christmas:
I was in the mall the other day and wandered into a store I've not seen before called 'Big Lots' They had these marvelous seed type LED Christmas lights:

Prewired and ready to be installed in your model project, in this case my never ending Thunderhawk Project:
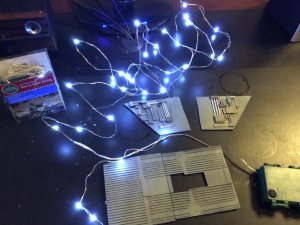
Striping down the fuselage and just jamming about half the bulbs into the forward cargo bay shows me they will provide sufficient light to illuminate the interior and taking so little space to be readily hidden behind the thin walls and ceiling of the bay
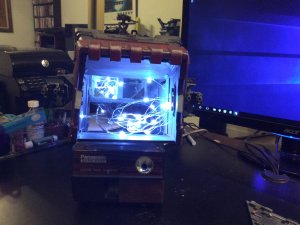
Threading the lights though the hull will require a bit of effort but the savings of time manufacturing the circuit is worth the $5 cost of the string.
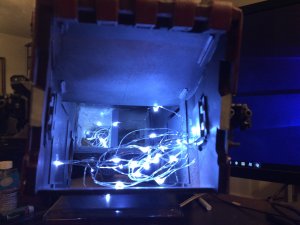
They come in Cool White, (Shown) Warm White and Multicoloured .... I may buy the multicoloured string and splice colours in strategic areas of the model.
I can't wait to install some of these in my Warlord Titan.
Thanks for the replies and the accolades, it's gratifying to hear.
Meanwhile.......
It's Beginning To Look a Lot Like Christmas:
I was in the mall the other day and wandered into a store I've not seen before called 'Big Lots' They had these marvelous seed type LED Christmas lights:

Prewired and ready to be installed in your model project, in this case my never ending Thunderhawk Project:

Striping down the fuselage and just jamming about half the bulbs into the forward cargo bay shows me they will provide sufficient light to illuminate the interior and taking so little space to be readily hidden behind the thin walls and ceiling of the bay

Threading the lights though the hull will require a bit of effort but the savings of time manufacturing the circuit is worth the $5 cost of the string.

They come in Cool White, (Shown) Warm White and Multicoloured .... I may buy the multicoloured string and splice colours in strategic areas of the model.
I can't wait to install some of these in my Warlord Titan.
Yeah well I don't see any of them chucking their store bought T'hawks in disgust but I do get quite a few likes on various forums.  Thanks for the reply.....
Ceiling Panel and Lenses
last night it came to me how to employ these marvelous lights. I had hoped for more conventional LEDs but the circuitry behind the ceiling panel was quite restricted if I was to have adequate clearance for a Slick Rhino in the cargo bay. These seed LEDs were just the ticket but how to mount them???
I began with a sheet of 0.030 inch styrene cut to fit the ceiling... initially I posited 18 lights to illuminate the bay interior and drilled two rows of nine per side but I hit upon some scrap plastic interesting shapes in the form of dispossible contact lens containers. Slightly fogged these container vials provide interesting shapes, just the thing for a set of 40K light fixtures plus they diffuse the light.......
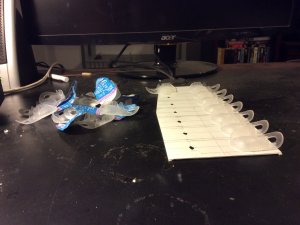
With the holes drilled for the sockets to mount the LEDs and a dry trial run I think these will work out nicely.
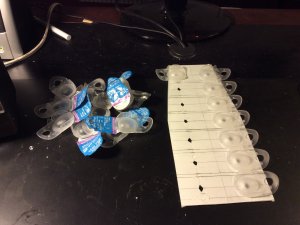
Ceiling Panel and Lenses
last night it came to me how to employ these marvelous lights. I had hoped for more conventional LEDs but the circuitry behind the ceiling panel was quite restricted if I was to have adequate clearance for a Slick Rhino in the cargo bay. These seed LEDs were just the ticket but how to mount them???
I began with a sheet of 0.030 inch styrene cut to fit the ceiling... initially I posited 18 lights to illuminate the bay interior and drilled two rows of nine per side but I hit upon some scrap plastic interesting shapes in the form of dispossible contact lens containers. Slightly fogged these container vials provide interesting shapes, just the thing for a set of 40K light fixtures plus they diffuse the light.......

With the holes drilled for the sockets to mount the LEDs and a dry trial run I think these will work out nicely.

Tripping the Lights Fantastic:
This is coming out 'way better than I expected. It's amazing how much light these little diodes generate.
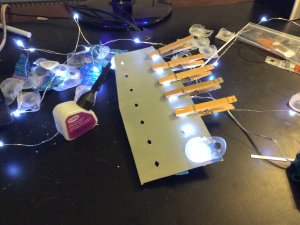
The image below shows three stages of construction with the finished light assembly in the foreground. I used Testors' Clear Parts Cement to glue the LED to the ceiling panel and I just dropped the lens blister over the foreground LED to show what I have in mind once all the LEDs are installed
Below is a close up of the LED and the lens blister.
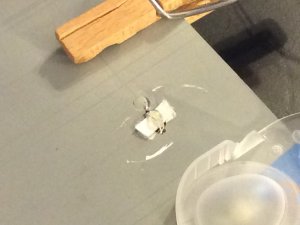
Once the panel is completed the raised rim around the lens blister will be painted to give a purpose to the structure that is a buttress frame member and to give protection for the lens in the cargo hold.
This is coming out 'way better than I expected. It's amazing how much light these little diodes generate.
The image below shows three stages of construction with the finished light assembly in the foreground. I used Testors' Clear Parts Cement to glue the LED to the ceiling panel and I just dropped the lens blister over the foreground LED to show what I have in mind once all the LEDs are installed

Below is a close up of the LED and the lens blister.

Once the panel is completed the raised rim around the lens blister will be painted to give a purpose to the structure that is a buttress frame member and to give protection for the lens in the cargo hold.
- Apr 5, 2013
- 13,876
- 10,214
- 228
People who can't make things clutch tightly to their store bought goodies, for validation, and to cloak their envy. Those who come forward are genuine, and probably decent to game with. I have seen so many people into this that I want to scream, "Please, go get a life!". Of course, this is not towards those who make their owns works, either because they just like to, and may not have anything else to do with Warhammer40K. I do have to admit that those tanks without any suspension are quite ridiculous, but the people playing them have never been in something that is unforgiving, and sending jarring shocks up your spine. (I rode a hard tail Harley for a mile, that was my experience). 
I get a great deal of fun building these things but I couldn't care less about actually playing the game. I like the outlandish technology impractical as it is just for the sake of the monstrous beauty of the designs. When I glance in passing when my son and a group of his friends are engaged in a really huge game I see a lot of tedious development of the pieces and resolution of each turn which would drive me to distraction were I to attempt playing. My idea of a wargame is Chess.
Trial Bay Lighting:
Awright before anyone points it out, I know the ceiling is hanging down on the left side....
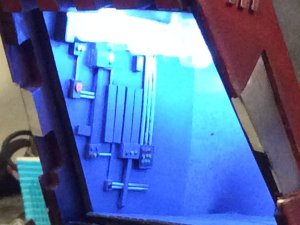
This is just a trial to determine of the lighting is adequate which it is and then some. The camera lens picks up a lot more light than is apparent in person and the lenses defuse the harshness of the LEDs just about right.
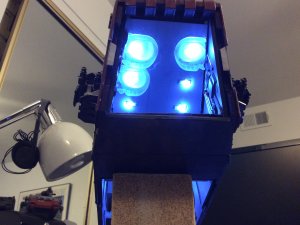
Close up of the ceiling shows 14 LEDs is sufficient to illuminate the entire bay
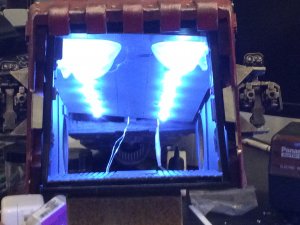
My entry gewgaws which I thought too 'busy' actually look plain and uninspired in the cold light.
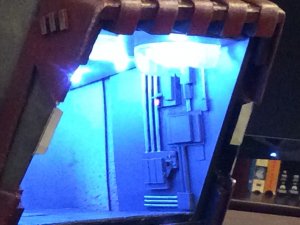
I need to perk them up quite a bit plus the walls further back in the bay now that it is illuminated.
Trial Bay Lighting:
Awright before anyone points it out, I know the ceiling is hanging down on the left side....
This is just a trial to determine of the lighting is adequate which it is and then some. The camera lens picks up a lot more light than is apparent in person and the lenses defuse the harshness of the LEDs just about right.

Close up of the ceiling shows 14 LEDs is sufficient to illuminate the entire bay

My entry gewgaws which I thought too 'busy' actually look plain and uninspired in the cold light.

I need to perk them up quite a bit plus the walls further back in the bay now that it is illuminated.

My New Photo Studio:
Is too small for the Thunderhawk! I converted my closet in the den to a paint booth / photo studio and the first thing I use it for is too big to fit. Gaaah!
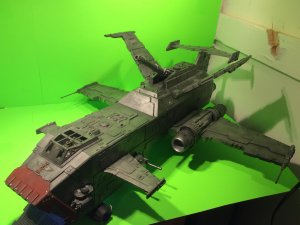
Well it's not really a problem as I can just extend the table but I gotta start making smaller models. Not likely.
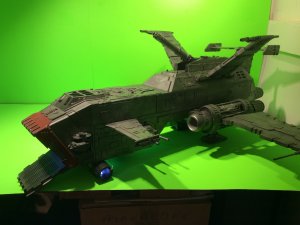
So the real reason for the post is an update on the interior cargo lighting before I disassemble the model for the rest of the lighting installation.
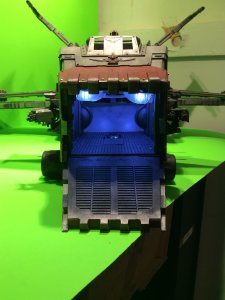
I sorely need more interior detail
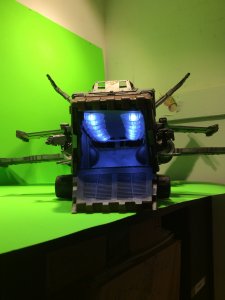
and a vehicle
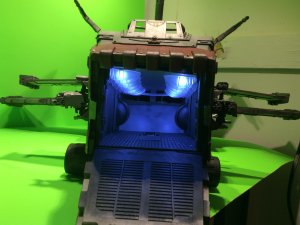
Next up Cockpit Lighting.
Is too small for the Thunderhawk! I converted my closet in the den to a paint booth / photo studio and the first thing I use it for is too big to fit. Gaaah!

Well it's not really a problem as I can just extend the table but I gotta start making smaller models. Not likely.

So the real reason for the post is an update on the interior cargo lighting before I disassemble the model for the rest of the lighting installation.

I sorely need more interior detail

and a vehicle

Next up Cockpit Lighting.
Thanks for the reply,
How Not To Build a Thunderhawk:
Or at least How Not To Make the Same Mistakes I Did
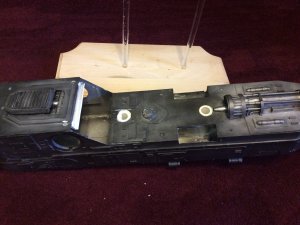
Below is my solution to mount the craft on a pedestal base using 1/2 inch rods to provide relatively innocuous levity.
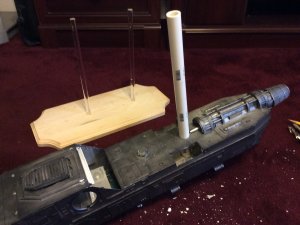
The problem being I have to do all this work inside out without damaging the already finished exterior. It pays to plan ahead.....
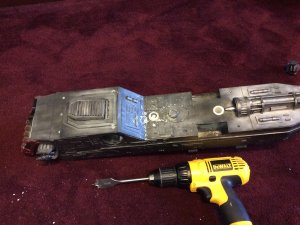
After drilling an oversized hole I glued in a sleeve to receive the transparent rod. As an added refinement I plan now to finish the upper gallery with Lighting and Space Marines ready to deploy; all this accomplished in the inside out manner previously mentioned. Heh, heh, heh! (He laughs maniacally.......)
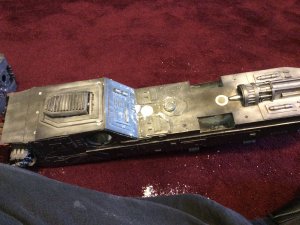
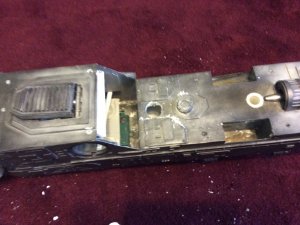
The rest of the images probably need no explanation as it just duplicates forward the work described above.
However there is one more surprise in store for followers of these interminable thread addenda Heh,heh.heh!
How Not To Build a Thunderhawk:
Or at least How Not To Make the Same Mistakes I Did
Below is my solution to mount the craft on a pedestal base using 1/2 inch rods to provide relatively innocuous levity.

The problem being I have to do all this work inside out without damaging the already finished exterior. It pays to plan ahead.....

After drilling an oversized hole I glued in a sleeve to receive the transparent rod. As an added refinement I plan now to finish the upper gallery with Lighting and Space Marines ready to deploy; all this accomplished in the inside out manner previously mentioned. Heh, heh, heh! (He laughs maniacally.......)
The rest of the images probably need no explanation as it just duplicates forward the work described above.


However there is one more surprise in store for followers of these interminable thread addenda Heh,heh.heh!
Cure For a Rainy Day:
OMG every thing is coming up Roses. Purists may baulk at a Thunderhawk Transport carrying a Landraider but I've wanted this every since I first laid eyes on a T'hawk. The shape of the fwd cargo compartment fairly screams for that configuration. Since my T'hawk is so much larger than the basic FW version it can easily fit a Landraider in the notch space between the wings.
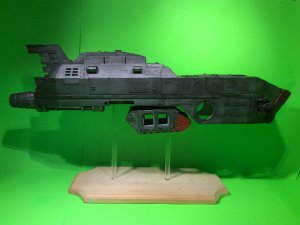
Finally the center of balance for the model is right where the transparent rod pierces the Landraider forward turret so everything is falling into place with a minimum of alteration to the APC just a 1/2 inch hole aft of the bulkhead. Tada!
Martini Time; Skoal!
OMG every thing is coming up Roses. Purists may baulk at a Thunderhawk Transport carrying a Landraider but I've wanted this every since I first laid eyes on a T'hawk. The shape of the fwd cargo compartment fairly screams for that configuration. Since my T'hawk is so much larger than the basic FW version it can easily fit a Landraider in the notch space between the wings.

Finally the center of balance for the model is right where the transparent rod pierces the Landraider forward turret so everything is falling into place with a minimum of alteration to the APC just a 1/2 inch hole aft of the bulkhead. Tada!
Martini Time; Skoal!
Awesome!! So many additions, not enough words.
I'm always open to questions.


