B5 - Centauri Sentri Fighter

Sky Seeker

Well Established Member
Hey everyone! I haven't posted for a while due to a combination of work, life, and other stuff (ok helping to test out the game Subnautica). Anyway I've dusted off the 'ole knife and have started on another project related to Babylon 5. Also, during the course of doing this model I'm going back and rewatching the entire series for model ideas and spotting new races. Some I'm seeing there that haven't been talked about anywhere. Also, discovering more about some of the more obscure alien races such as the Abbai. More later on them as well as other races some other time.

Here are some shots of the latest project the Centauri Sentri Fighter.

upload_2016-10-6_23-28-21.jpeg

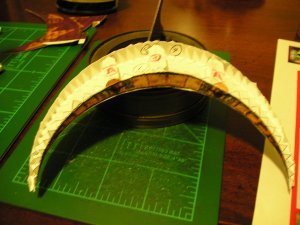
The start of the stand.
upload_2016-10-6_23-28-49.jpeg

upload_2016-10-6_23-28-58.jpeg

Partially assembled. Note the purple piece on the side. It's supposed to go below the top piece as seen below.
upload_2016-10-6_23-29-33.jpeg

The purple piece just could not be made to fit under there.
upload_2016-10-6_23-29-45.jpeg

The bottom section has been colored in black to make it blend in more with the rest of the base since the purple piece could not fit there.
upload_2016-10-6_23-31-19.jpeg

A view of the bottom assembly with raised sides. Note how the wings of the model naturally curves downwards. Everything starting out was flat. Neat eh?
Front view.
upload_2016-10-6_23-32-40.jpeg

Side view.
upload_2016-10-6_23-35-54.jpeg

That's it for now.

Sky Seeker
 
Last edited:

Sky Seeker

Well Established Member
More pics.

Reinforcements have been added to the model behind the raised yellow tabs as well as the center (roughly - especially in this case). The yellow raised tabs are to be used for lining up the guns later on.
upload_2016-10-6_23-38-26.jpeg

Side view.
upload_2016-10-6_23-38-33.jpeg

Back View. You barely make out where the engines are going.
upload_2016-10-6_23-40-51.jpeg

These are the top of the wings. Note the tabs in the rear portion that have the black colored bottoms. Also the tabs at the back sides when glues make the backs curve down a little bit.
upload_2016-10-6_23-41-40.jpeg

The top of the wings assembled! This took a bit of doing. What I did was line up the center section and then glue tabs between the raised yellow tabs (they could be gold - you decide!) then work on one wing and then the other. As the wing is glued you push in the raised sides just slightly until they line up with the edge of the top wing.

Top / front view.
upload_2016-10-6_23-43-18.jpeg

Back view. This didn't turn out like I originally intended. I'll probably end up cutting one side and then the center section.
upload_2016-10-6_23-47-33.jpeg

The top of the back section. This shows the top of the rear portion that will overlap and cover the engines.
upload_2016-10-6_23-49-14.jpeg

That's all for now!:)

Sky Seeker
:tank:
 

Attachments

  • upload_2016-10-6_23-40-11.jpeg
    upload_2016-10-6_23-40-11.jpeg
    160.1 KB · Views: 4

Sky Seeker

Well Established Member
Very well done, Sky! I'm looking forward to seeing more of it! :)

Thanks RF! I think I've got the off center back portion worked out to make it centered. More to be done. This is just a little quick build. The bigger project is the Centauri Vorchan. It'll be done according to the scale of Jaybat's Omega Destroyer that was done a few months back. Since nobody else has done a paper build on that (at least none that I'm aware of) it'll be challenging. I might need some help on that one.

Have a great day and thanks for stopping on by!:)

Sky Seeker
:tank:
 

zathros

*****SENIOR ADMINISTRATOR*****
Staff member
Administrator
Moderator
It came out nice. Those tabs prevent a decent seam, we (some of us) were discussing new ways of making the edges tight, like making inner walls that the glue can sit on and could be spaced with the thickness of the paper. I love the B-6 stuff. I don't know why it's not in syndication, considering all the crap on T.V. these days. :)
 

Sky Seeker

Well Established Member
More pics. Just added the cockpit and a rear section.

Cockpit addition.
Front View
upload_2016-10-12_0-45-38.jpeg

Side View - The rear of the cockpit is rolled to form a pointed section.
upload_2016-10-12_0-45-56.jpeg

Bottom View. Note the bottom of the cockpit has a magenta bottom plate.
upload_2016-10-12_0-46-17.jpeg

These are the pieces of the bottom rear section (maybe a rear spoiler?). These are the pieces from the top picture folded. It was difficult to decipher how the side pieces were to be folded.:headbange::realmad: On one side of the piece is an arrow shaped section. The piece on the left shows the unfolded configuration with one side jutting out from the main body. This section folds inward while the tabs fold down at a 90 degree angle. Then glue the tabs to the "V" section of the arrow.

Difficult fold, but possible as you can see on the right.
upload_2016-10-12_0-48-57.jpeg

The piece on the right is a top down view of the bottom of the side piece fully assembled.:) Note also how the edges of the pieces have been marked with a magenta marker to eliminate white from showing BEFORE glueing.
upload_2016-10-12_0-49-43.jpeg

The side pieces once folded properly and mounted. Note how the side pieces are aligned with the pattern on the bottom of the ship.
upload_2016-10-12_0-58-29.jpeg

However, when you line up the side pieces with the pattern the main spoiler is too big to fit in between the side pieces. The piece is then centered and marked where to cut.
upload_2016-10-12_0-59-59.jpeg

When mounting the main spoiler glue the sides of the bottom section and mount underneath the tabs of the side pieces. Apply glue on top of the side tabs. Then fold the top portion in half over the bottom portion. Try to line up the apex of the spoiler (raised triangular peak) with the pointed rear end of the cockpit to give it symmetry.
upload_2016-10-12_1-1-35.jpeg

This shows the rear end tilted slightly down. Note the arrow shaped side portions of the spoiler. These are the key areas when folding to match up the pieces for correct folding. The center of the spoiler looks slightly bent upwards. This is actually an optical illusion. It is nearly flat in real life. Engines are still mis-aligned, but everything else checks out.
upload_2016-10-12_1-5-38.jpeg

Apex lined up with back flaps and rear end of cockpit.
upload_2016-10-12_1-5-48.jpeg

Remember to try to eliminate the white edges by using a marker of the desired color (if possible). If you can't find the right color, try using a pencil in the areas that are dark to try to eliminate the white glare from uncolored glued areas.:)

That's it for now.

Sky Seeker
:tank:
 
Last edited:

zathros

*****SENIOR ADMINISTRATOR*****
Staff member
Administrator
Moderator
I would rather outline a model in near color or black, than leave it white. Kind of like paintings by artist "Ben Benn". The Human eye kind've does that that on it's own, and will ignore edges more readily. :)

ARTIST_TABLE_l.jpeg
 

Sky Seeker

Well Established Member
New pics - gun mounting, engine assembly, and minor greebling to finish things off.

Gun mounts before assembling. Note white areas colored in with black felt tip marker.
Front view
upload_2016-10-17_10-18-8.jpeg

top view - Shows the gun portions (hump areas) mounted on top of the two wings.
upload_2016-10-17_10-18-31.jpeg

Guns assembled and ship on stand.
upload_2016-10-17_10-19-0.jpeg

upload_2016-10-17_10-20-49.jpeg

upload_2016-10-17_10-21-4.jpeg

Back view pre correction. Note that the engines are off center. I reprinted the template and made a new back engine template.
upload_2016-10-17_10-21-19.jpeg

Back view correctly aligned template glued in place on the ship. Engine pieces rolled. Also, the top, bottom, and sides of the inside of the engines were colored black to reduce the white glare.
upload_2016-10-17_10-20-5.jpeg

Engines assembled and mounted.
upload_2016-10-17_10-24-13.jpeg

Back orthogonal view of the engines.
upload_2016-10-17_10-25-35.jpeg

That's it for now.

Sky Seeker
:tank:
 
Last edited:

Sky Seeker

Well Established Member
Greebling and final pics.

The front portion has some minor details added.
Pre detailing - front view
upload_2016-10-17_10-29-50.jpeg

Front view - detailing added - Do you notice the difference?
upload_2016-10-17_10-30-30.jpeg

Orthogonal - left view
upload_2016-10-17_10-31-3.jpeg

Back view
upload_2016-10-17_10-31-10.jpeg

Right Side view
upload_2016-10-17_10-31-18.jpeg

Orthogonal - right view
upload_2016-10-17_10-31-29.jpeg

The designer's name is Diego Cortez.

The source for this model comes from this defunct website:

https://web.archive.org/web/20060623080208/http://dpileggispicks.com/models.html

They have eight other models there. Enjoy!

That's it for now. I hope that you enjoy this model as much as I did building it. A nice quick build with colors for a change (instead of grey!).

Have a great day!:Grin:

Sky Seeker
:tank:
 
Last edited:

Sky Seeker

Well Established Member
Recently This ship model ran into a Techno Mage trader that gave the fighter owner a cloaking device. So thus my model of this ship has disappeared. Seriously, though I have no clue of what happened to this model so I guess I'll just have to build a "new one". Maybe I should add in some magnetics for kicks this time?

Sky Seeker
:tank:
 

Revell-Fan

Co-Administrator
Staff member
Administrator
Moderator
Not a bad idea, Sky! :)

However, one thing I noticed was that the texture is pretty pixelated. The kit would greatly benefit from some cleaner and crisper graphics.
 

Sky Seeker

Well Established Member
Not a bad idea, Sky! :)

However, one thing I noticed was that the texture is pretty pixelated. The kit would greatly benefit from some cleaner and crisper graphics.

I can get the original template, but do you know of anyone who could "clean it up"?

Sky Seeker
:tank:
 

zathros

*****SENIOR ADMINISTRATOR*****
Staff member
Administrator
Moderator
You built that model as well as it could have been. I stayed away from those kits as they were all "troublesome" looking. I wish that our fellow member "lepaj" had done this one, his other's came out so well. ;)
 

Sky Seeker

Well Established Member
You built that model as well as it could have been. I stayed away from those kits as they were all "troublesome" looking. I wish that our fellow member "lepaj" had done this one, his other's came out so well. ;)

Lepaj is the master of B5 anything! I think of this model as sort of a "beta build". Once you do a first build of this most of the lines could be taken out to smooth things out. The pixelation could be smoothed just a little bit. It would be time consuming to do, but you could have a good model in the end.

B5, especially on some models, gets a little skimpy on some details. I'm just thankful that Diego was able to do a model in the first place.

Sky Seeker
:tank:
 
Top