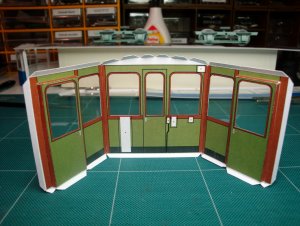
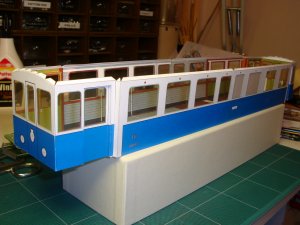
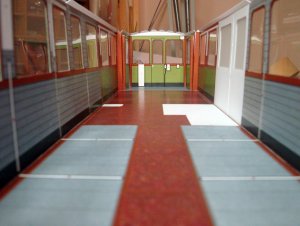
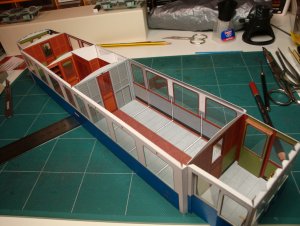
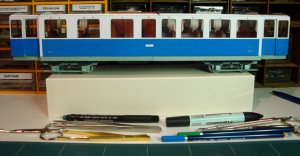
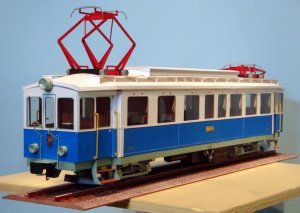
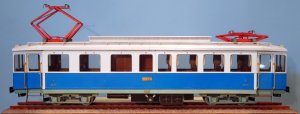
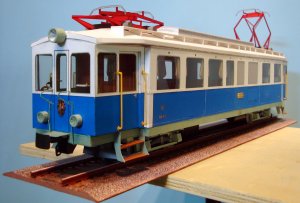
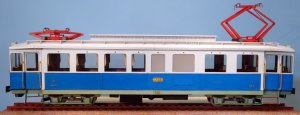
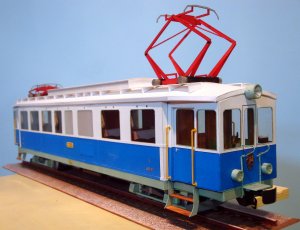
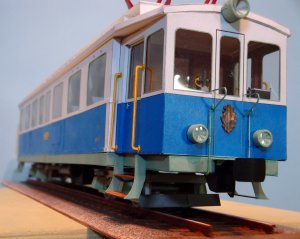
AB03: the old white and blue train from San Marino

Tonino

Well-Known Member
Hi all, my friends.

I'm back again, after a very long time, to tell you a nice story about an old train.

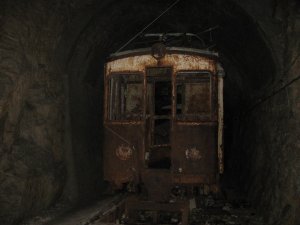
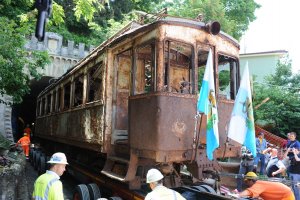
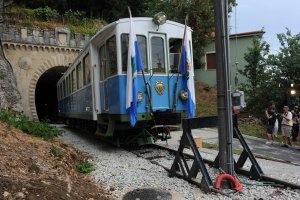
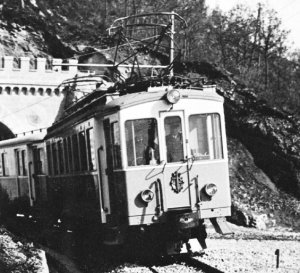
I'm from San Marino, a very little nation standing in middle Italy. Here we had only one railway that serviced between San Marino and the near city of Rimini, on the adriatic coast, from 1932 to 1944 when a bomb run destroyed the line ending the story. The railway was never restored after the war and the trains was abandoned in the galleries to the rust and vandals who slowly consumed them. This until, in june 2011, they was recovered from the galleries and one of the locomotives, the AB03, was completely restored and put back in full functionality to be a sort of museum telling about the past railway life. Now the AB03 can run on a 800 meters track of the original restored line (the terminal part in the city of San Marino) on the - I think - shortest railway line of the world.

The ATBA "Associazione Treno Bianco Azzurro" (White and Blue Train Association) funded to preserve memories, documentations and relics from the old train, decided to realize a gadget to celebrate, in the 80th anniversary of the train first run, the restoration of the AB03. The idea was to commission a cardmodel of the locomotive. I suggested the name of Julius Perdana (who, between cardmodelers, doesn't know the founder of paper-replika.com?). He accepted and the results is a beautiful model of the old AB03. This is the building chronicle of the first prototype that I made to test the fittings and to suggest the modifications to the model to make it as close to the real as possible. I hope you'll enjoy it.San Marino Station 1940.jpgin the gallery.jpgAB03 extraction.JPGAB03 restored.JPG
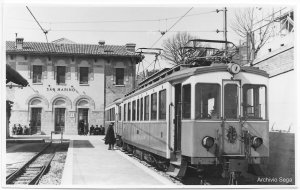
 
Last edited:

Tonino

Well-Known Member
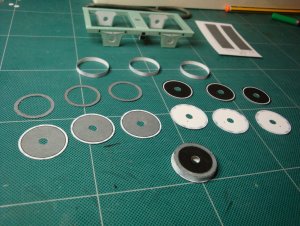
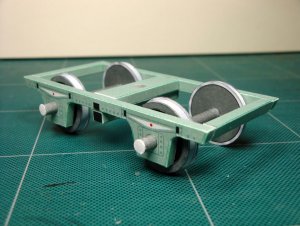
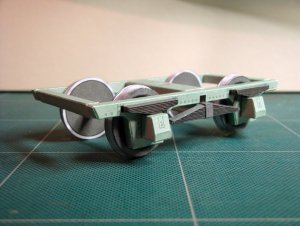
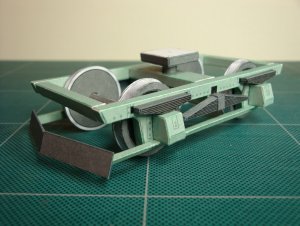
The first step was to build carriages (please excuse me I don't know if this is the right word in English).
In the old photo you can observe how good is Perdana's interpretation of the real thing.
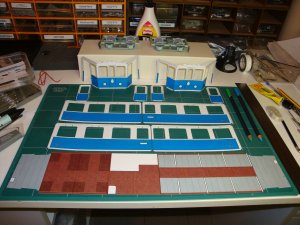
DSC04460.JPG DSC04462.JPG DSC04463.JPG DSC04470.JPG DSC04475.JPG DSC04496.JPG confronto.jpg
 
Last edited:

Tonino

Well-Known Member
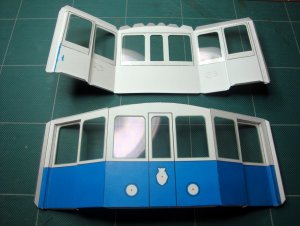
The main body.

DSC04580.JPG
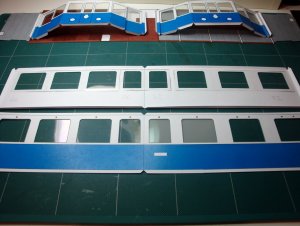
All the parts ready to be joined.

DSC04666.JPG DSC04668.JPG
Acetate windows on place. The toilet and the machinery compartment has grey windows.

DSC04669.JPG
All the walls has detailed internal side.

DSC04676.JPG
Main body is complete but the walls are dropping outside under their own weight. Internal walls will soon fix this.

DSC04681bis.JPG
A virtual tour of the AB03.

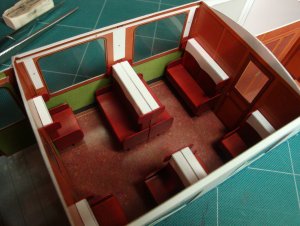
DSC04750.JPG DSC04745.JPG DSC04748.JPG DSC04749.JPG
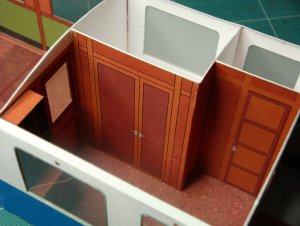
All internal walls are now in place.
 

zathros

*****SENIOR ADMINISTRATOR*****
Staff member
Administrator
Moderator
Absolutely beautiful!! Is this wonder going to be offered up on Paper-Replika?!? Your build is excellent, please post more when you can. :)
 

Rhaven Blaack

!!!THE MAN BEHIND THE CURTAIN!!!
Staff member
Administrator
Moderator
What a WONDERFUL model and an AMAZING story behind it!
You are doing a FANTASTIC JOB on this build!!!
 

Tonino

Well-Known Member
Thank you all! I really love this train like many other people do here in San Marino. We hope it will be again in full service one day. Waiting for that beautiful day we dream with paper models!
To answer zathros: no the model was designed by Perdana on behalf of ATBA but won't be shared on paper-replika.com. Il will be soon put on sale, I don't know what will be the distribution channels but surely will be available in next months. Now the files are under revision to correct some little mistakes and to add some details lacking in the first version. I'll keep you informed on progresses if you'd like to.

Now back to building chronicles...

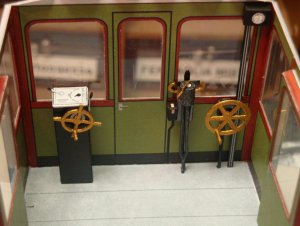
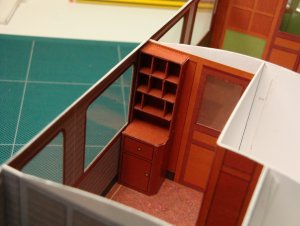
This time I'll show you some internal details, first the conductor's place

DSC04712.JPG
Then the postal officer's desk
DSC04742.JPG DSC04744.JPG
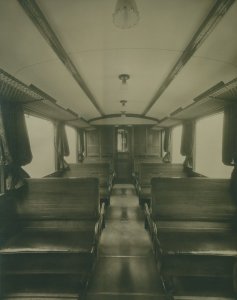
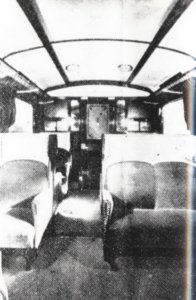
This is the only image survived of the original one (from inside the gallery, some years ago, before it was destroyed)
2012-05-09 20-24-04_0003.jpg
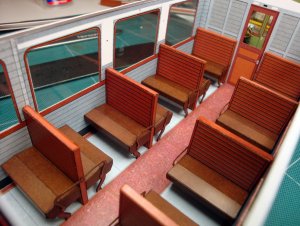
The third class compartment
DSC04792.JPG
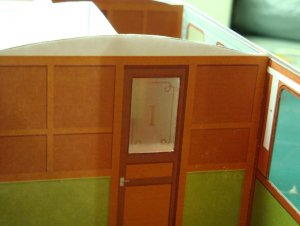
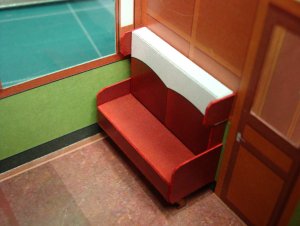
And the first class
DSC04795.JPG DSC04802.JPG
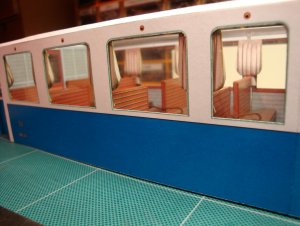
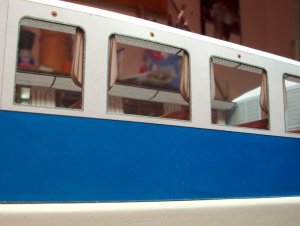
Perdana didn't forget anything... even curtains are provided
DSC05033.JPG DSC05036.JPG
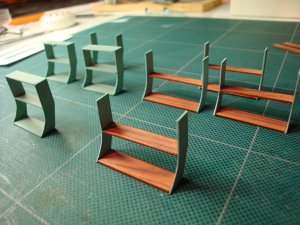
And with the luggage racks the interiors are complete
DSC05043.JPG
 

Chris74

New Member
Your efforts are worthy of great praise, and I'm saying this thinking of how many types of railcars or locomotives ended at scrap heap, although many museums could host at least a few exemplars of them. Also Julius Perdana's work is great, not to speak about yours, admirable clean and well done details. Thank you for the story, for the pics - and keep them coming.

Chris

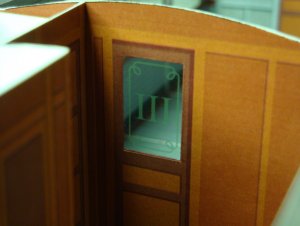
PS - The 'glass' of interior doors, separating the first and the third class, have specific markings - I and III, framed by thin fine lines.... A great detail, I am curious - how did you done them? Thanks.
 
Last edited:
zathros

*****SENIOR ADMINISTRATOR*****
Staff member
Administrator
Moderator
Normally, we don't allow commercial models to be advertised through this forum. The exception is what you are doing right now. By showing a step by step build , and in essence, your prototyping, you have fulfilled the requirements, and at the end of your build, you can post a link to where the model will be sold. It truly is wonderful. I have a collection of Trams I would love to get to someday. :)

Members, "Hit" the "Like" button! :)
 

Tonino

Well-Known Member
zathros... please excuse me, I feel very stupid. I was not aware of this rule (should have read around better before posting) but, believe me, wasn't my intention to advertise the model. I just want to share with you the great pleasure I had building this loco. Anyway the model is not in production yet so you cannot buy it... and, anyway, when it will be on the market, the money raised will be totally managed by ATBA for the activities involved in train conservation (so it's for a good cause ;))...

Chris: I'm glad you asked me about the door glasses... it was one of my favourite details.
In the original train there was two kind of doors: the third class had transparent glass with satin details (see photo)
terza.jpg
In the first class the glass was satin and the details transparent (for better privacy I suppose)
prima.jpg
(sorry for the bad photo, it's the only one available of a first class compartment)
So I tried to obtain a similar effect printing with a color laser on transparent foil with several pale colors, the best result was obtained with something halfway from a light blue and a light green. The result, after several tries, is pretty good compared to real photos.

Now let's go on with some building photos...

DSC05047.JPG DSC05049.JPG
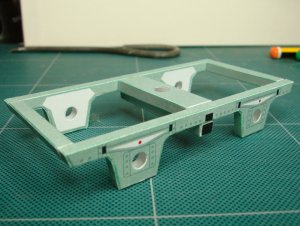
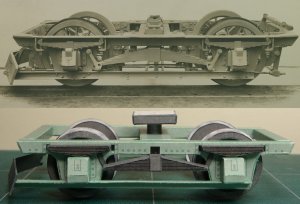
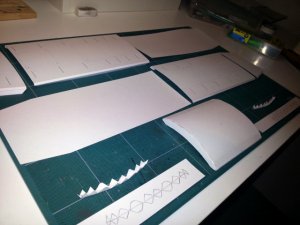
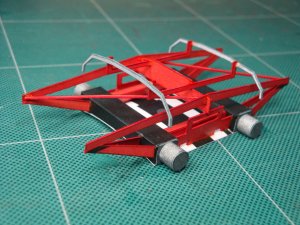
The chassis is a very BIG part. printing on A4 paper was not possible to have it in one single part so it was splitted in two halves, the white piece is for reinforcement and to join the two parts.
DSC05050b.JPG
finally the AB03 can stand on her own wheels...
DSC05054.JPG
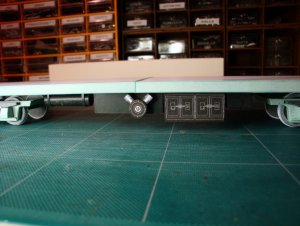
A little more details on the underside: tanks, air compressor and batteries.

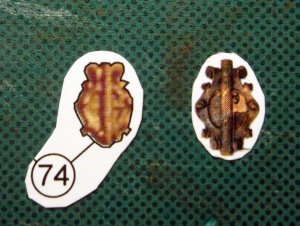
A little nice story about the front crest.
After the war they all was removed (all fascist simbology was carefully taken away from sight) and no trace of them was found for many years.
When the model was commissioned the better image available depicting the crest was this photo:
testa.jpg
And this was the image I gave to Perdana to realize the front detail.

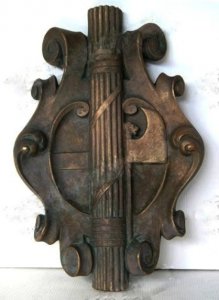
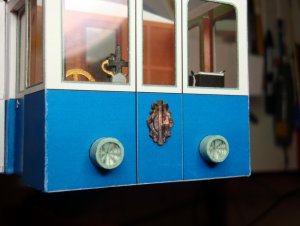
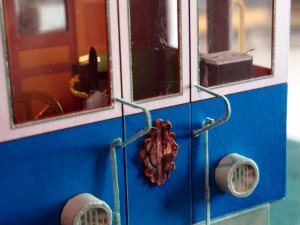
When the model was already designed, someone of my ATBA fellows found, on a WWII memorabilia collector website, a bronze crest surprisingly similar to our long searched one. We managed a travel to the city where the collector lives (who knows how it was finished there...?) and, WOW :D it was our crest!!! The bolts on the back collimate precisely with the holes on AB03 front door!!! We finally found it!
stemma littorio treno.jpg
The crest is back!
I used this photo to enhance the original part realized by Perdana with the old photo above

DSC05100.JPGDSC05096.JPG

:)

Note that (see my first post with photo of the the restored AB03) the crest was not used for the restoration. In part this is because the finding was done when the work was already complete, in part for "opportunity" reason regarding the symbol depicted on it. I don't agree with this decision: an historical accurate restoration should not deal with such considerations. The crest is part of the original machine and should be put in his original place. But this is off-topic I think...
Anyway, in the cardmodel the crest is the original one!
 
Last edited:

zathros

*****SENIOR ADMINISTRATOR*****
Staff member
Administrator
Moderator
Don't worry about it, you have done exactly what we require, and the fact that it is for a "non profit' cause, really cinches the deal, so all is good! I have extended this same offer to any person who wants to offer a model for sale. They just have to do a complete, and I mean complete, build thread, then they can post the link. For some reason, few take me up on this. A couple have, and they happen to be people I whose work I really respect. Gremir, for instance, makes excellent models, and has a great website.

I am very very Happy that you have posted this thread here, and look forward to more of your work in the future. :)
 

Tonino

Well-Known Member
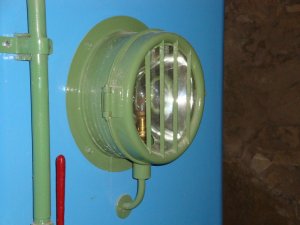
Just a little update about the headlights you can see in last photo of my previous post...
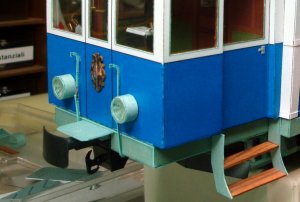
The AB03 has a grate in front of the glass
DSC05086.JPG
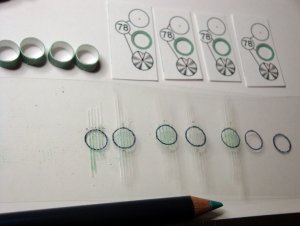
I tried to reproduce it scoring a transparent acetate foil with a needle and then using a green pencil on the grooves... it worked fine.
DSC05093.JPG

Now some more detailing..

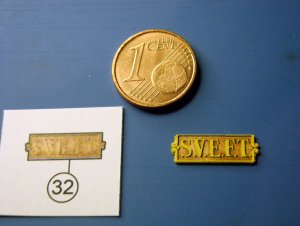
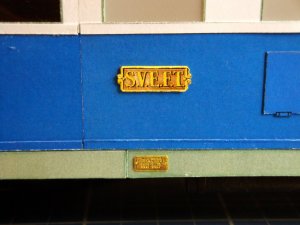
The SVEFT plate was taken from a photo and was a little confused. I tried to enhance it a little with some computer retouch... (the coin is for size reference)
DSC05090.JPG
by the way: SVEFT stands for "Società Veneto Emiliana di Ferrovie e Tranvie". It was the Italian society who managed the railway during his activity.

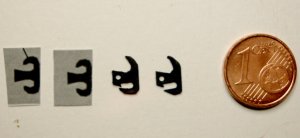
The coupling hooks were not of the right shape (left). Another little bit of computer graphic and two brand new hooks were ready to be glued on place (right).
DSC05052.JPG
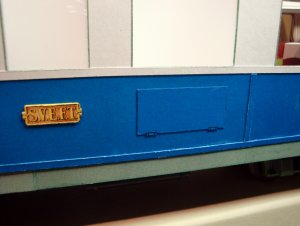
An inspection door that was not included in the model was realized in the same way.
DSC05095.JPG
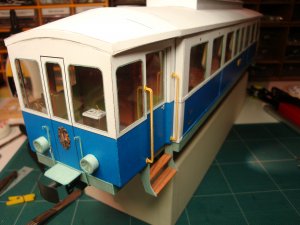
Another enhancement on the original design was done on the stairs. The model had 3 steps green painted. The real AB03 has 2 wooden steps and the dimension is wider. I realized the new stairs after having assembled the original ones and having tried to glue them in place. I was sure something was wrong with them...
DSC05420.JPG
Another personal addition to the model was the hydraulic connection pipes. They are a distinctive tract of her face. I wouldn't exclude them from my AB03.
Just a little bit of CoreDraw ...et voilà!
DSC05427.JPG
DSC05440b.JPG
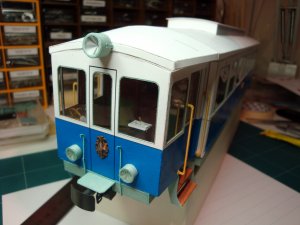
Now the face of my little AB03 is almost complete. (it lacks only the third headlight, but it should be attached to the roof... let's wait for it to be assembled).
 

zathros

*****SENIOR ADMINISTRATOR*****
Staff member
Administrator
Moderator
I really think if urbanized places made the local transportation have character, and made you feel like you were in something special, they would be used and in abundance. Making Trams, modernized for safety of course, but with the same charm, I'd ride it just for the ride! :)
 

Tonino

Well-Known Member
...I was away for a while, now back again to complete my building report.

Zathros, you cannot imagine how much I agree with you. It was for this exact reason that ATBA was founded (and I was one of the founders). We are fighting to have back our train. Not only an 800 mt. display course but the complete line to Rimini. It would be a fantastic attractive for any visitor of this old land. Here in Europe there are plenty of historic or turistic railways. People travel many kilometers just to jump aboard one of them. This is no more a pure transport service, it's a real experience. Last year I was on the Bernina Train, I don't know if you heard about it. It was a great emotional trip. Fantastic! We would like to have a little copy of it here in San Marino.

But let's jump back to paper AB03...

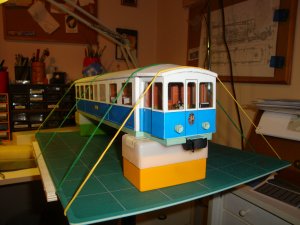
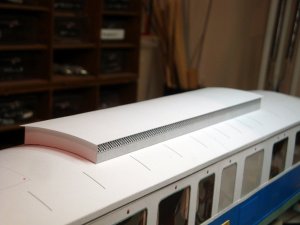
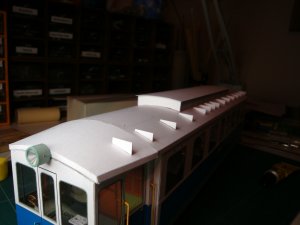
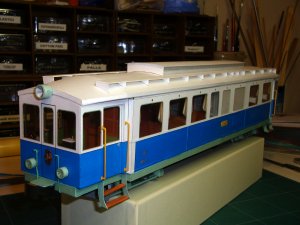
Here are the roof building, this is the part that most made me worry for the round lines that I was not sure to make similar to the real thing. I was afraid this would have unveiled "paper nature" of the model.

20140117_164704.jpg DSC05425.JPG DSC05437.JPG

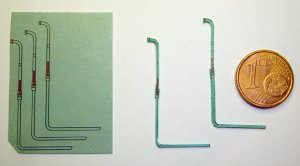
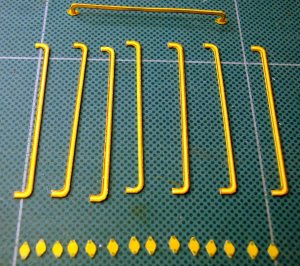
Other external details: the handrails. I've redrawn them in CorelDraw to make them brass colour.

DSC05441.JPG DSC05444.JPG

And now the third headlight. Now that we have a roof we can place it.

DSC05447.JPG

With the service gangways the roof is almost complete...

DSC05468.JPG DSC05475.JPG
It lack only two "little" details: the ... I don't know the English word, in italian is "pantografo", the device that collect current from electrical line. Perhaps "pantograph"?
 
Last edited:
Tonino

Well-Known Member
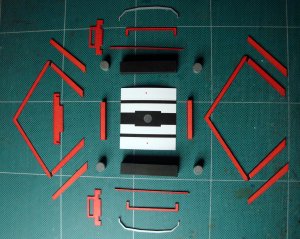
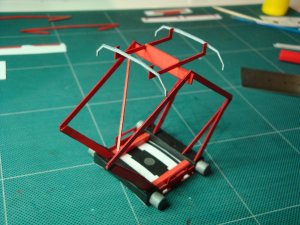
Here we are with the most complex and fragile component of all the building.

DSC05449.JPG
It's a lot of tiny parts to be glued on their edges. Facing surfaces are minimal.

DSC05450.JPG
To reinforce all joining points I touched them with a brush and some vinyl glue diluted in water 50/50. The drop is white until wet. Then it disappear leaving a transparent film, completely invisible, that strenghten even the littlest joint.

DSC05461.JPG
The lowered one for the other side.

Just two more little details and the work is done.
I noticed the model was lacking a little plate with the constructor's name "Carminati & Toselli". I realized it from an old photo found on a book.

targaB.jpg targhetta.JPG
...and, last but not least, the littlest detail of all. Left for the last step to reduce chance of breaking it during manipulation of the model... the front handles, very very small pieces.

maniglie.jpg

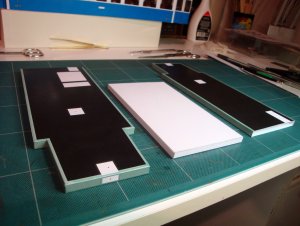
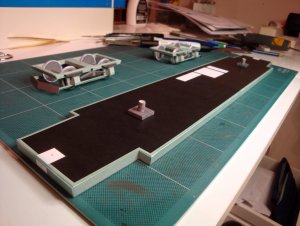
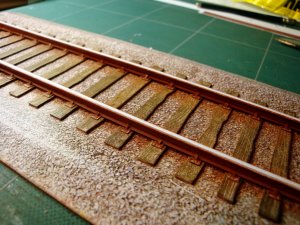
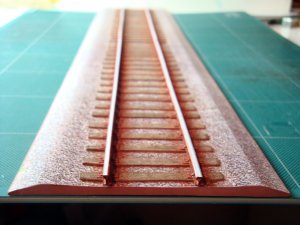
To be used as display stand I re-scaled the wonderful track section downloadable from dutch site SCHAALBOUW . It should deserve a complete building thread by itself but I see there is already one by DanBKing on this forum, so I post just a couple of photos of my track.

binario1.jpg binario2.jpg
 
Last edited:
Rhaven Blaack

!!!THE MAN BEHIND THE CURTAIN!!!
Staff member
Administrator
Moderator
You have done a SPECTACULAR JOB on this build.
If I had not seen the build thread, I would not have believed that it was made of paper.
KUDOS TO YOU ON A FINE JOB WELL DONE!!!
 

Tonino

Well-Known Member
Thanks @Rhaven Blaack, I had a lot of good time building this old friend. But, now that the work is done, I think that there are a lot of things that I should have done in a different way.
Now let's wait for the next coach... (who knows? It would be nice to have the complete train one day or the other)... but this is only an idea now.
 

zathros

*****SENIOR ADMINISTRATOR*****
Staff member
Administrator
Moderator
Beautiful! Put it in an argon gas filled display case, t0 preserve it, and use U.V. shielding glass. This model saves a piece of History! Exceptional craftsmanship, the pictures say it all! like like like pressed!
 
Last edited:
Top