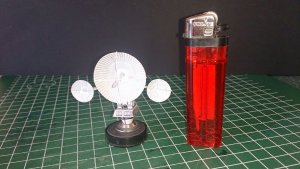
2001 ASO USSC Discovery One
- Thread starter DanBKing
- Start date
You are using an out of date browser. It may not display this or other websites correctly.
You should upgrade or use an alternative browser.
You should upgrade or use an alternative browser.
Far freakin' out!! I was hoping you would finish the tops and sides of the arms with finish pieces.
Thanks Z. But, I am not quite finished with it yet ......
im looking forward to seeing more of your tricks!
The next 'trick' is gonna be building the small dishes ........ :meh:
I have a small announcement to make:
I HAVE COMPLETED ALL CONSTRUCTION AND ASSEMBLY!!!!!!!
I have nothing more to make on this model...
I need to do a few adjustments, touch-up's and final tweaking still, but, I do not have to cut, score, fold, shape or glue another part!!!!
It is getting late here now and nearly time for bed. Plus, I have a busy day/evening tomorrow, so if all goes well, I will post the pictures of the final assembly of the antenna array over the coming weekend.
Once I am happy with how everything is, I will set up a photo shoot of the final, completed model.


Stay tuned everybody, I am extremely close to realizing a now 42 year old dream!!!!!!!!

I HAVE COMPLETED ALL CONSTRUCTION AND ASSEMBLY!!!!!!!

I have nothing more to make on this model...

I need to do a few adjustments, touch-up's and final tweaking still, but, I do not have to cut, score, fold, shape or glue another part!!!!
It is getting late here now and nearly time for bed. Plus, I have a busy day/evening tomorrow, so if all goes well, I will post the pictures of the final assembly of the antenna array over the coming weekend.
Once I am happy with how everything is, I will set up a photo shoot of the final, completed model.


Stay tuned everybody, I am extremely close to realizing a now 42 year old dream!!!!!!!!

Ok, an update, as promised.
As I mentioned earlier in the thread, I wanted to use a magnet to hold the antenna array in its place. But also, I wanted the ability to adjust the position and angle of the array easily, if required. I thought the best way to achieve this would be to use a ball-bearing to create a sort of ball-joint, when used in conjunction with the magnet.
Using hot-glue, I attached a 5mm ball bearing into the mounting flange. Once this was in, I built up the mounting platform. I then took a 5mm diameter magnet and hung this from the bottom of the ball bearing. I partially filled the cavity of the mounting tower with hot glue and pushed the magnet/ball/mounting flange assembly into position, hoping and praying that the glue would not push up and outward too far so that it glues the mounting flange pieces together permanently. I left the thing in position until the hot glue had set and then attempted to remove the mounting flange.
No problems encountered ..... With the magnet/ball connection, I can now position the array at any angle and position I choose, and of course it is removable too. (oh, and it can even lay flat, like it was in 2010, with the Leonov attached....
  )
)
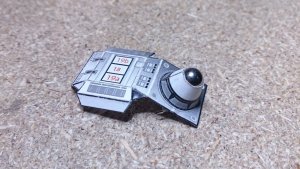
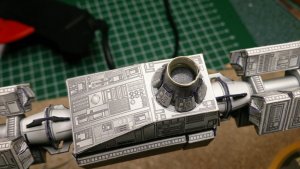
Without going into too much detail about the build of the small dishes, I made them. Let's leave it at that ..... :wacky:
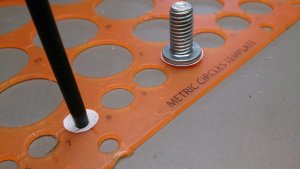
I did use my circle template, the back of a paint brush and a bolt head to help shape the parts....
The transmitter supports of the two dishes are super thin. After a few unsuccessful attempts at cutting each support separately with a scalpel, I tried another, very successful, method! The problem is, the things are so thin, if you try to cut them individually, they tend to curl up and/or break while cutting. So, I cut all four in one go.
I used 5 spare blades from a craft knife, stacked them together and taped them securely, and using a steel rule to keep things straight, cut the legs. The spacing of the stacked blades was perfect.
The pics will explain it better, I think.......

Each piece was then made up in the same way as the supports for the big dish, albeit a lot bloody smaller.....


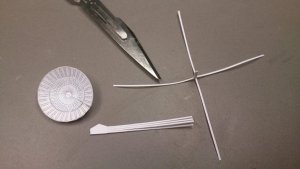
I decided to fit the small dishes to the mounting arms first, before attaching the transmitter supports to save damaging the super fine things.
It was at this point, my plans changed a little ......
With reference to the picture in post #273, of the back of the array, you can see that the back of each small dish has a spring like construction in the middle of it. Unfortunately, this was only represented as a flat disc on the templates. Time to change that!
I used a spare copy of the antenna array mounting module and cut out a grill pattern from it.......... This piece was then rolled into a tube. The tube was then cut in half. The resulting two textured tubes would be used to represent the spring thingies on the back of the small dishes.
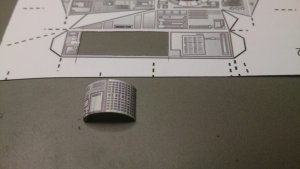
With fear and trepidation, I used my flush-cutters, and cut a slot into the mounting arm of each small dish. This slot would then accommodate the tubes.
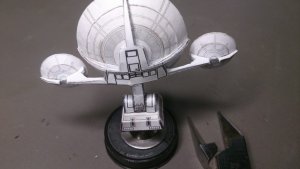
I then glued the tubes in place and capped them off with a small disc of paper. At this scale, my leather punch was set on the smallest available size, but even this was slightly too large. But the result is satisfactory.
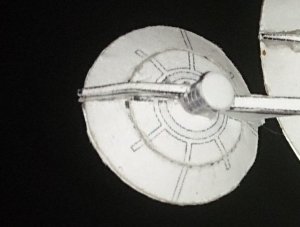
Next up, I attached the support post to the center of the dishes and once dry, I glued the support arms to the edges of the dishes. As you can see, I cut the arms over-long, so that I had plenty of 'play' for adjustment and also a bit more to hold on to with the tweezers ....
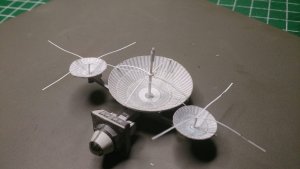
And that, ladies and gentlemen, was the last piece of construction completed!!!!!!!!!!!!!!!!!!
In my next post, the 'beauty shots' of the antenna array......
Back in a bit ........
As I mentioned earlier in the thread, I wanted to use a magnet to hold the antenna array in its place. But also, I wanted the ability to adjust the position and angle of the array easily, if required. I thought the best way to achieve this would be to use a ball-bearing to create a sort of ball-joint, when used in conjunction with the magnet.
Using hot-glue, I attached a 5mm ball bearing into the mounting flange. Once this was in, I built up the mounting platform. I then took a 5mm diameter magnet and hung this from the bottom of the ball bearing. I partially filled the cavity of the mounting tower with hot glue and pushed the magnet/ball/mounting flange assembly into position, hoping and praying that the glue would not push up and outward too far so that it glues the mounting flange pieces together permanently. I left the thing in position until the hot glue had set and then attempted to remove the mounting flange.
No problems encountered .....


Without going into too much detail about the build of the small dishes, I made them. Let's leave it at that .....
I did use my circle template, the back of a paint brush and a bolt head to help shape the parts....

The transmitter supports of the two dishes are super thin. After a few unsuccessful attempts at cutting each support separately with a scalpel, I tried another, very successful, method! The problem is, the things are so thin, if you try to cut them individually, they tend to curl up and/or break while cutting. So, I cut all four in one go.
I used 5 spare blades from a craft knife, stacked them together and taped them securely, and using a steel rule to keep things straight, cut the legs. The spacing of the stacked blades was perfect.
The pics will explain it better, I think.......

Each piece was then made up in the same way as the supports for the big dish, albeit a lot bloody smaller.....


I decided to fit the small dishes to the mounting arms first, before attaching the transmitter supports to save damaging the super fine things.
It was at this point, my plans changed a little ......

With reference to the picture in post #273, of the back of the array, you can see that the back of each small dish has a spring like construction in the middle of it. Unfortunately, this was only represented as a flat disc on the templates. Time to change that!
I used a spare copy of the antenna array mounting module and cut out a grill pattern from it.......... This piece was then rolled into a tube. The tube was then cut in half. The resulting two textured tubes would be used to represent the spring thingies on the back of the small dishes.

With fear and trepidation, I used my flush-cutters, and cut a slot into the mounting arm of each small dish. This slot would then accommodate the tubes.

I then glued the tubes in place and capped them off with a small disc of paper. At this scale, my leather punch was set on the smallest available size, but even this was slightly too large. But the result is satisfactory.

Next up, I attached the support post to the center of the dishes and once dry, I glued the support arms to the edges of the dishes. As you can see, I cut the arms over-long, so that I had plenty of 'play' for adjustment and also a bit more to hold on to with the tweezers ....

And that, ladies and gentlemen, was the last piece of construction completed!!!!!!!!!!!!!!!!!!

In my next post, the 'beauty shots' of the antenna array......
Back in a bit ........
Last edited:
LIGHTS .........!
CAMERA ........!
(All these shots are taken in 'Macro,' so all my mistakes and crappy build quality, really shows up in places ... ops
ops
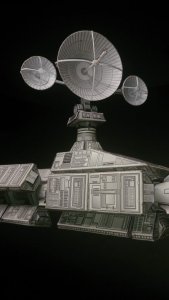
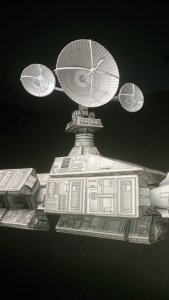

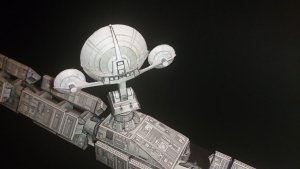

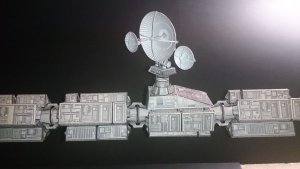
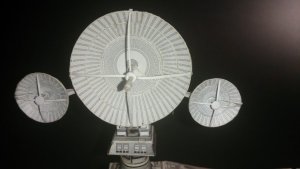
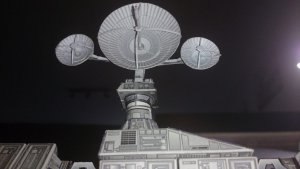
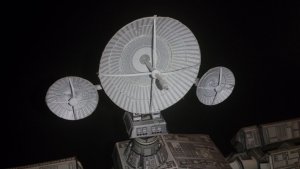
I may be away a little while now, as I am finalizing my design and plan for the display case, with it's associated lighting and electrical circuits and the model suspension system.
I have ordered the acrylic sheet for the case today, but due to the current work load of the supplier, I can only take delivery next week. But, that works out well for me, as it is also payday week next week.....
I'm hoping to get some time to cut and assemble the wooden frame this coming weekend, ready to fit the clear acrylic.
IF, I get time this week, I want to attempt to suspend the model to test my suspension system in reality. I can assure you, there will be a soft sponge mattress, about a centimetre under the model, to catch it, damage free, if something goes wrong ....... :nailbiting:
When, the suspension system is stable and proven, I am going to take some test photos of the whole model with the lighting working too.
This will be an experiment with depth of field, focal length and to try out the concept of 'focus stacking.' (For info on focus stacking, see here: https://en.wikipedia.org/wiki/Focus_stacking and a tutorial here: http://blog.patdavid.net/2013/01/focus-stacking-macro-photos-enfuse.html and for the brilliant software, go here: http://hugin.sourceforge.net/ <-- AND IT'S FREEEEE!

Will update as and when I can.
Take care one and all. See you around the forums.

CAMERA ........!
(All these shots are taken in 'Macro,' so all my mistakes and crappy build quality, really shows up in places ...


I may be away a little while now, as I am finalizing my design and plan for the display case, with it's associated lighting and electrical circuits and the model suspension system.
I have ordered the acrylic sheet for the case today, but due to the current work load of the supplier, I can only take delivery next week. But, that works out well for me, as it is also payday week next week.....

I'm hoping to get some time to cut and assemble the wooden frame this coming weekend, ready to fit the clear acrylic.
IF, I get time this week, I want to attempt to suspend the model to test my suspension system in reality. I can assure you, there will be a soft sponge mattress, about a centimetre under the model, to catch it, damage free, if something goes wrong ....... :nailbiting:
When, the suspension system is stable and proven, I am going to take some test photos of the whole model with the lighting working too.
This will be an experiment with depth of field, focal length and to try out the concept of 'focus stacking.' (For info on focus stacking, see here: https://en.wikipedia.org/wiki/Focus_stacking and a tutorial here: http://blog.patdavid.net/2013/01/focus-stacking-macro-photos-enfuse.html and for the brilliant software, go here: http://hugin.sourceforge.net/ <-- AND IT'S FREEEEE!
Will update as and when I can.
Take care one and all. See you around the forums.

Last edited:
Hanging Around ..........
Well, the Discovery model has been hanging by a thread, (literally,) without mishap for 3 days now....... :happy:
I attached the two suspension threads from the spine of the model to a broom handle, which in turn was suspended between the curtain rail and the light fitting in the spare bedroom, at a 'cat-proof' height.
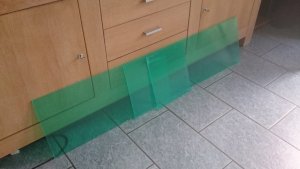
I received a phone call with good news yesterday evening too! I can pick up the clear acrylic sheet for the display case on Saturday (tomorrow) instead of next week........ Happy days!! :happy::happy::happy::happy:
As I mentioned earlier, I hope to be able to make a start on the parts for the display case this weekend.
Will post some pics soon with an update on the build process of the display case.
See ya soon!

:Congrats:
You are not only making a thread ABOUT the model but attaching a thread TO the model.
:King:
You are not only making a thread ABOUT the model but attaching a thread TO the model.
:King:
:Congrats:
You are not only making a thread ABOUT the model but attaching a thread TO the model.
:King:
“The Way It Is
There’s a thread you follow. It goes among
things that change. But it doesn’t change.
People wonder about what you are pursuing.
You have to explain about the thread.
But it is hard for others to see.
While you hold it you can’t get lost.
Tragedies happen; people get hurt
or die; and you suffer and get old.
Nothing you do can stop time’s unfolding.
You don’t ever let go of the thread.
~ William Stafford ~”
Dan,
You are truly a master modeler, your work is superb!
Thank you for the compliment, Mike......
Master Modeller? Nah, not even close.......... I still have so much to learn, as the antenna dishes proved, (for 1,) ......

When I am 100% happy with any build I do, then maybe.......
But I am too much of a perfectionist to ever achieve that.

Oh, btw: I got another phone call this morning..........
:happy::happy:

A quick update, before I go out for the evening. 
I had a productive day yesterday and completed most of the construction work on the display case.
I had two old wardrobe doors laying in the attic and I cut out the upper and lower pieces of the case from these. Each piece is 18mm chipboard with melamine facings.
My plan was to cut a 3,2mm wide slot, 5mm deep, around the inner faces of the board, 5mm in from the edge. The edges of the 3mm thick acrylic sheets would then fit into the slots, and thereby holding the whole structure rigid. Gravity would be my glue.
 (This was done so that I could dismantle the case for easier transportation in the future.)
This plan was rudely thwarted though, when my attempt to buy a 3,2mm slot cutter for my plunge router, failed miserably. I could not buy one anywhere in my town. Nobody had one in stock, and I would have to wait at least a week for one to be ordered.
So, I made another plan.....
I purchased a couple of lengths of wooden 'L' shaped profile that I could use as a pre-made slot for my acrylic. Unfortunately, the slot was 6mm wide, so I had to cut a 2,8mm rebate all around the boards to make sure I got a snug, clearance fit of the acrylic.
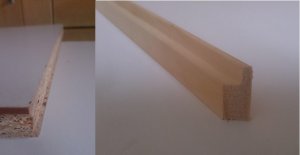
The 'L' shaped strips were then cut and mitred on their ends and glued and nailed around the edges of the boards.
Once this was dry, the lower board was laid on the floor with the slots uppermost, and the acrylic sheets were snugged into the slots.
The top board was then placed on this, snugging the acrylic sheets into the upper slots.
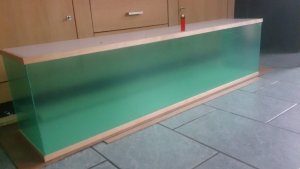
I still have to cut and fit the backing board yet, but I miscalculated my quantities for the edging strip. I need to buy another length next week to complete the edging, before I fit the backing board.
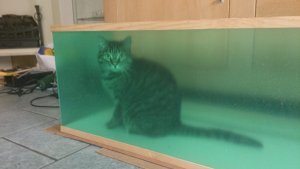
The green colour is the protective film, to prevent scratching. This will be removed at the final assembly, when everything else is done.
The construction work was closely inspected by my Martian cat, and approval was given.

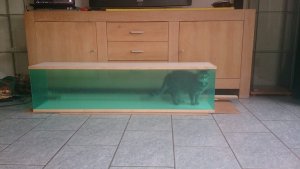
I still have to fill and sand the boards, spray them with primer and a final matt black lacquer.
The completed dimensions of the display case are: 150cm (l) x 30cm (w) x 35cm (h) ( 5ft x 1ft x 1ft 2in) (Imperial is rounded up)
Its huge!!!!

I also finalized the wiring attachments for the lighting. The wiring that runs through the spine tube from the connector, were pushed through small holes drilled into the tube. This was then soldered to the fine wire that will run from the model, down to the electrical circuits under the bottom board of the display case. (More on that later!)
I then wrapped a small piece of insulation tape around the tube, to prevent any chance of a short-circuit. The fine wire was then wrapped around the tube a few times and tied off. The paper flange assembly at the ends of the spine sections were then slid on the tube and over the wiring joint, hiding it completely.

I then moved my suspension system (broom handle) from the spare bedroom and hung it in the lounge. I then attached the spine suspension lines to the broom handle.
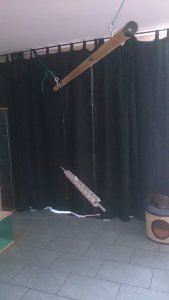
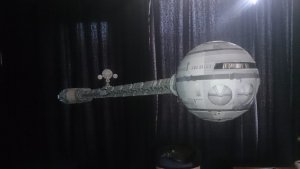
I then attached the sphere and engine module and the antenna array.
I am waiting for night time to take some better photos, when I can control the lighting a bit more.
But for now, a few crappy pictures taken with my phone camera.
In the first few pics, you can see the suspension lines and wiring lines in action. These will be coloured to match the background picture of the display case at a later stage. Then you will hardly see them at all.
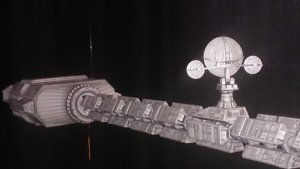
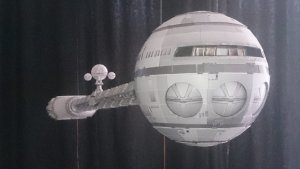
And in this pic, it looks like Discovery is doing a low flyby through my lounge...

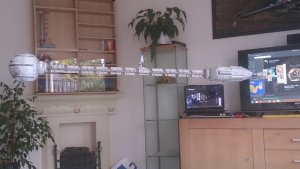
I'll be back through the week, as and when I can, with more.

I had a productive day yesterday and completed most of the construction work on the display case.
I had two old wardrobe doors laying in the attic and I cut out the upper and lower pieces of the case from these. Each piece is 18mm chipboard with melamine facings.
My plan was to cut a 3,2mm wide slot, 5mm deep, around the inner faces of the board, 5mm in from the edge. The edges of the 3mm thick acrylic sheets would then fit into the slots, and thereby holding the whole structure rigid. Gravity would be my glue.
This plan was rudely thwarted though, when my attempt to buy a 3,2mm slot cutter for my plunge router, failed miserably. I could not buy one anywhere in my town. Nobody had one in stock, and I would have to wait at least a week for one to be ordered.
So, I made another plan.....
I purchased a couple of lengths of wooden 'L' shaped profile that I could use as a pre-made slot for my acrylic. Unfortunately, the slot was 6mm wide, so I had to cut a 2,8mm rebate all around the boards to make sure I got a snug, clearance fit of the acrylic.

The 'L' shaped strips were then cut and mitred on their ends and glued and nailed around the edges of the boards.
Once this was dry, the lower board was laid on the floor with the slots uppermost, and the acrylic sheets were snugged into the slots.
The top board was then placed on this, snugging the acrylic sheets into the upper slots.

I still have to cut and fit the backing board yet, but I miscalculated my quantities for the edging strip. I need to buy another length next week to complete the edging, before I fit the backing board.

The green colour is the protective film, to prevent scratching. This will be removed at the final assembly, when everything else is done.
The construction work was closely inspected by my Martian cat, and approval was given.


I still have to fill and sand the boards, spray them with primer and a final matt black lacquer.
The completed dimensions of the display case are: 150cm (l) x 30cm (w) x 35cm (h) ( 5ft x 1ft x 1ft 2in) (Imperial is rounded up)
Its huge!!!!
I also finalized the wiring attachments for the lighting. The wiring that runs through the spine tube from the connector, were pushed through small holes drilled into the tube. This was then soldered to the fine wire that will run from the model, down to the electrical circuits under the bottom board of the display case. (More on that later!)
I then wrapped a small piece of insulation tape around the tube, to prevent any chance of a short-circuit. The fine wire was then wrapped around the tube a few times and tied off. The paper flange assembly at the ends of the spine sections were then slid on the tube and over the wiring joint, hiding it completely.

I then moved my suspension system (broom handle) from the spare bedroom and hung it in the lounge. I then attached the spine suspension lines to the broom handle.

I then attached the sphere and engine module and the antenna array.
I am waiting for night time to take some better photos, when I can control the lighting a bit more.
But for now, a few crappy pictures taken with my phone camera.
In the first few pics, you can see the suspension lines and wiring lines in action. These will be coloured to match the background picture of the display case at a later stage. Then you will hardly see them at all.


And in this pic, it looks like Discovery is doing a low flyby through my lounge...

I'll be back through the week, as and when I can, with more.


 ,:Bravo:,Claphands and