M4A4 Sherman VC Firefly, Halinski 1:25

snake7

Well-Known Member
Dec 13, 2004
424
1,165
93
46
Israel
Thanks guys!

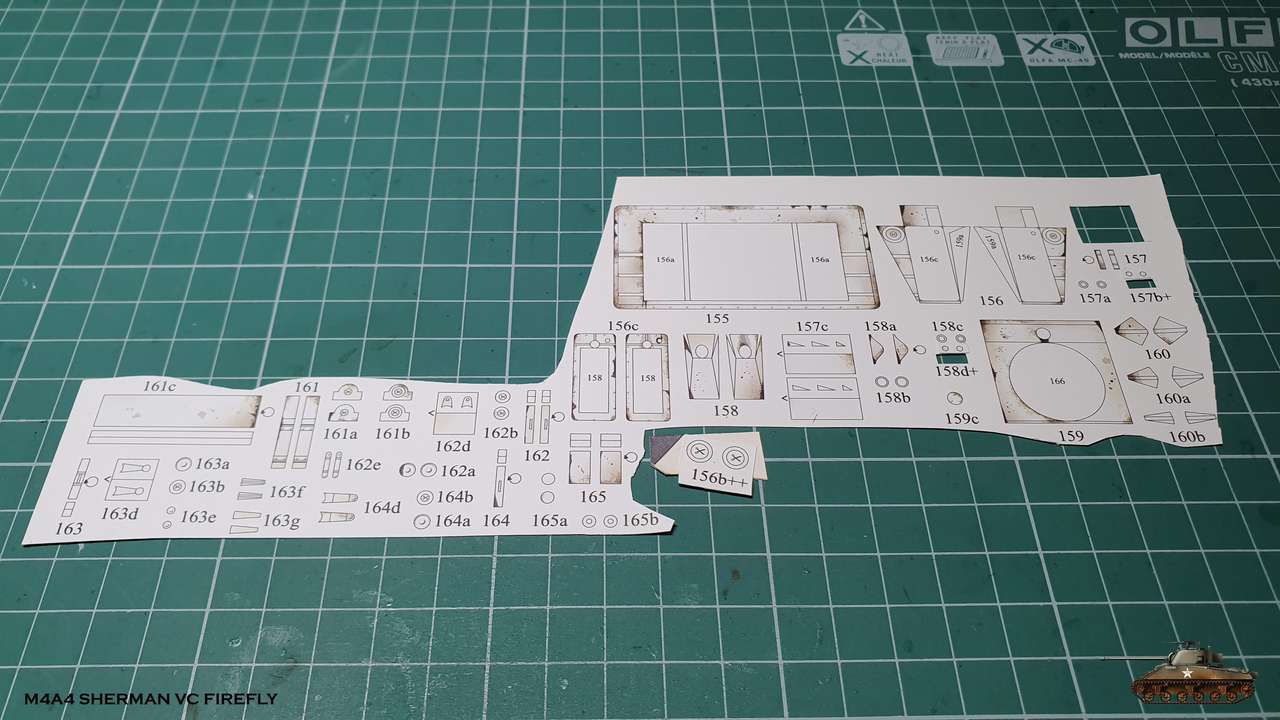
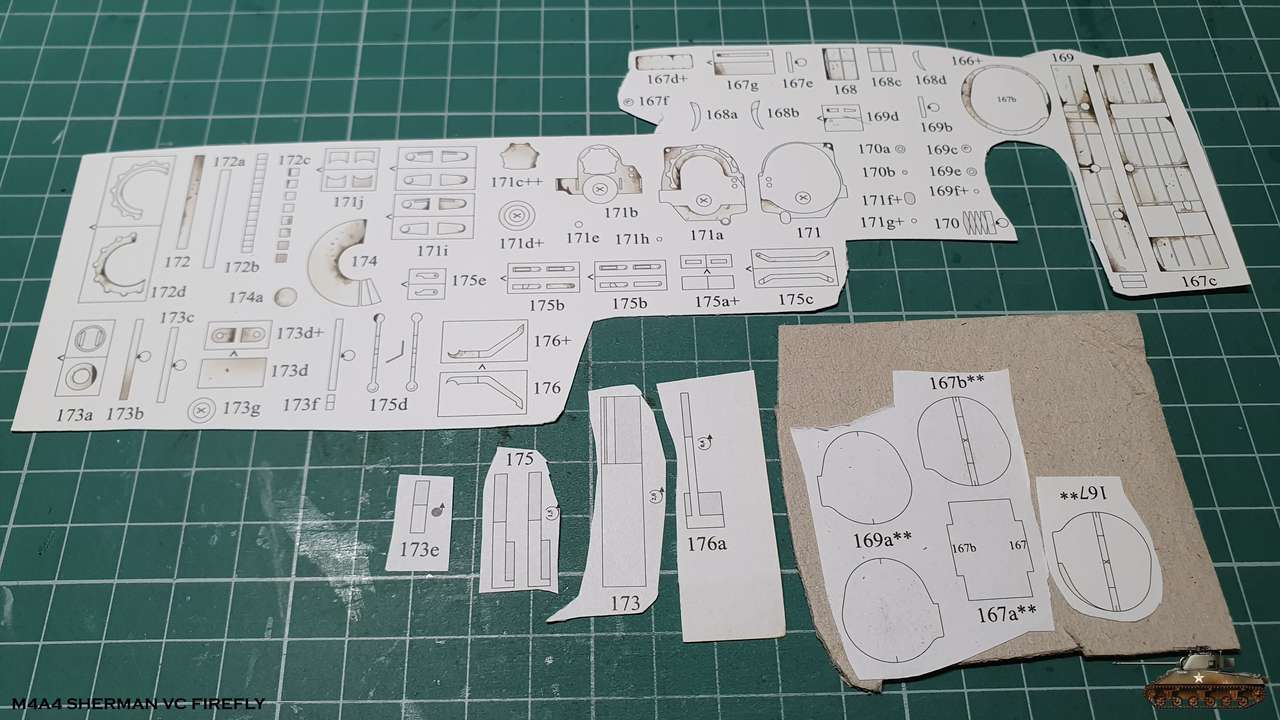
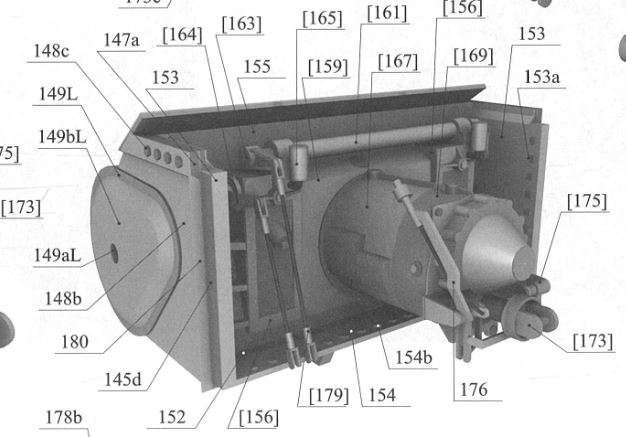
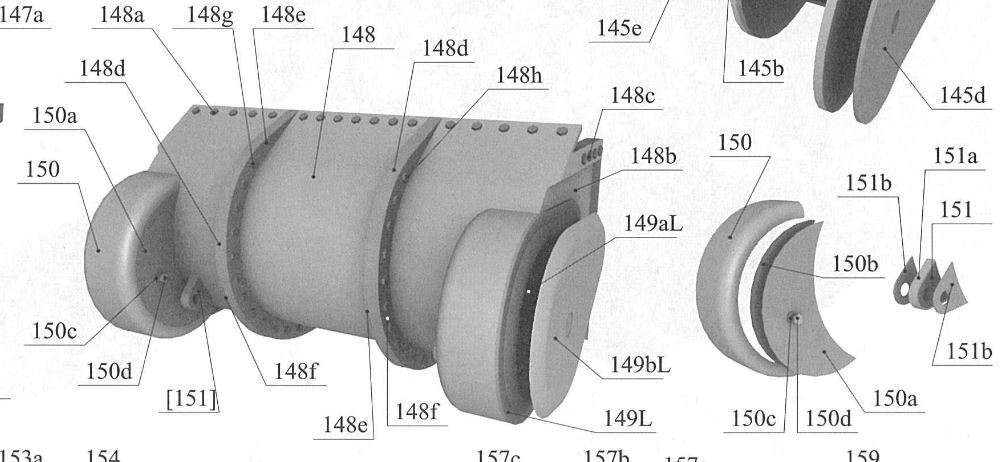
First of all - don't forget part 147, i almost did :)

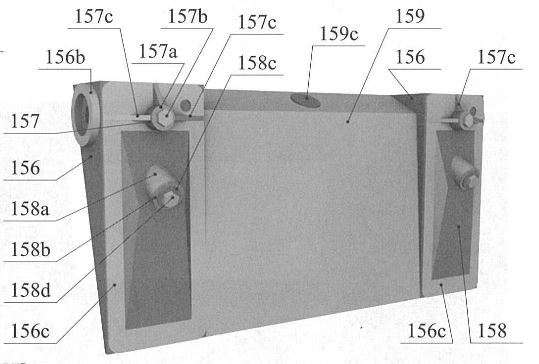
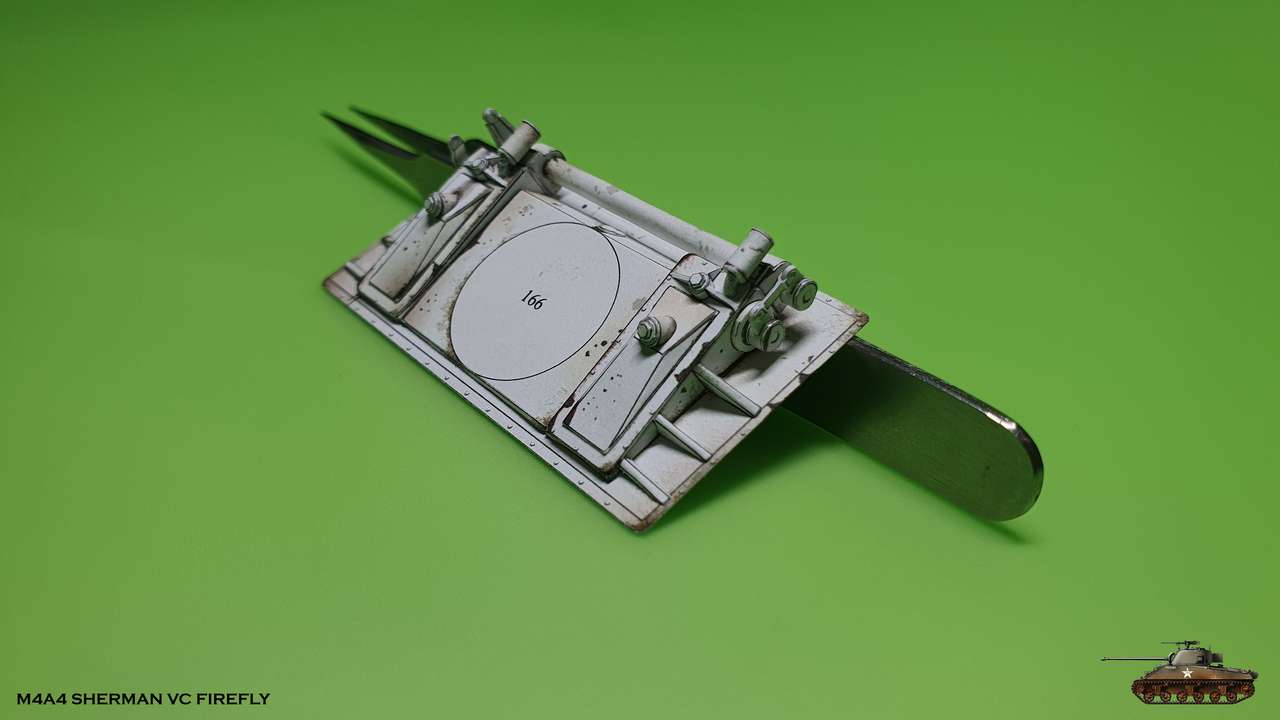
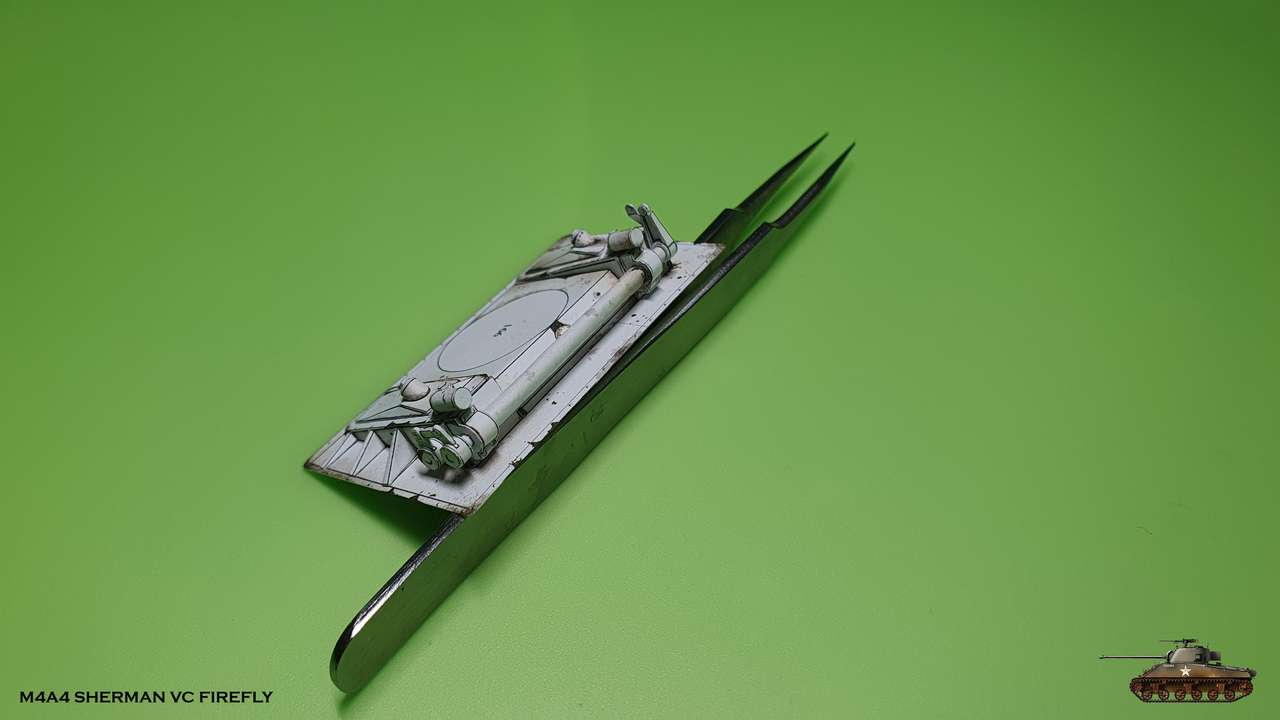
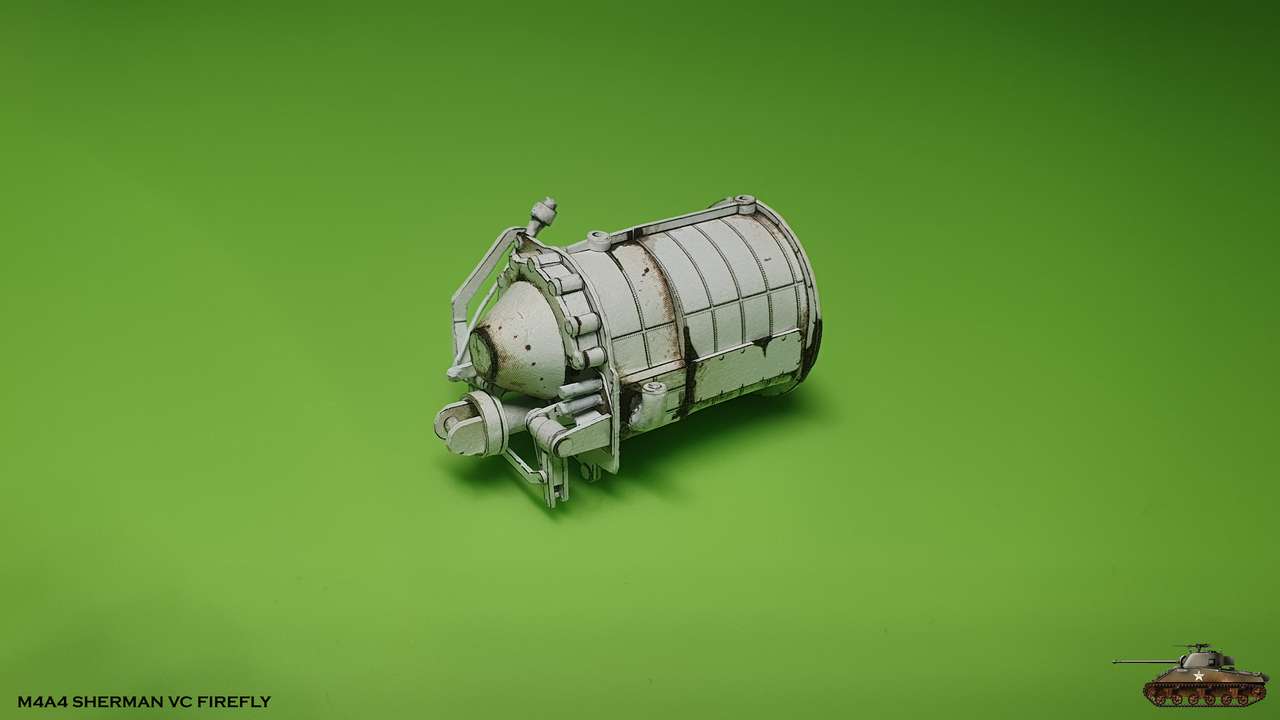
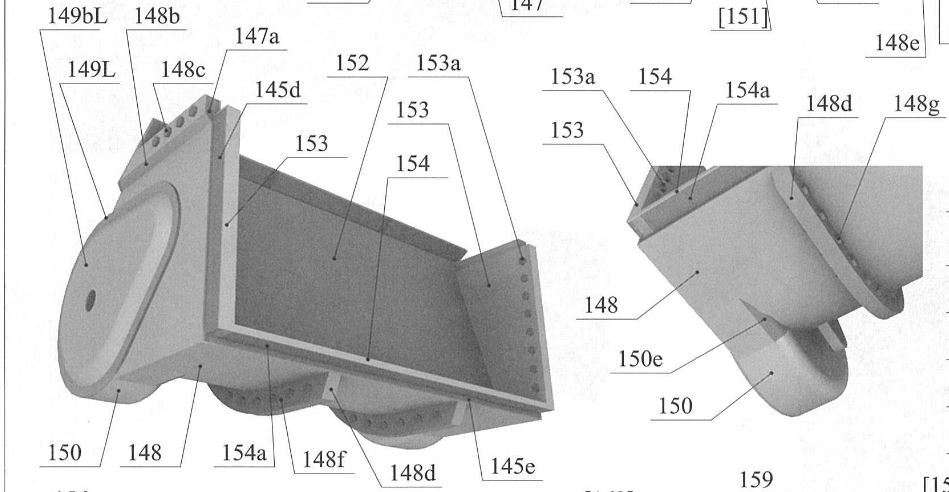
I was little afraid about this tabs part with curved edges.
But if you plane wisely - it can go easy.
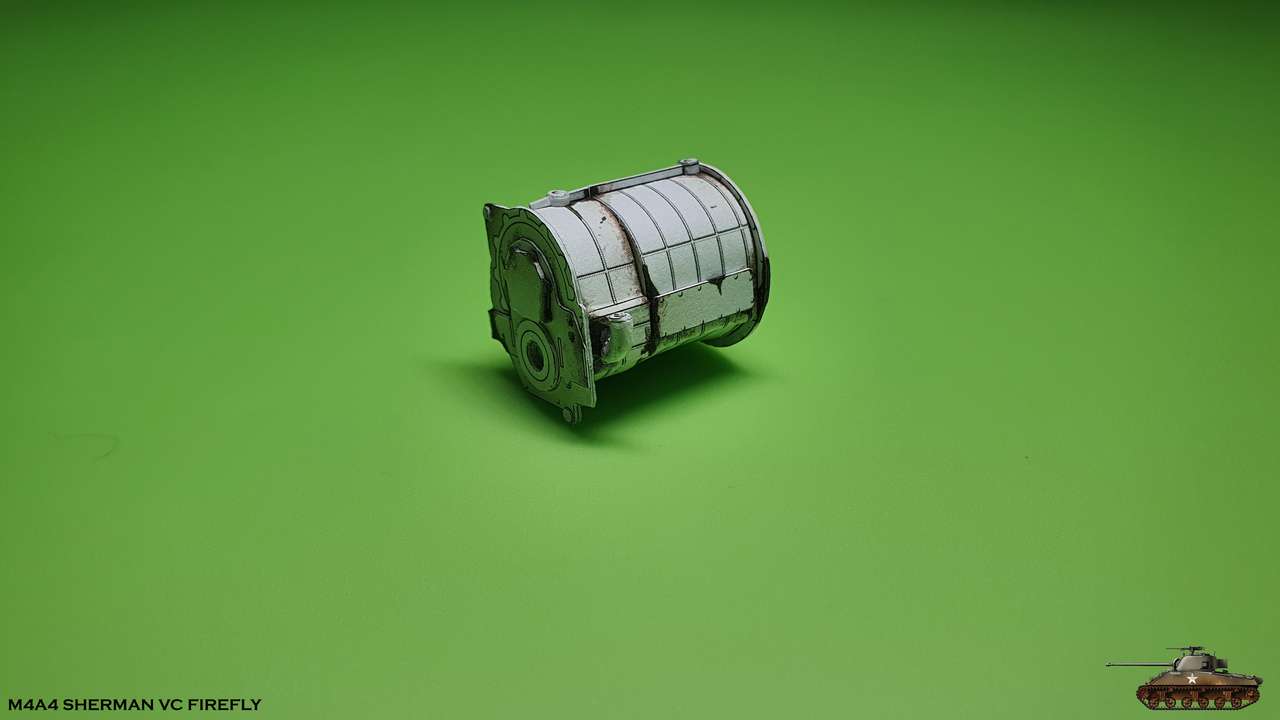
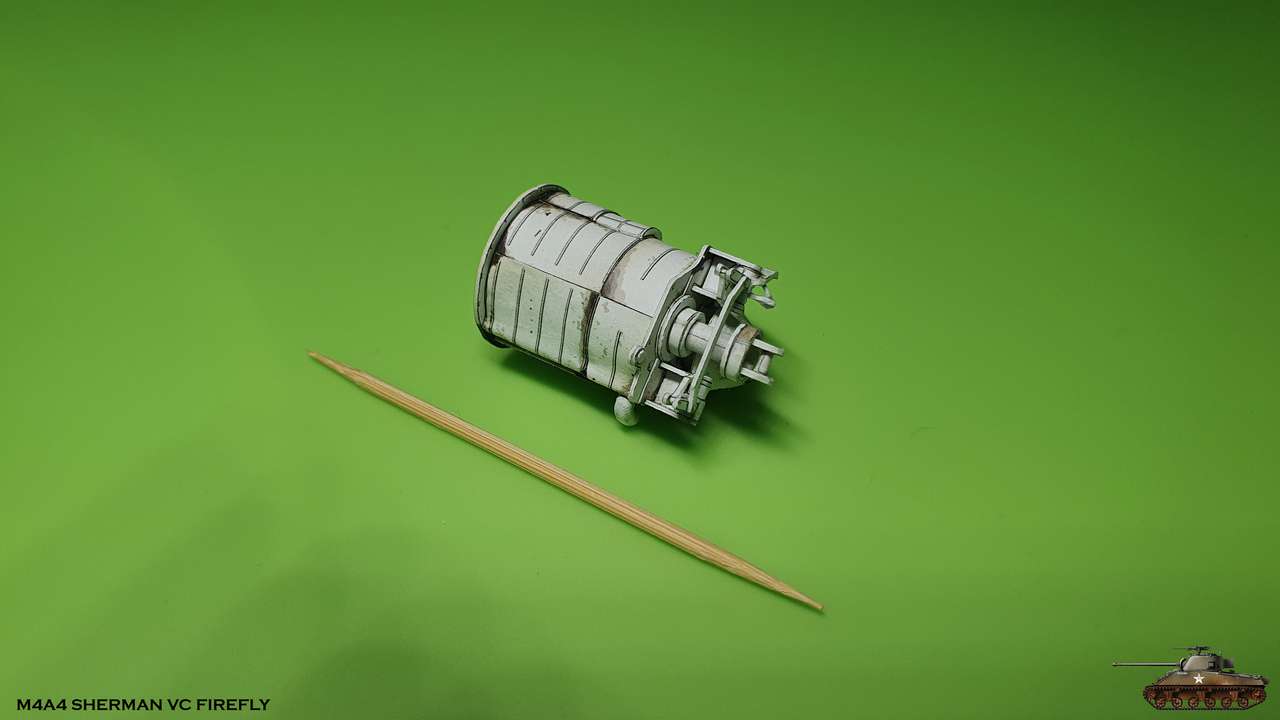
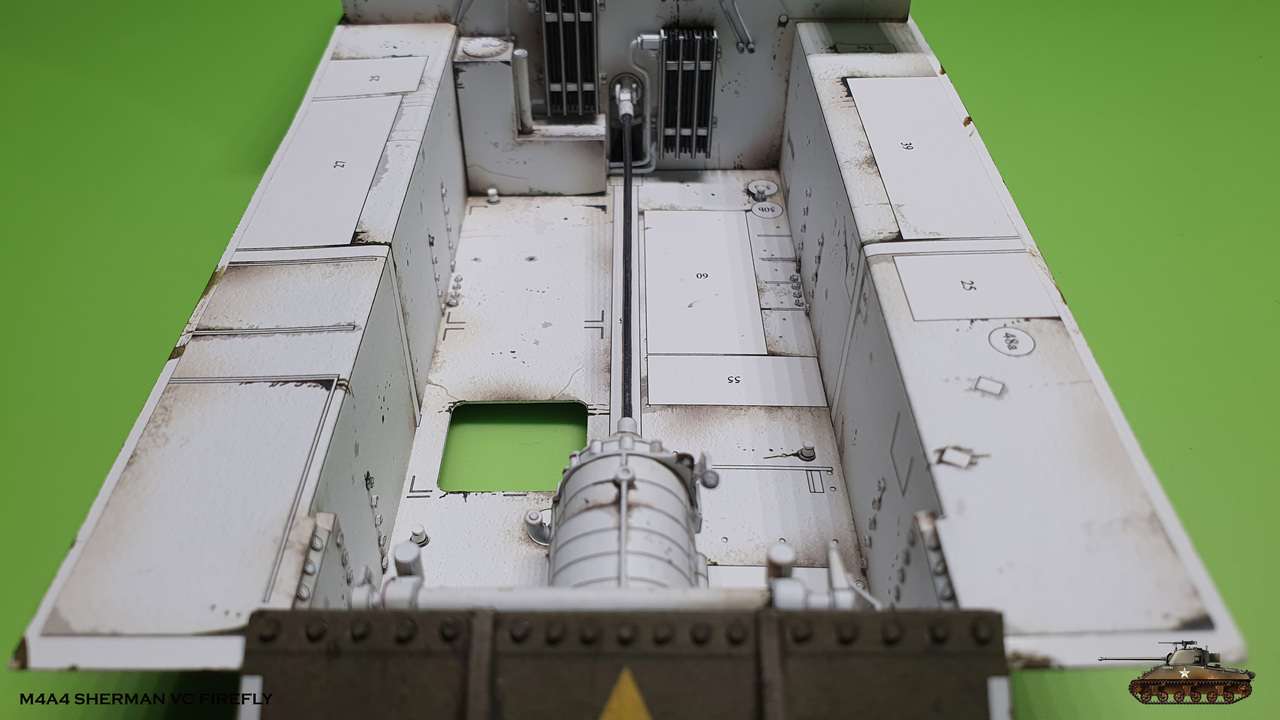
I decided to glue wall 150a/b to main part and then shape the tabs and the skin(150). Tried several times to assemble together without glue and it went well.
Tabs set exactly on wall curved edge. The curved part skin sits on, gave me right shape and i glued tabs to wall edge.
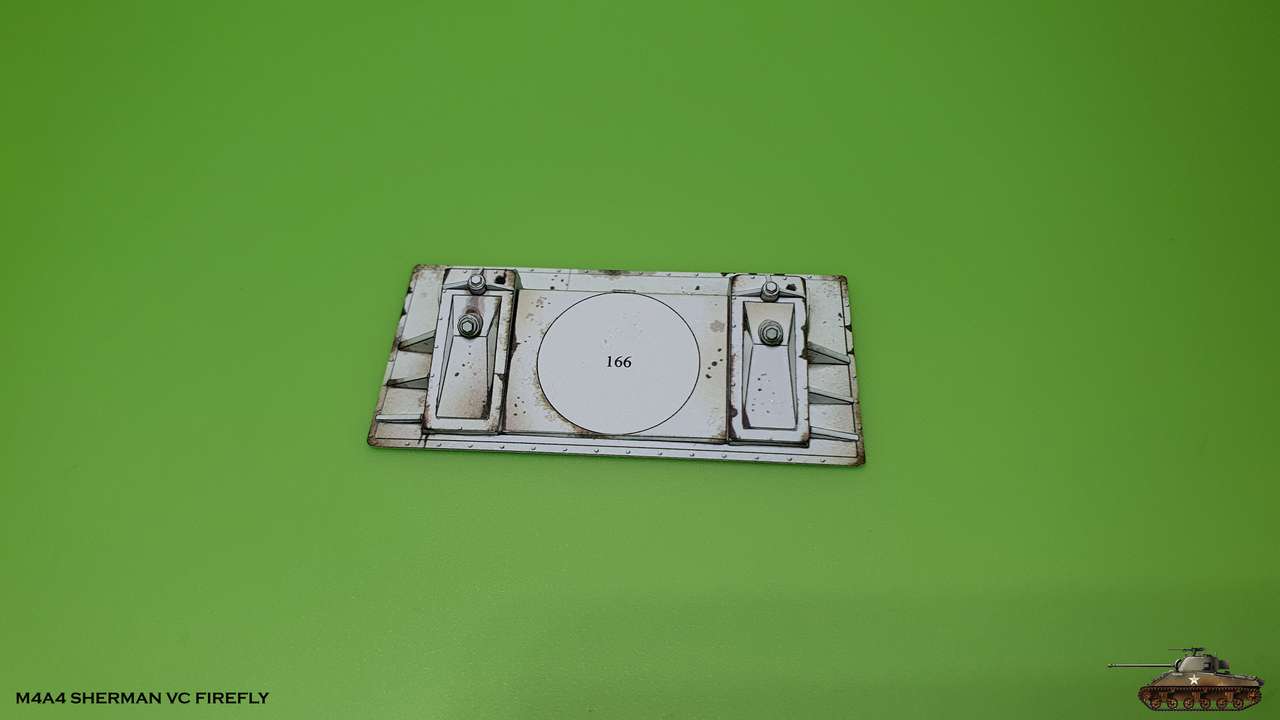
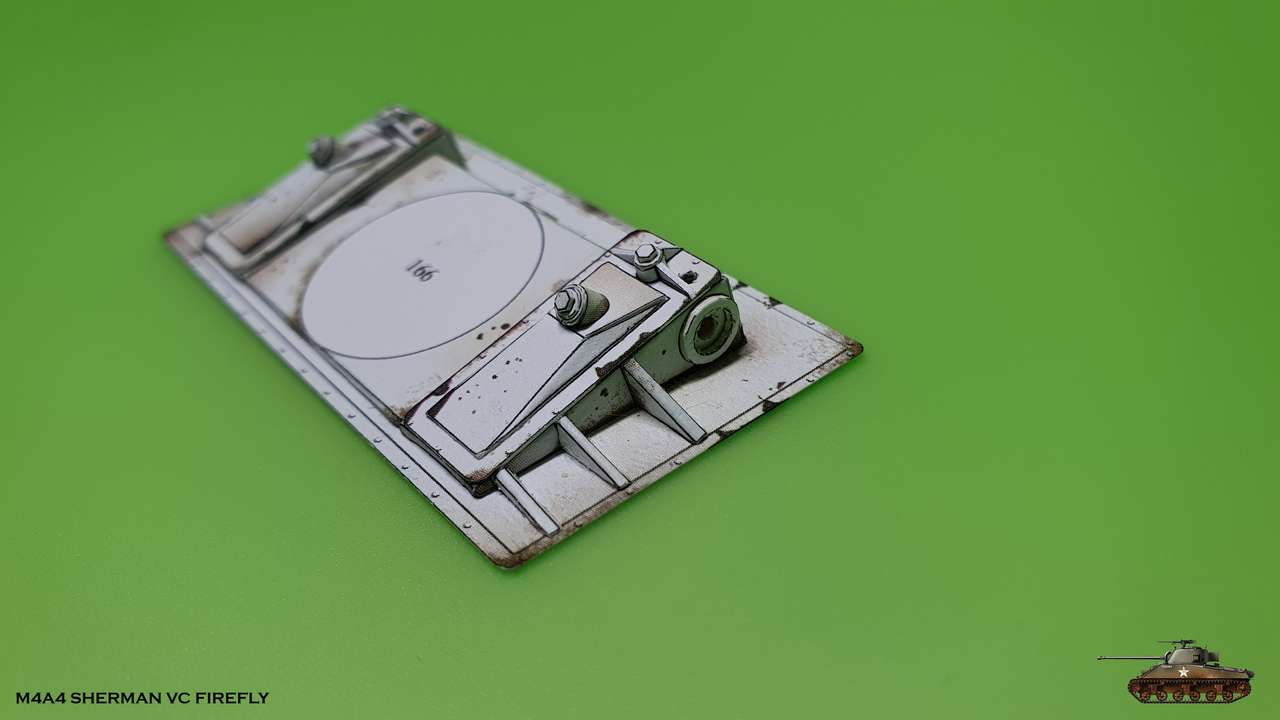
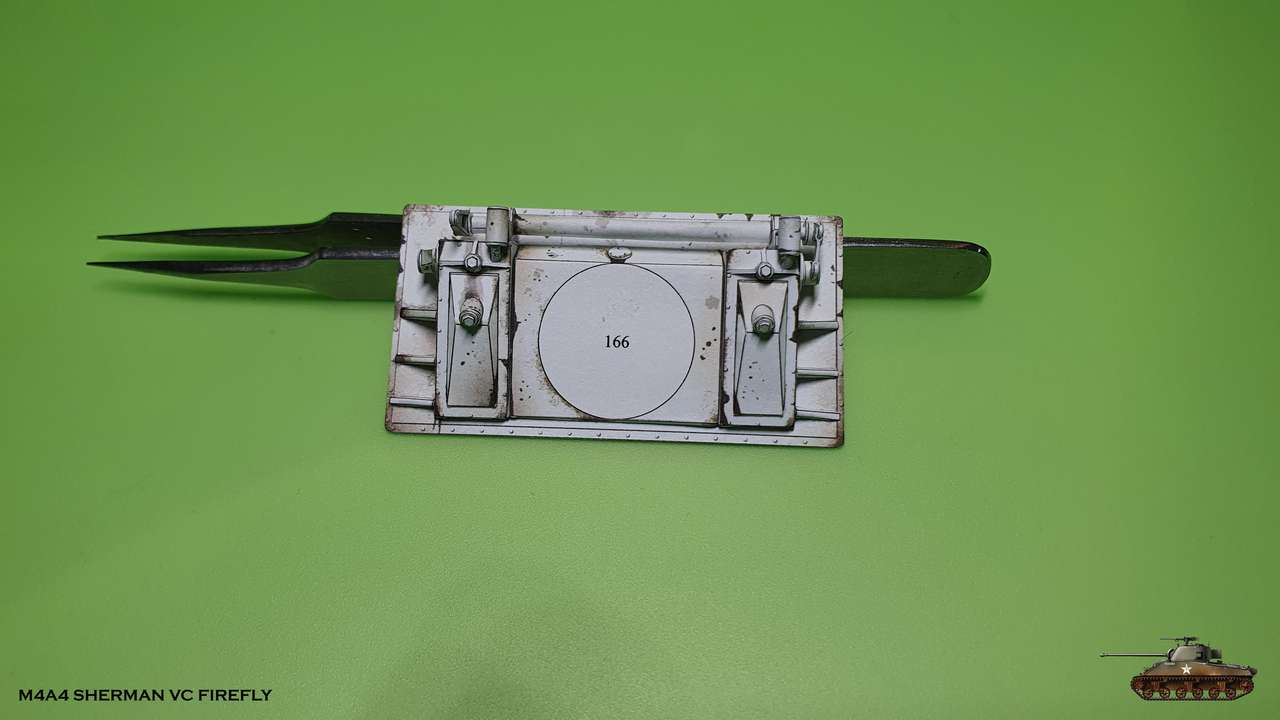
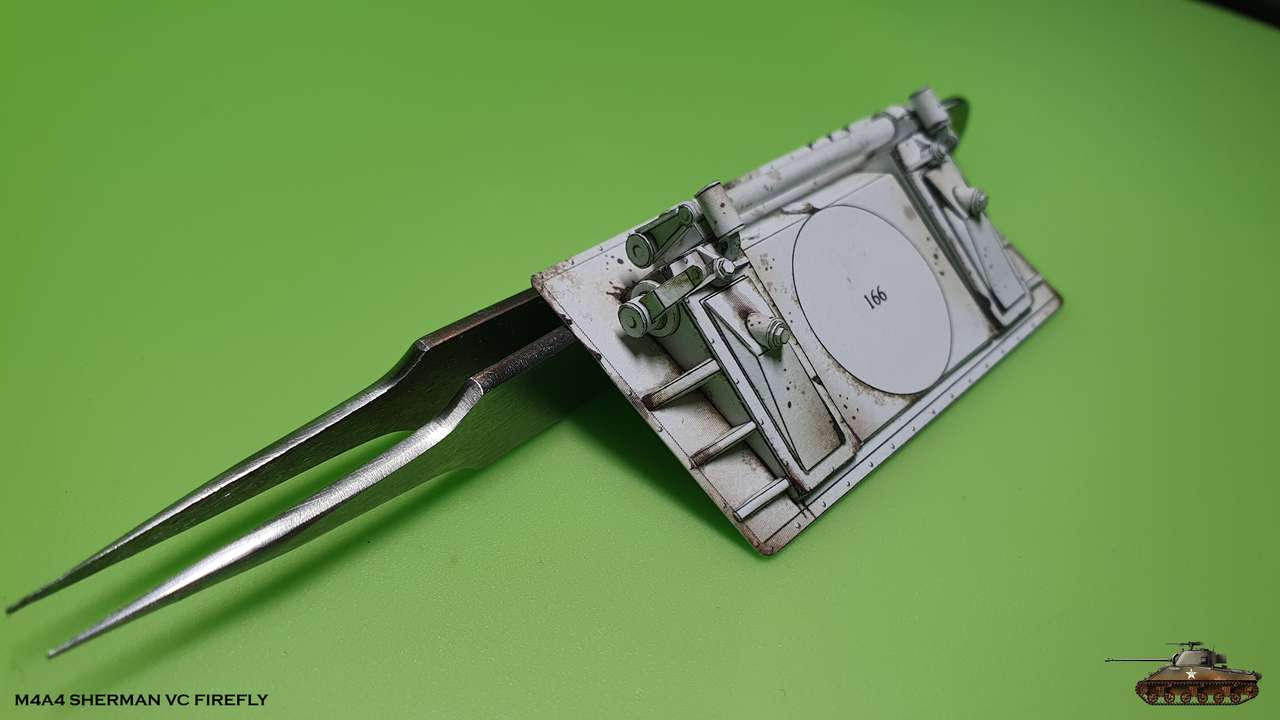
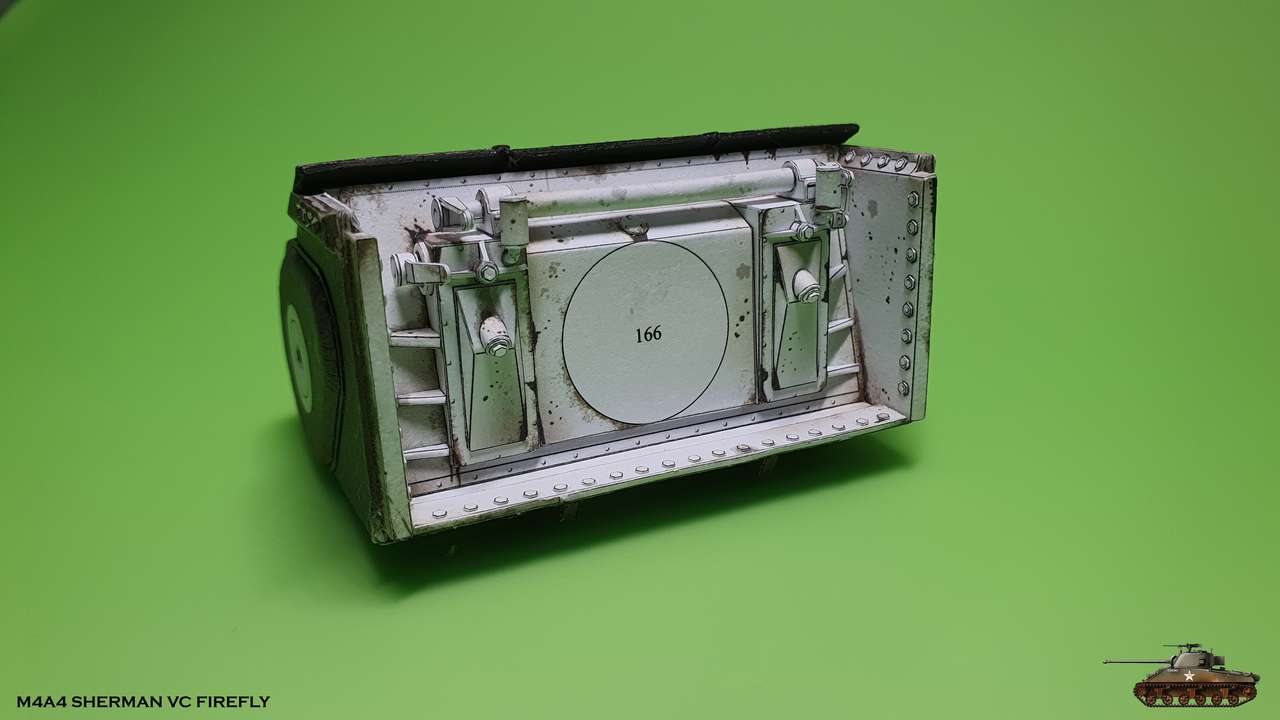
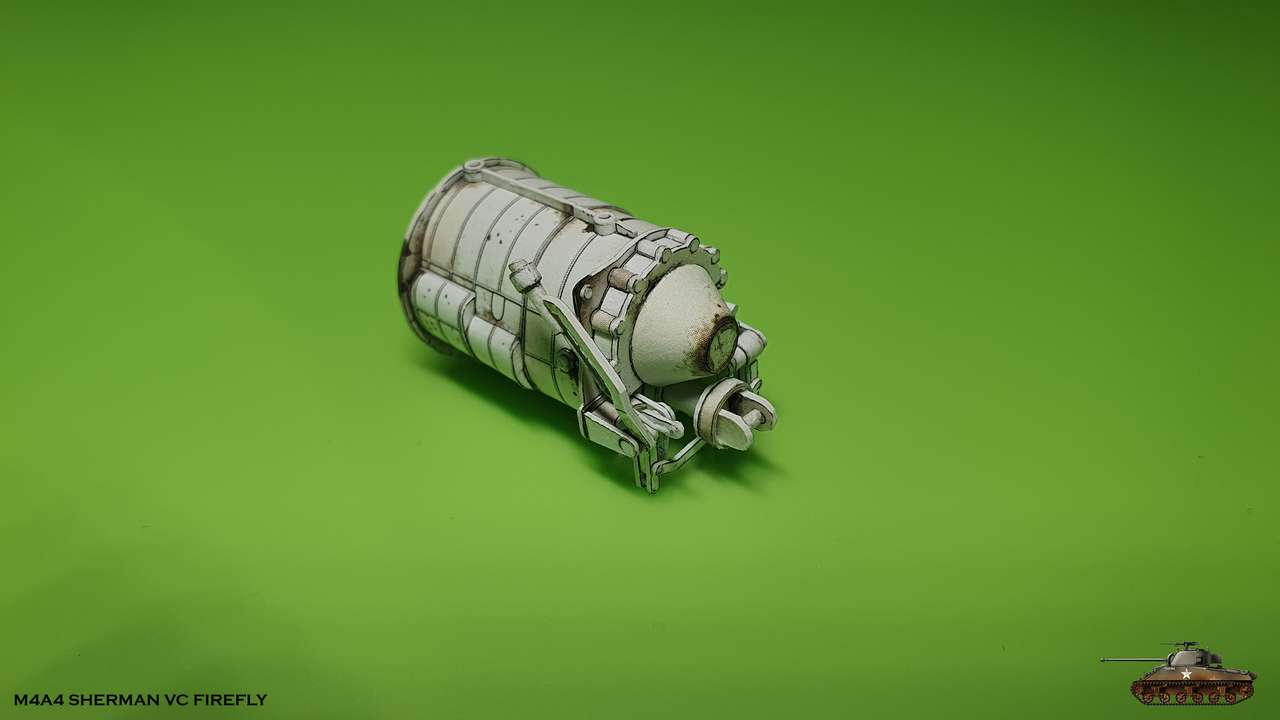
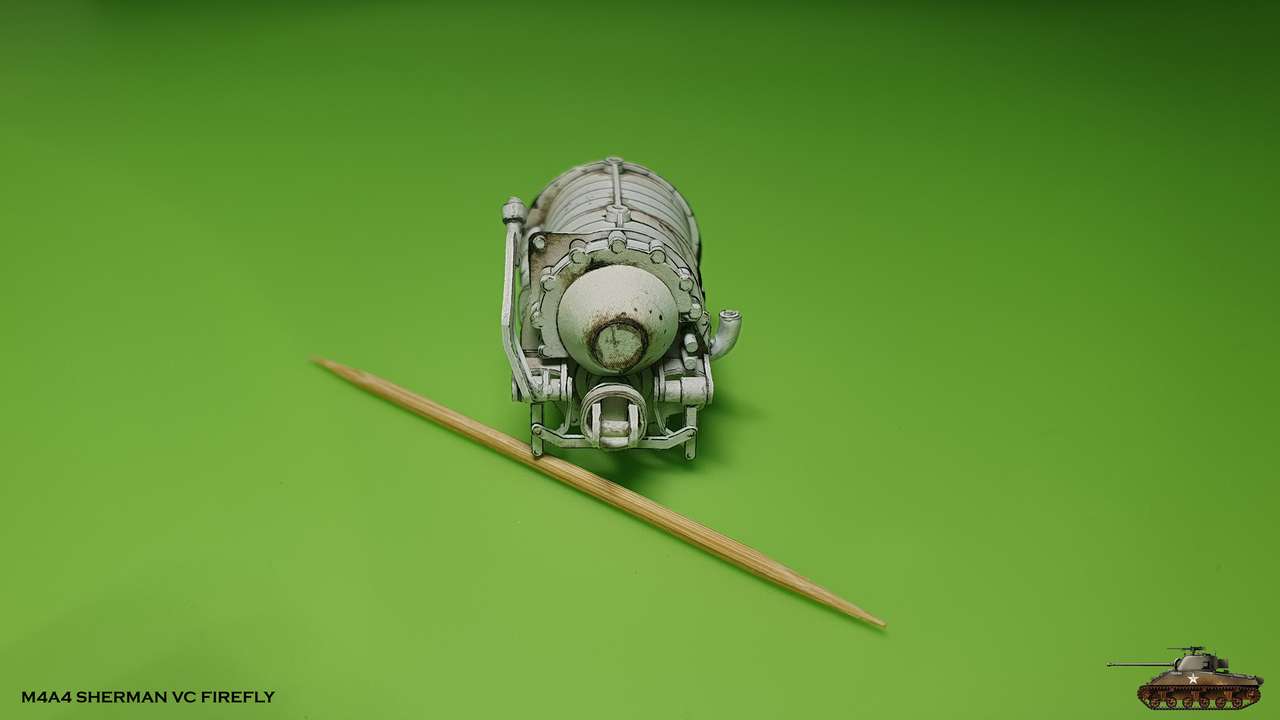
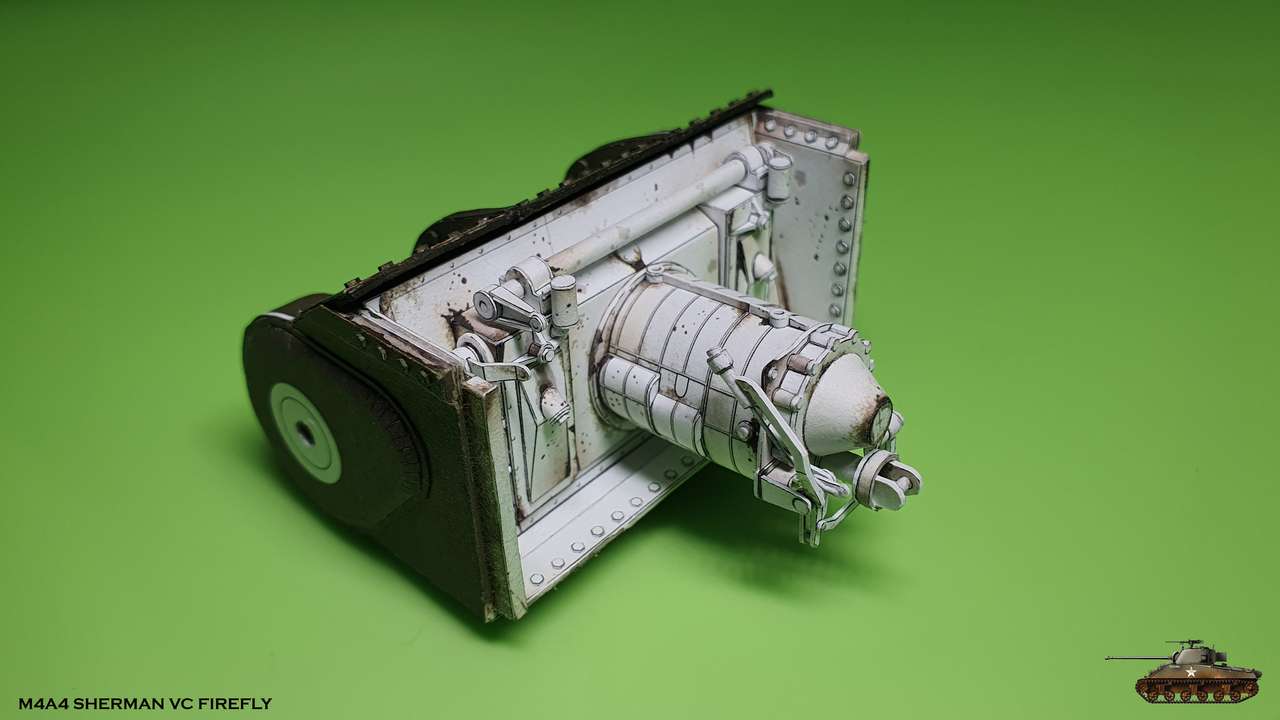
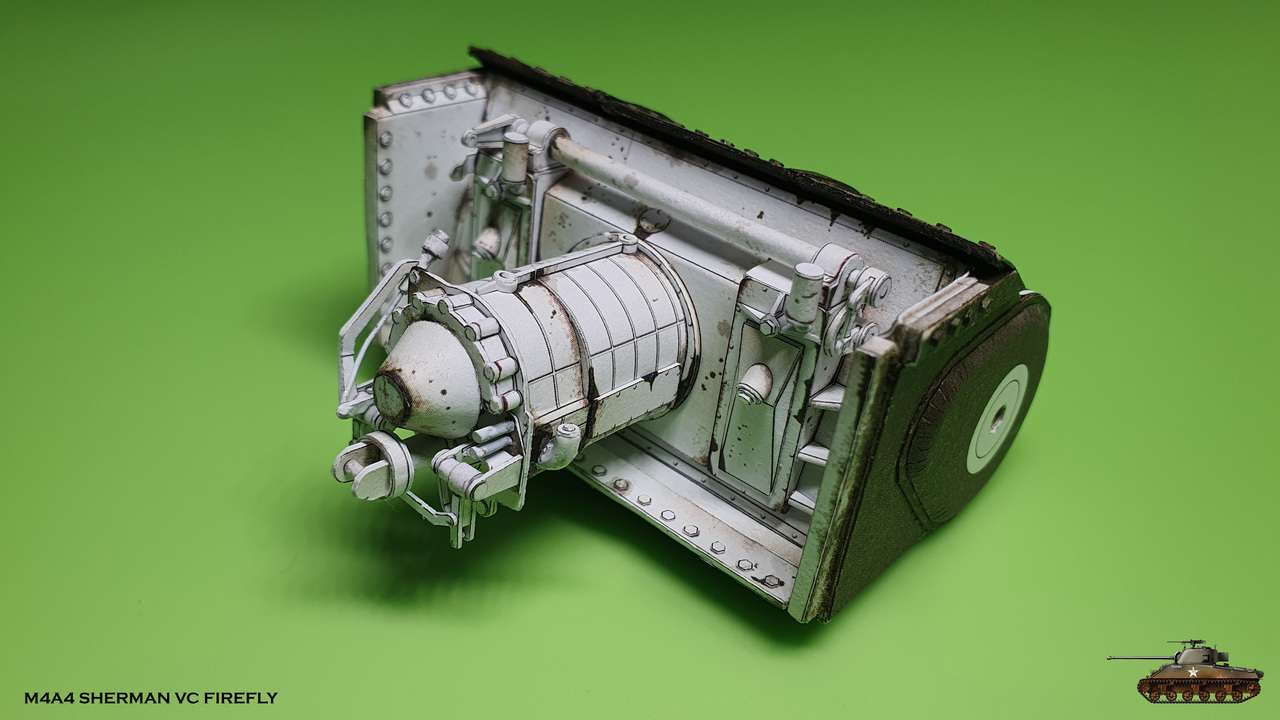
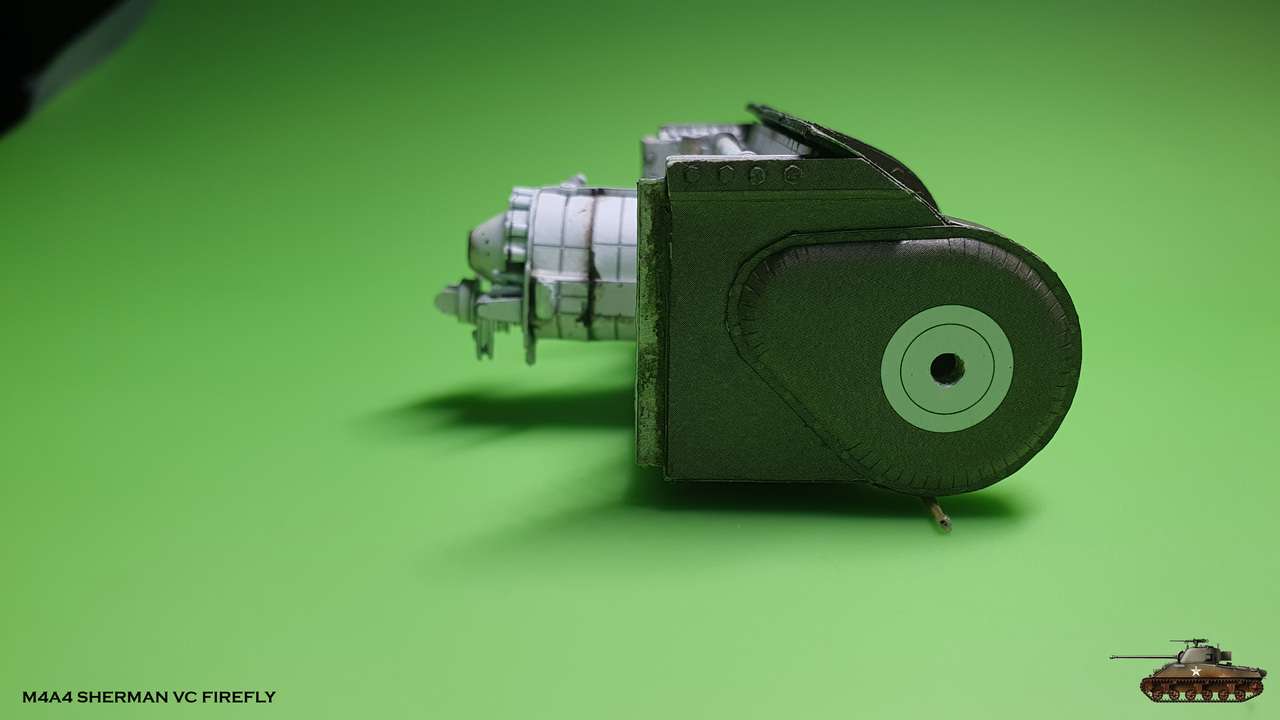
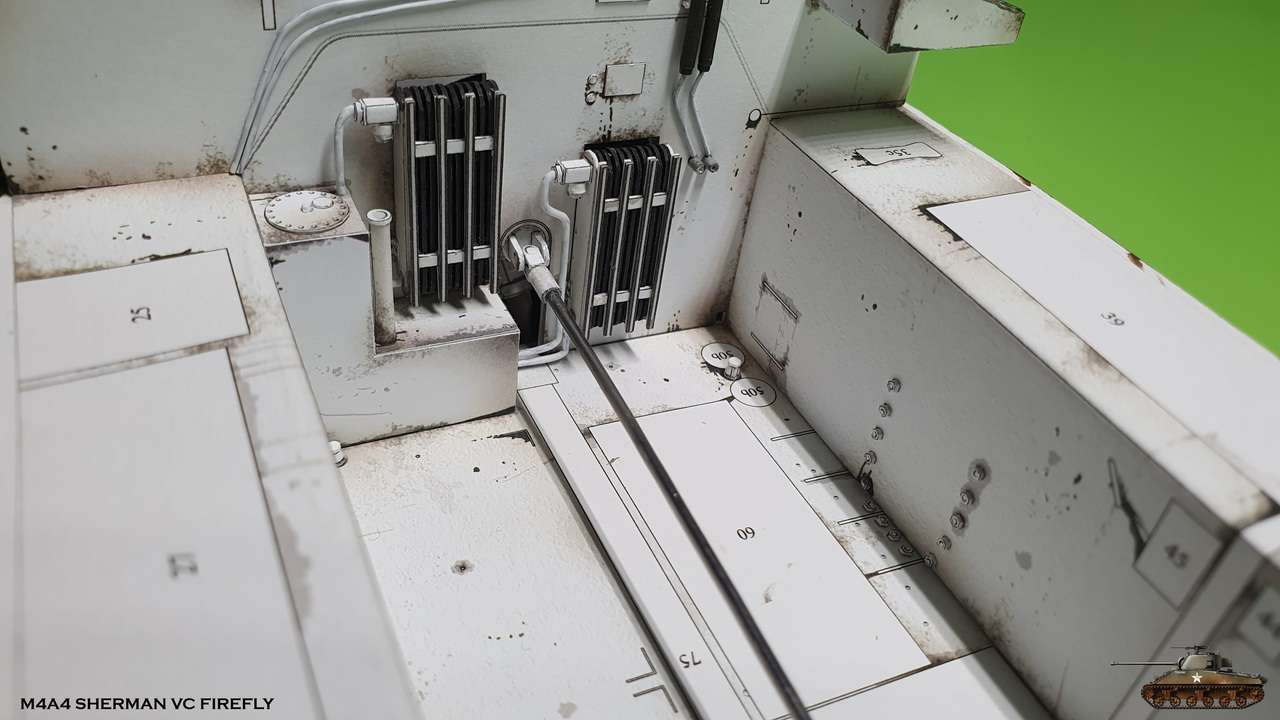
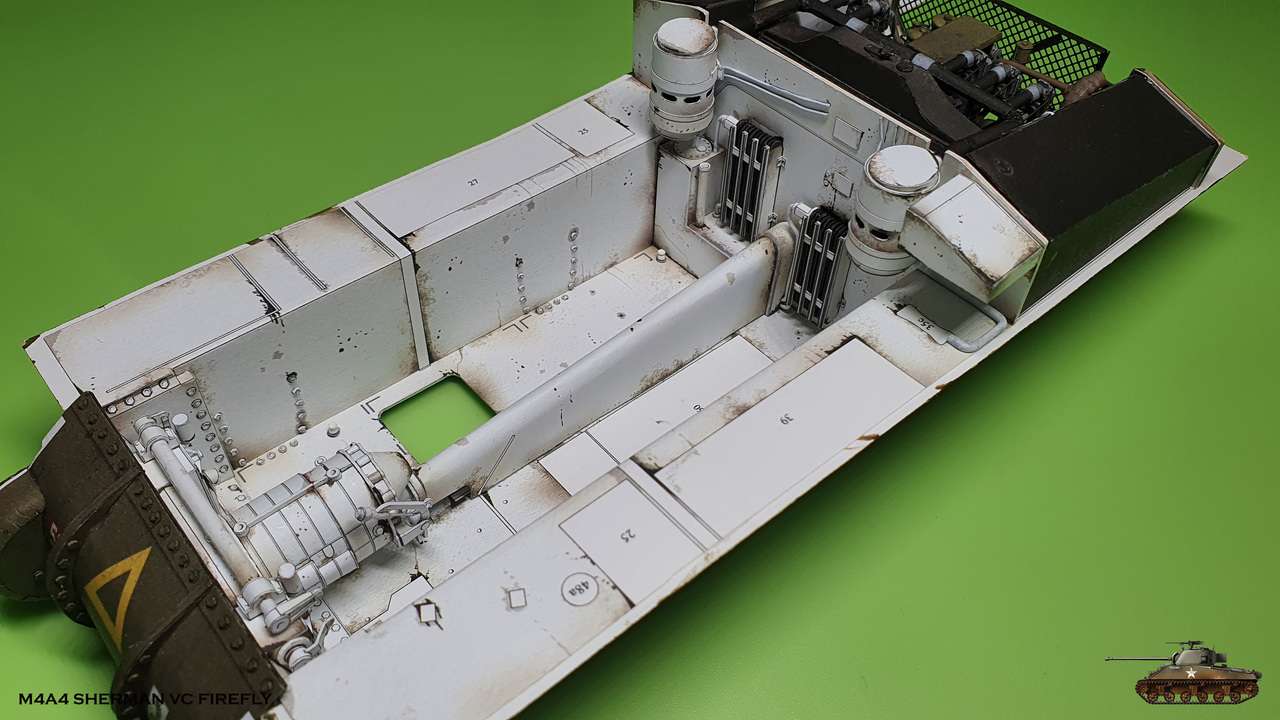
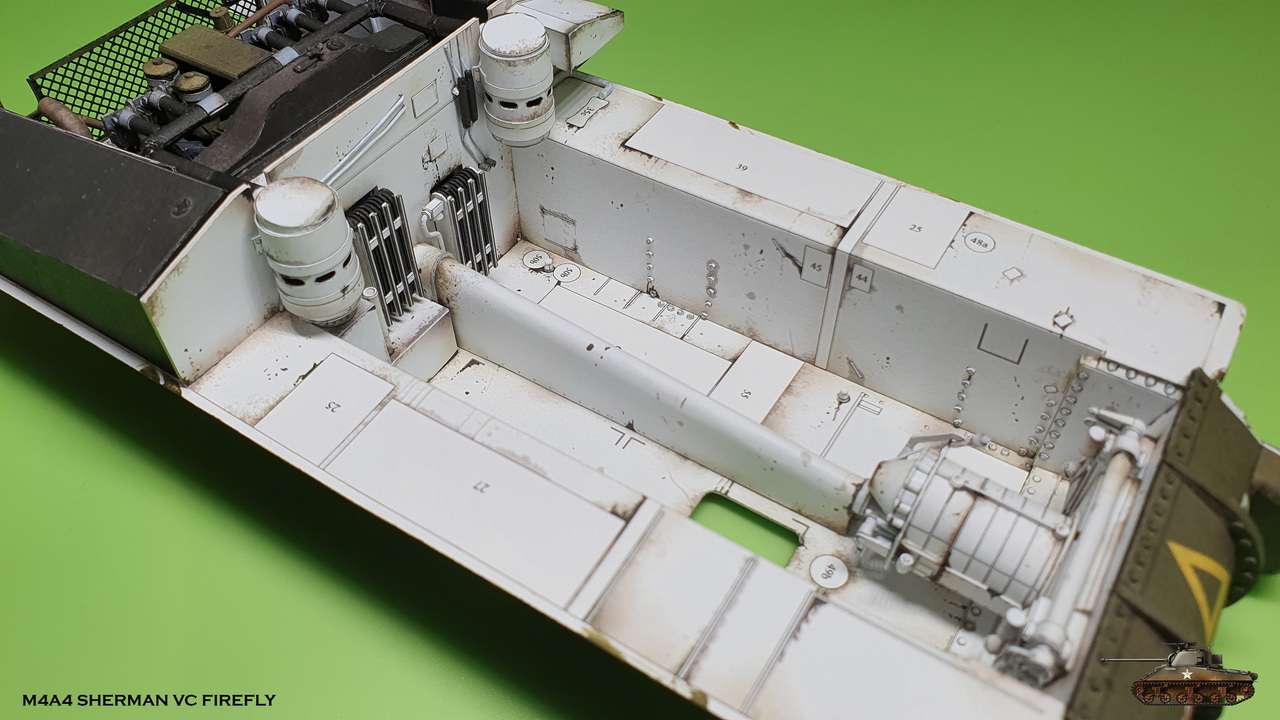
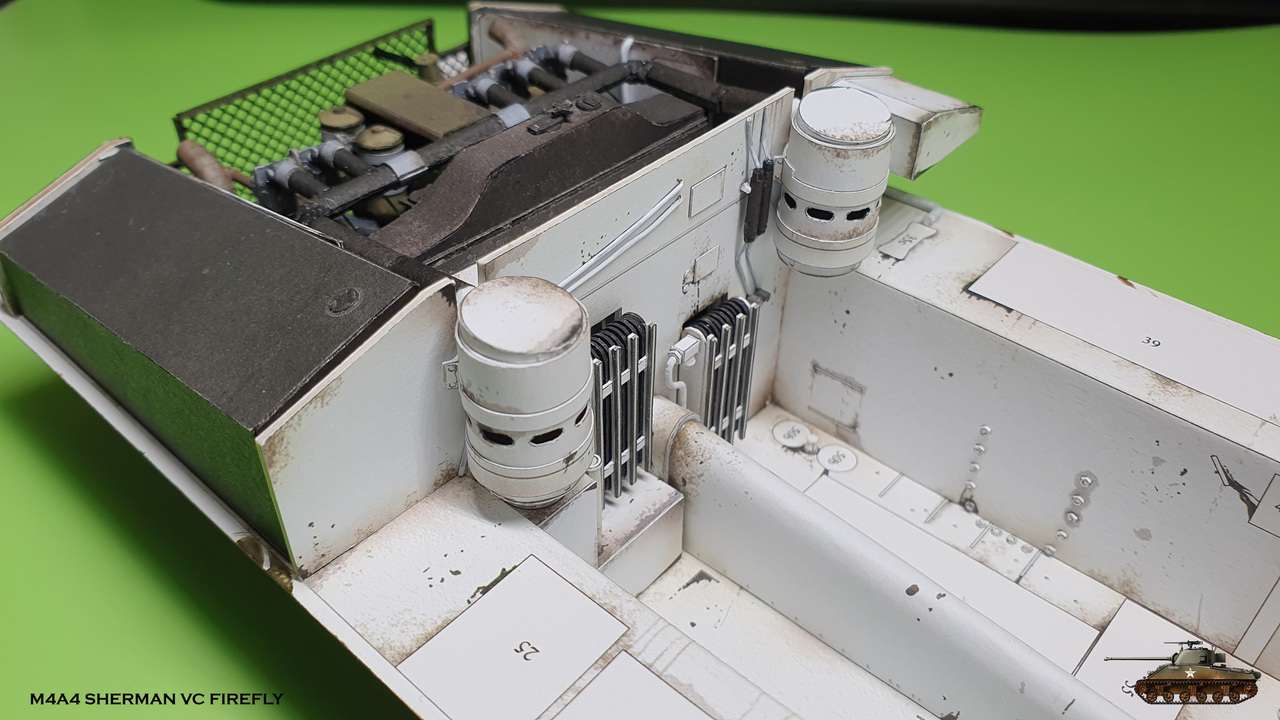
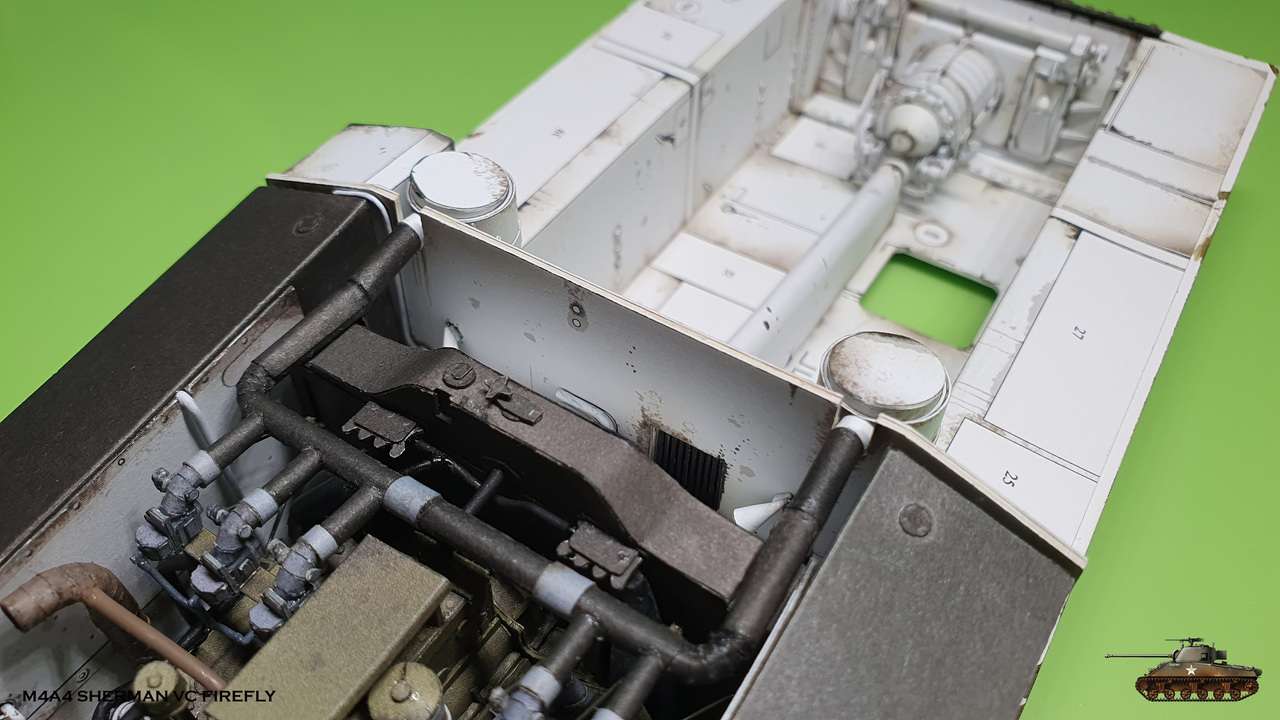
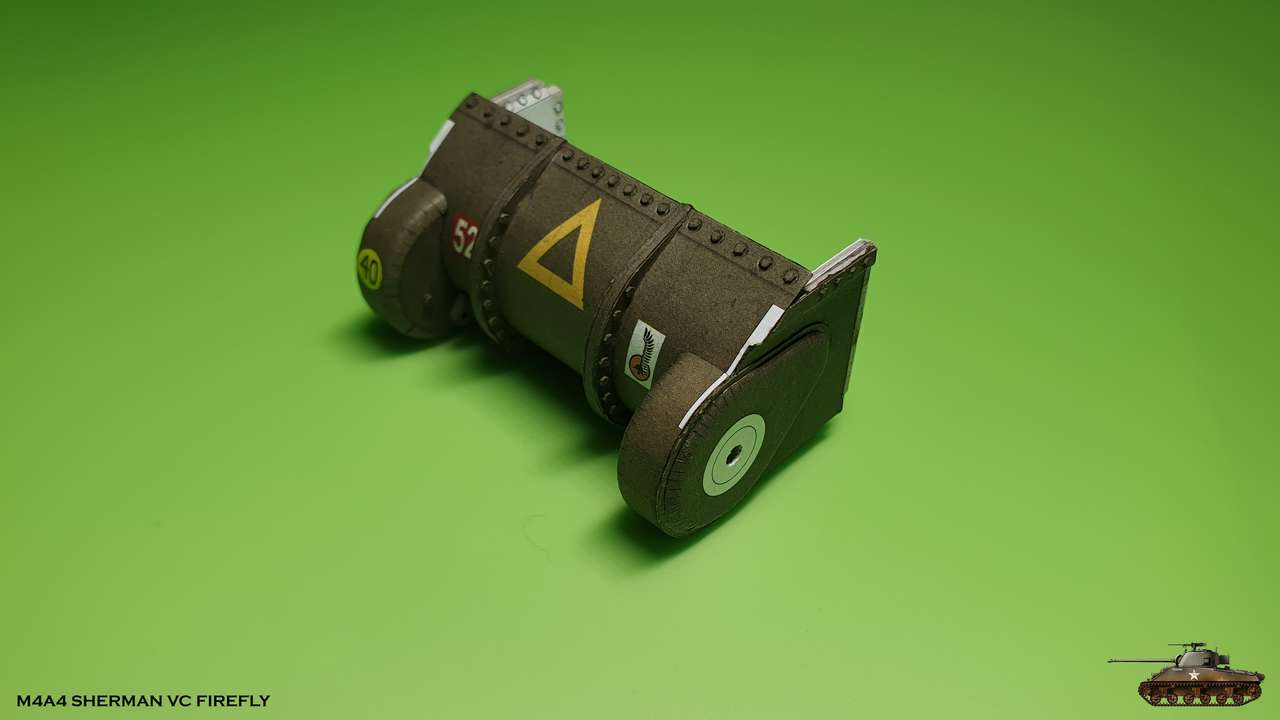
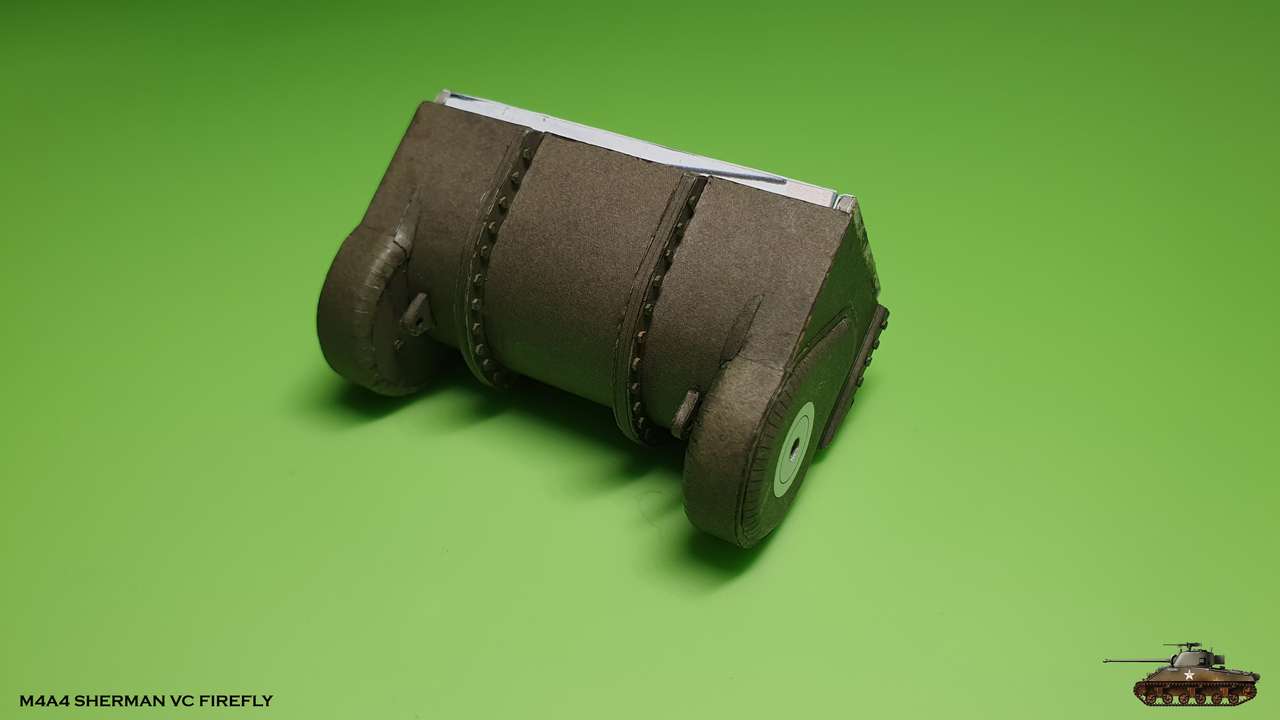
Assembled side bumps and interior skins and finished with lots of rivet heads.
In reality they replaced whole unit so everything was on rivets.
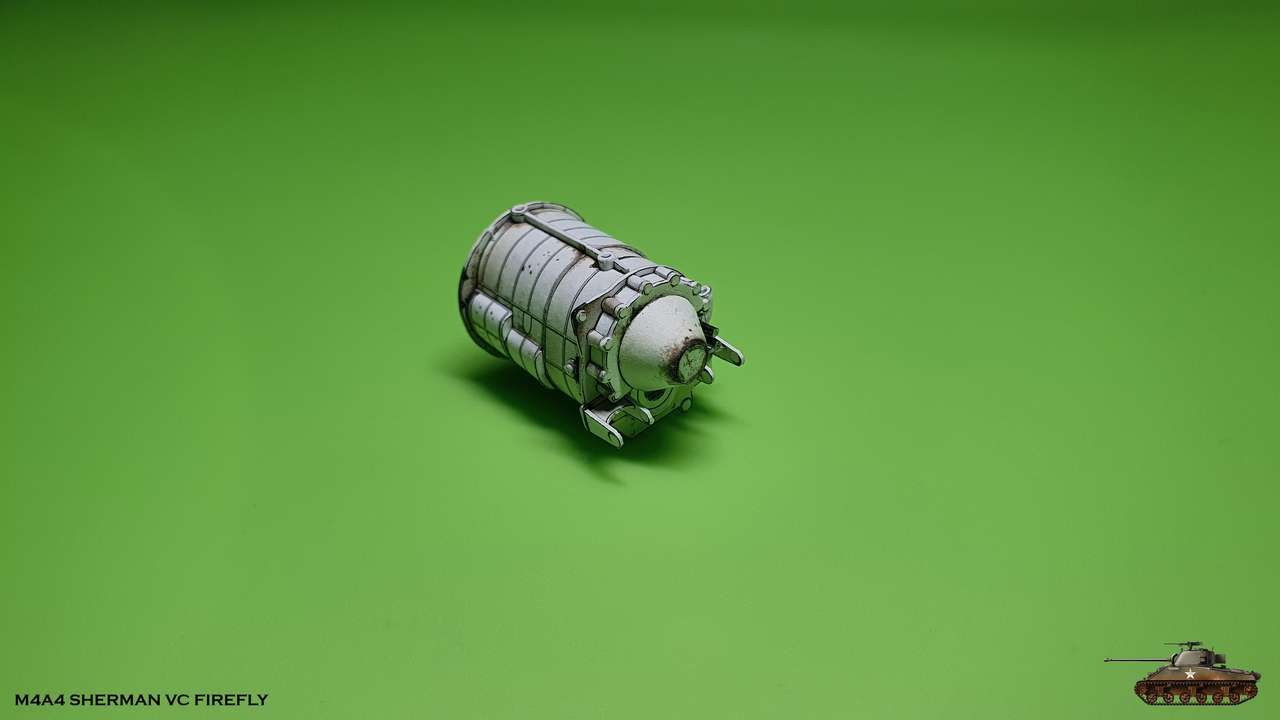
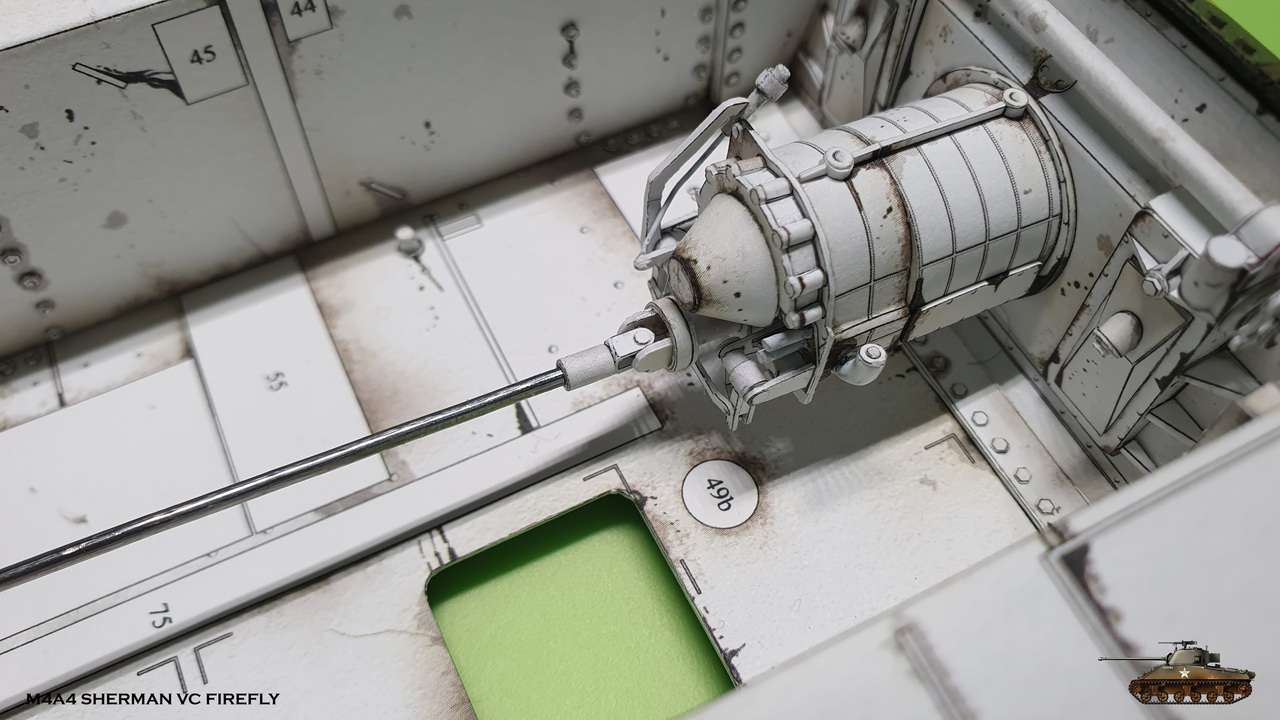
Transmission unit is ready!

FFO5cl.jpg


I4b6ue.jpg


kSnktQ.jpg


m1WrgL.jpg


lPbKm8.jpg


H9LfPk.jpg
 

snake7

Well-Known Member
Dec 13, 2004
424
1,165
93
46
Israel
Thank you Boris and Rhaven Blaack

I continue with inner parts of transmission unit.
The assembling was a joy, probably because of thoughtful design and white parts that almost don't need edge coloring :)

XrAFfe.jpg


First of all differential carrier panel with steering brakes covers

cnefYH.jpg


84TtcT.jpg


Y1oker.jpg


Then were assembled all the levers that operated steering brakes and differential breathers.
Pay attention to engineering solution to transfer power to right steering brake by means of fat shaft and double lever.
A lot of small parts, but everything connected nice.

zYweiS.jpg


zvOZpD.jpg


PMUI48.jpg


zvXuhE.jpg


And parts are glued to place
I will connect roads to steering levers in later stage, when driving chair plate will be mounted

FjRdDd.jpg


friTUq.jpg


QguMeo.jpg


e6um5O.jpg


JLzKD3.jpg


Tried dry fit panel into transmission unit

bhhPMO.jpg
 

zathros

*****SENIOR ADMINISTRATOR*****
Staff member
Administrator
Moderator
Apr 5, 2013
13,498
9,549
228
The precision of your work is astounding. ;)
 

snake7

Well-Known Member
Dec 13, 2004
424
1,165
93
46
Israel
Thank you Boris and Zathros!

I continue with gearbox.
Assembling was a joy, despite a few fiddling parts at the end.

This are all the parts. I love how designer attempted to group together most of unit parts, so the assembler will not search for them all over this huge book.

JFWCoP.jpg


And first comes the gear box itself

wgB5UA.jpg


SjtmP5.jpg


kTMRzI.jpg


Next is the engine generator cover

r5EMZQ.jpg

HsRJEU.jpg


U6PEmh.jpg


And last are shift mechanism with shift lever and universal joint assembly

0fJKiI.jpg


HuuvvR.jpg


I wanted to assemble all units as in drawings and then glue together, but as you see in picture above, i decided to leave some parts no glued and do it on main unit later. That gave me more freedom to adjust and glue easily

Qwy3Ao.jpg


x127lp.jpg


22ekIf.jpg


55MOpi.jpg


A6RMCI.jpg
 

zathros

*****SENIOR ADMINISTRATOR*****
Staff member
Administrator
Moderator
Apr 5, 2013
13,498
9,549
228
If you Photoshoped these pats of wooden pallets in a parking lot, I would think someone took apart a tank and were selling it's components! :)
 
  • Haha
Reactions: snake7

snake7

Well-Known Member
Dec 13, 2004
424
1,165
93
46
Israel
If you Photoshoped these pats of wooden pallets in a parking lot, I would think someone took apart a tank and were selling it's components! :)
That's the amazing detalization of this model, taken to the maximum of 1:25 scale. I can't describe in words the joy I get building on such level.
The downside - every other model after this will feel like a toy
 
Last edited:
  • Like
Reactions: zathros

Revell-Fan

Co-Administrator
Staff member
Administrator
Moderator
Aug 1, 2009
11,611
12,352
228
Vreden
That's marvellous! The cleanness and crispness of your work is remarkable. :)
 
  • Like
Reactions: snake7

zathros

*****SENIOR ADMINISTRATOR*****
Staff member
Administrator
Moderator
Apr 5, 2013
13,498
9,549
228
That's the amazing detalization of this model, taken to the maximum of 1:25 scale. I can't describe in words the joy I get building on such level.
The downside - every other model after this will feel like toy


It's your skill plus the design. I could see this model being put together horribly. You put in the extra touches that made it the model as we see it now. ;)
 
  • Like
Reactions: snake7

snake7

Well-Known Member
Dec 13, 2004
424
1,165
93
46
Israel
Thanks again

Well, gearbox is finished, so it's time to assemble all together

Gearbox to differential carrier and then to powertrain


Y1j2hY.jpg


Ns3GnE.jpg


2GqMiy.jpg


ONPK11.jpg


Here you can see, that gearbox seats a little angled, that because on the other side engine axcell is higher

CCsrmG.jpg


Fast assembling of driveshaft and then, finally, powertrain connected to the hall!

BWotEV.jpg


E5f1sD.jpg


M69zLm.jpg


MV1VT7.jpg


RBHX3a.jpg


Sm01at.jpg


i9S6iF.jpg


6VHzDg.jpg


97kq89.jpg
 

zathros

*****SENIOR ADMINISTRATOR*****
Staff member
Administrator
Moderator
Apr 5, 2013
13,498
9,549
228
Fantastic!! That's one beefy differential!! :)
 
  • Like
Reactions: snake7

snake7

Well-Known Member
Dec 13, 2004
424
1,165
93
46
Israel
Thank you mates :)

As i ended to join powertrain to hall, i returned to instructions continue to fill the interior.

Next are air filters. They located inside main hall and connected with tubes to the engine.
I decided to to join the tubes on site, for better match.

0rY8Fq.jpg


o1ts9a.jpg


LX6kS4.jpg


Also assembled driveshaft cover

9tbcph.jpg


TBVoYV.jpg


And glued everything in place.
Yes, driveshaft disappeared completely under the cover, but you and I know
that it is there and connects engine to gearbox, like it should ;)
As i assumed, i was in need to adjust a little the length of the tubes, but eventually they connected well.

T5oYAs.jpg


pnPglO.jpg


vvPAOF.jpg


6TvqDV.jpg
 

zathros

*****SENIOR ADMINISTRATOR*****
Staff member
Administrator
Moderator
Apr 5, 2013
13,498
9,549
228
I'm really at a loss of words. This is really an beautifully executed model. ;)
 
  • Like
Reactions: snake7