

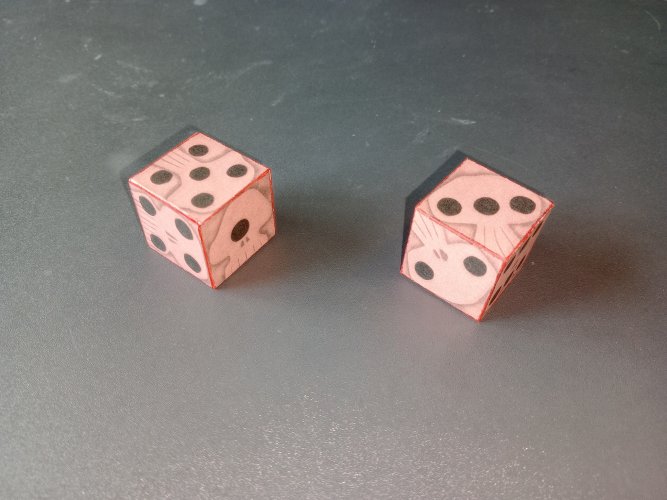
Here is my first build since joining this site! It is Oogie Boogie's Dice. They come from The Nightmare Before Christmas, which I have not watched yet, although I do intend to. I decided on this project because I just think the dice look really cool!
I found it here:
https://www.disneyexperience.com/activities/models/dice_model.php
Printed Out:

First, I cut out the pieces. There were only 2, with all straight cuts and not very many cuts. Therefore, this step was easy and did not take very long.

Next, I used fineliner markers to color the edges. I did not have an exact red, so I used the closest I had to the model red. This part took quite some time, as the edges are long, but it was quite relaxing. For non-tab edges, I used the fine tip end. I decided to use the wide tip end on the tabs since I expected more edge to be visible wherever there would be a gap after folding, and for some reason, little balls of fiber kept getting stuck on the tabs. As you can see, one of the tabs has extra markings - this is where I was trying to clean those extra fibers off, and afterwards it was not a problem anymore. In hindsight I should have just used a different piece of paper, but I wasn't very organized when I built this and the tab itself was the next best choice.

After the finelining, the next step was to score the fold lines. For this, I like to use a tool that has a metal tip with a tiny metal ball on the end. Not sure what it is called, but it scores the paper nicely without tearing (at least not on the first couple of passes). I have tried to use a craft knife before to score, but I find, at least for me, that it just causes more problems than it solves. Some of my score lines went off track a little bit, so I should have used a ruler or went a little slower, or perhaps softer with more passes.

The next step was folding and gluing. This was the most exciting step for me. The final result had imperfect gaps, but I finished it off by fine lining the other edges of the dice. This accomplished a more uniform look, as well as hiding a lot better any gaps where the tabs were glued, as well as corner gaps. I am quite pleased with the result.

Even though this was theoretically a very simple model, there was still a lot to be learned!
I found it here:
https://www.disneyexperience.com/activities/models/dice_model.php
Printed Out:
First, I cut out the pieces. There were only 2, with all straight cuts and not very many cuts. Therefore, this step was easy and did not take very long.
Next, I used fineliner markers to color the edges. I did not have an exact red, so I used the closest I had to the model red. This part took quite some time, as the edges are long, but it was quite relaxing. For non-tab edges, I used the fine tip end. I decided to use the wide tip end on the tabs since I expected more edge to be visible wherever there would be a gap after folding, and for some reason, little balls of fiber kept getting stuck on the tabs. As you can see, one of the tabs has extra markings - this is where I was trying to clean those extra fibers off, and afterwards it was not a problem anymore. In hindsight I should have just used a different piece of paper, but I wasn't very organized when I built this and the tab itself was the next best choice.
After the finelining, the next step was to score the fold lines. For this, I like to use a tool that has a metal tip with a tiny metal ball on the end. Not sure what it is called, but it scores the paper nicely without tearing (at least not on the first couple of passes). I have tried to use a craft knife before to score, but I find, at least for me, that it just causes more problems than it solves. Some of my score lines went off track a little bit, so I should have used a ruler or went a little slower, or perhaps softer with more passes.
The next step was folding and gluing. This was the most exciting step for me. The final result had imperfect gaps, but I finished it off by fine lining the other edges of the dice. This accomplished a more uniform look, as well as hiding a lot better any gaps where the tabs were glued, as well as corner gaps. I am quite pleased with the result.
Even though this was theoretically a very simple model, there was still a lot to be learned!


")
")