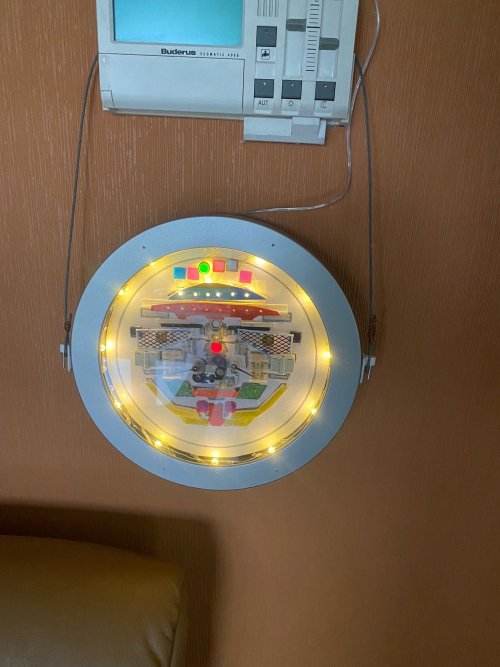
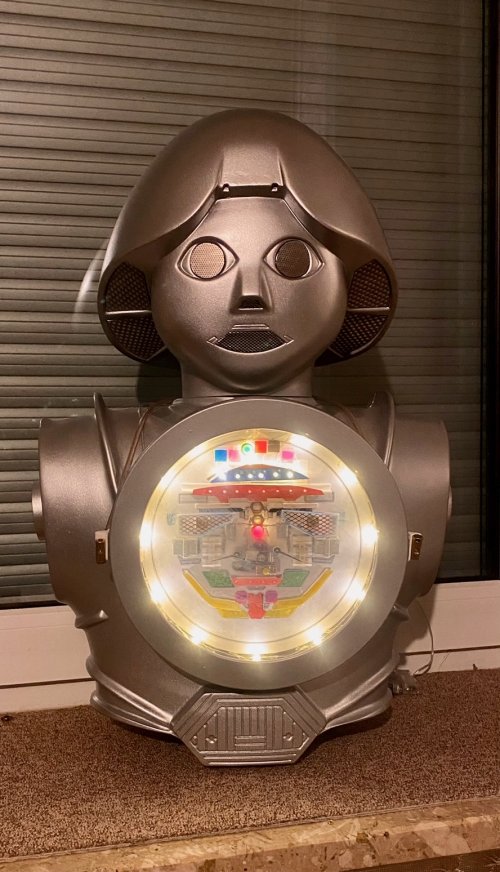
OK, but how do you attach the cellophane without visible glue spots or stains?For 1:1, my thought is to have PDF templates for use on tinted cellophane. Then the cut tinted cellophane parts are attached to the clear layers.
Dr Theopolis 1:1 scale from Buck Rogers
- Thread starter Revell-Fan
- Start date
You are using an out of date browser. It may not display this or other websites correctly.
You should upgrade or use an alternative browser.
You should upgrade or use an alternative browser.
Maybe using something like Testors window glue?
Truly, if I were to build this 1:1, I would use acrylic and laser cut it. Not exactly a home build.
Truly, if I were to build this 1:1, I would use acrylic and laser cut it. Not exactly a home build.
You might just get yourself a pack of Printable water-slide decal sheets...I use them and they are great...a little clear acrylic Laquer and away you go!The pictures are back!
One thing I did not like was that the prints on the clear sheet came out very pale. I'll need to redo them but I have no idea how to increase the saturation of the print. In addition, the clear sheet was not water-clear but had a blue tint to it, so printing two versions and laminating them together would affect the overall look and make the face blue and hazy. I need the colours to look as strong and vivid like they had been printed on regular paper but with transparency where the usual white "flesh" is. It would be easier to use acrylic card and paint the pattern on with transparent colours but I think there MUST be a way to directly print the pattern from a PDF to a transparent sheet. Does anybody have an idea how to achieve that?
OHHHH - that would be worth a try indeed. The decals should be transparent or semi-transparent from the start, so that might be an option. 
Well - after consulting the mighty river shop with the small "a" I may have found an applicable solution: transparent vinyl sticker foil. I may need to cut out the single elements and apply them separately but that shouldn't be a big probem as soon as they are printed with the desired saturation. They are a bit expensive but maybe I can find a cheap sample for testing. I think I'll talk to a professional copy shop first to ask for some tips. My local DIY shop has BIG sheets of acrylic for pretty cheap, so the project may be continued soon.I was thinking that you could print out the images using one of those vinyl cutters or a Crikit, using the vinyl as a mask, place on clear acrylic sheets and paint with transparent paint. When done, peel off the vinyl.
Jenny!!! What a pleasure to see you again. I almost thought you had fallen into a wormhole.…..and now….your greatest fangirl View attachment 206869View attachment 206870

I hope you are doing well. Theo looks great!
I'll be returning to mine shortly but I have been flooded with other projects which I could not postpone, e.g. a special version of the Power Sled and an interior for Martin's shuttle.
Take care and have fun!
Is there a pdf or higher res image available for Dr. Theopolis' face? The paper back drop version. I am doing a mix between 3d printing a shell and doing laser cut acrylic to make the face and some of the internals. I would like to use your paper back drop file if available.Hi fans!
This is gonna be something easy: Dr Theopolis from Buck Rogers. The pattern I'm making is supposed to fulfill two tasks at the same time: First, it will be rescaled to become an accessoire for my Lego-Twiki. Second, it is supposed to be turned into a life-size prop.
The original prop was very crude and simple and is an ideal candidate for another paper model.
Here are the first WIP pics of the different layers:
View attachment 185194
paper back drop
View attachment 185195
mouth and eyebrows
View attachment 185196
eyes
View attachment 185197
shell
The white circles mark the positions of the lights.
CU soon!
Bobby Brown
Is there a pdf or higher res image available for Dr. Theopolis' face? The paper back drop version. I am doing a mix between 3d printing a shell and doing laser cut acrylic to make the face and some of the internals. I would like to use your paper back drop file if available.
Bobby Brown
Of course.
I'd love to continue the build but in the meantime have fun with the graphics.
They are in about 1:1 scale, it is a bit tricky to determine that, but you can scale it up or down according to your needs. Please post a build thread on your progress, I'd love to see how it turns out!
Attachments
OMG how perfect. I will start to incorporate this into the CAD that i have and try to make a build guide as I go. I will use AI and an Arduino to make a home assistant Dr. Theo prop. If it works I will post the arduino sketch with my final build guide and build post thread. I am using the Dr. Theo CAD from Ian hughes to start but I might need to rework it . Whatever I come up with in as a final version will be free and open including my source files... not just .stl files so people can build, edit, or improve.Of course.
I'd love to continue the build but in the meantime have fun with the graphics.
They are in about 1:1 scale, it is a bit tricky to determine that, but you can scale it up or down according to your needs. Please post a build thread on your progress, I'd love to see how it turns out!
Bobby
Glad to be of help.OMG how perfect. I will start to incorporate this into the CAD that i have and try to make a build guide as I go. I will use AI and an Arduino to make a home assistant Dr. Theo prop. If it works I will post the arduino sketch with my final build guide and build post thread. I am using the Dr. Theo CAD from Ian hughes to start but I might need to rework it . Whatever I come up with in as a final version will be free and open including my source files... not just .stl files so people can build, edit, or improve.
Bobby


