"PaperLaul's Terminator 2: Hunter Killer Aerial - by DanBKing"
- Thread starter DanBKing
- Start date
You are using an out of date browser. It may not display this or other websites correctly.
You should upgrade or use an alternative browser.
You should upgrade or use an alternative browser.
- Status
- Not open for further replies.
A super result! As for the chrome finish, it is good to see that it survived the technique. I have read that some kinds of chrome finish (Alclad II) may turn dull or get rubbed off. This is gonna be a state-of-the-art model! 
Getting a good chrome effect with Alclad II, is more about the gloss black base coat, than anything else.
The better the gloss black, the better the chrome effect....
But. most importantly, it is all about having a super smooth base, before adding the gloss black............
Look back on the photos of the gloss black coated engines earlier in the thread......... As far as the camera is concerned, there is little difference ......
As said, the engines of the model were the test bed for the rest of the model. After many different approaches to achieving the desired effect, we think we have the correct formula.
We will see .............


Got in on this once more at last.
Well done Son :Congrats: You are indeed THE KING :King:
Well done Son :Congrats: You are indeed THE KING :King:
This is FANTASTIC!!!! I had to drag by force my wife in front of the monitor to show her my MOM award at Zealot, and all I obtained was a question: "Ask to your friends if they are married. And, if so, what their wives think about this..." :meh:
You have some of your family subscribed to the forum and cheering for you! :Congrats:
You're a lucky man Dan!
You have some of your family subscribed to the forum and cheering for you! :Congrats:
You're a lucky man Dan!
Thanks @Tonino
My mum joined back in May 2012, to follow the Discovery build. Now she follows everything.....! (With my dad looking over her shoulder)
My son is also a member here, but we unfortuantly dont don't see much of him.
So, now on this forum I have most of my real family, and you bunch of great people, as my extended family!!
I feel honoured! :happy:
Nosey Bugger!
After a lengthy production meeting, over a few beers, with my in-house airbrush expert, it was decided that it would be better to be able to spray the chrome coat into the nose recesses, without the spotlights fitted....... And, also it would prove difficult to get a good wash effect, with the limited access to the recesses, created by the spotlights.
As the spotlights are already primer and pre-coated, the lenses masked off with masking fluid and are ready for chroming, it was time to start on the nose section that houses them.
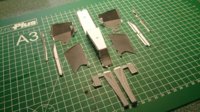
The starter parts for the nose are formed...
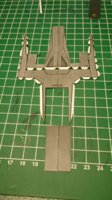
The second pic above of the under section of the nose, shows textured recessed areas..... So, guess what..... Time to make them 3D .....(It seems, and is probably true, I am building this model twice in one.....Ho-hum... :yawn
I have no idea what they are, whether they are technologically correct or not, but I added intake vents of sorts......
Because I am painting this model, I need as much surface detail as possible .........
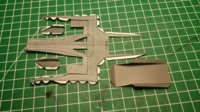

The side parts of the 'nose' are mirror images, so I put the two parts back to back and punched out a hole through both. This hole is for the mounting of the spotlights. As I want the spots to be adjustable, I need to make swivel mounts for them.
I then made a temporary 'jig' to hold everything lined up, and used a pen ink tube to mark the corresponding position of the holes on the side rails.
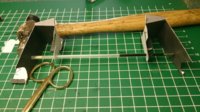
The nose section was then built up ...
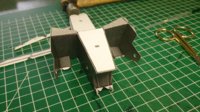
At this point, I thought the recesses looked a bit plain/flat/boring, so I made some 'greebles' to enhance things a bit ......
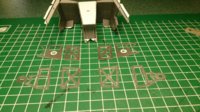
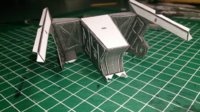
I even gave it a pimple on its nose .....
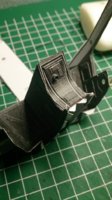
Will do my best to be back with more soon .......

After a lengthy production meeting, over a few beers, with my in-house airbrush expert, it was decided that it would be better to be able to spray the chrome coat into the nose recesses, without the spotlights fitted....... And, also it would prove difficult to get a good wash effect, with the limited access to the recesses, created by the spotlights.
As the spotlights are already primer and pre-coated, the lenses masked off with masking fluid and are ready for chroming, it was time to start on the nose section that houses them.
The starter parts for the nose are formed...


The second pic above of the under section of the nose, shows textured recessed areas..... So, guess what..... Time to make them 3D .....(It seems, and is probably true, I am building this model twice in one.....Ho-hum... :yawn
I have no idea what they are, whether they are technologically correct or not, but I added intake vents of sorts......
Because I am painting this model, I need as much surface detail as possible .........


The side parts of the 'nose' are mirror images, so I put the two parts back to back and punched out a hole through both. This hole is for the mounting of the spotlights. As I want the spots to be adjustable, I need to make swivel mounts for them.
I then made a temporary 'jig' to hold everything lined up, and used a pen ink tube to mark the corresponding position of the holes on the side rails.

The nose section was then built up ...

At this point, I thought the recesses looked a bit plain/flat/boring, so I made some 'greebles' to enhance things a bit ......


I even gave it a pimple on its nose .....

Will do my best to be back with more soon .......

"You've put on weight, your cheeks are fuller ......." ~ An Acquaintance 
Because of the disgusting weather we had here over the weekend, my external excursions were limited, therefore I had an hour or three on Sunday to get a little more done on the nose of the HK.
I fitted the pre made part with the air scoops underneath the nose.
My plan for the swivel mounts of the spot lights, seems to be workable.
The two mountings on the 'nose' section are made from a 5mm length of (empty :smuggrin ball point pen ink tube. The outer diameter of the ink tube fits perfectly into the paper tube of the swivel part on the spot light, and the inner diameter provides enough clearance for the twisted pair of wires that power the LED's. The inside of the nose was reinforced around the ink tube with a punched ring of thick card, to give structural strength.
On the 'cheeks,' I used a small dowel, reinforced the same way. There are no wires to run here ...
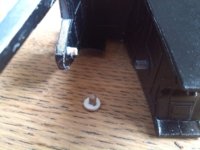
In the pic, things look out of alignment, but that will all come good once the roof is in place, and everything is pulled together into its correct positioning....
Next, I formed and glued the upper/side rail sections on both sides...
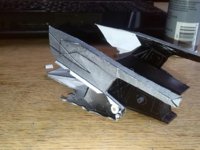
Followed closely by the 'cheeks'
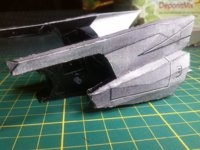
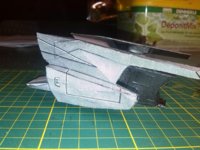
Now for the 'roof'....... I made up the basic roof structure and cut out all the panels, again from 250gsm card and stuck them on. Some were left for later, when the rear section of the 'roof' is attached........ A lot of the greebling and panel work will be left for later and done once the assembly of the fuselage is complete.
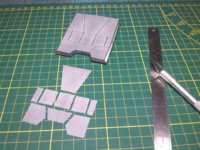
I made the rear section of the 'roof' ready for later. The dished-in section was made up and fitted.
I find when folding tabs over a long run, it is better to leave plenty of card over. The extra card helps keep things firm when you fold the tab, therefore creating a cleaner and straighter fold line, especially the types of tabs that have a long shallow angle, or are very thin. Folding them before cutting to size, makes life a whole lot more linear....... (Now, where have I heard that expression used many times ..... The Discovery and Linearity )
)
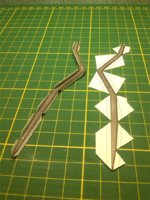
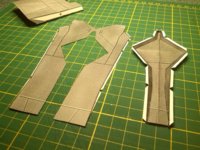
I also made up some greebles for the underside of the front 'roof', but I found I did not plan it very well. I had to remove sections of the greebles from the back, as the extra thickness of the greebles interfered with the height of the 'roof' and the associated side rails that the roof glues to. So I carefully trimmed them off, as you can see in the photo.......
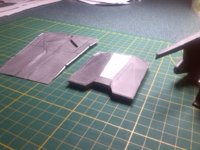
Next up is to attach the front roof to the nose section, clean things up, sand/smooth where necessary, primer and pre-coat the assembly, mask off things and get the spot light recesses on the nose, as well as the spotlights, chromed and weathered, so that I can fit the spotlights and continue with assembly .........
That depends on if life gives me a break .......(And if my airbrush expert is not too busy!)
See you all soon ..... I hope ...

Because of the disgusting weather we had here over the weekend, my external excursions were limited, therefore I had an hour or three on Sunday to get a little more done on the nose of the HK.
I fitted the pre made part with the air scoops underneath the nose.
My plan for the swivel mounts of the spot lights, seems to be workable.
The two mountings on the 'nose' section are made from a 5mm length of (empty :smuggrin
On the 'cheeks,' I used a small dowel, reinforced the same way. There are no wires to run here ...
In the pic, things look out of alignment, but that will all come good once the roof is in place, and everything is pulled together into its correct positioning....

Next, I formed and glued the upper/side rail sections on both sides...

Followed closely by the 'cheeks'


Now for the 'roof'....... I made up the basic roof structure and cut out all the panels, again from 250gsm card and stuck them on. Some were left for later, when the rear section of the 'roof' is attached........ A lot of the greebling and panel work will be left for later and done once the assembly of the fuselage is complete.

I made the rear section of the 'roof' ready for later. The dished-in section was made up and fitted.
I find when folding tabs over a long run, it is better to leave plenty of card over. The extra card helps keep things firm when you fold the tab, therefore creating a cleaner and straighter fold line, especially the types of tabs that have a long shallow angle, or are very thin. Folding them before cutting to size, makes life a whole lot more linear....... (Now, where have I heard that expression used many times ..... The Discovery and Linearity
 )
)

I also made up some greebles for the underside of the front 'roof', but I found I did not plan it very well. I had to remove sections of the greebles from the back, as the extra thickness of the greebles interfered with the height of the 'roof' and the associated side rails that the roof glues to. So I carefully trimmed them off, as you can see in the photo.......

Next up is to attach the front roof to the nose section, clean things up, sand/smooth where necessary, primer and pre-coat the assembly, mask off things and get the spot light recesses on the nose, as well as the spotlights, chromed and weathered, so that I can fit the spotlights and continue with assembly .........
That depends on if life gives me a break .......(And if my airbrush expert is not too busy!)
See you all soon ..... I hope ...

Last edited:
- Status
- Not open for further replies.


