U.S.S. Stargazer

bgt01

Exemplary Confidant
Jan 26, 2012
576
843
93
Ohio
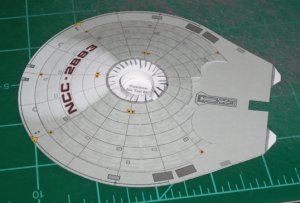
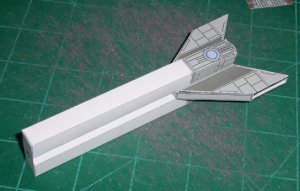
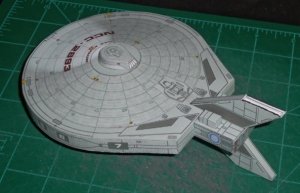
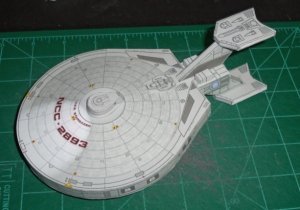
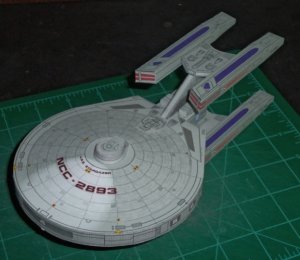
My latest addition to the fleet is Martin Sanger's version of the Constellation Class U.S.S. Stargazer. This is a really nice model and very easy to assemble. I printed my model at 130% so she would be in scale with my Rawen models (those models I built at 90% scale so they would fit on 8.5x11 paper).

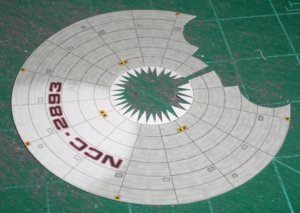
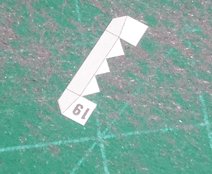
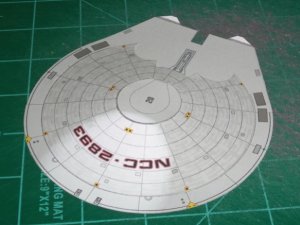
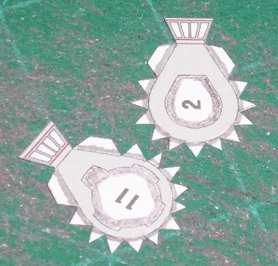
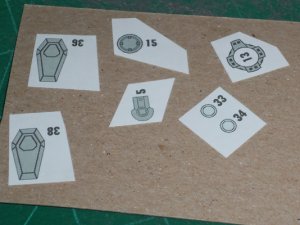
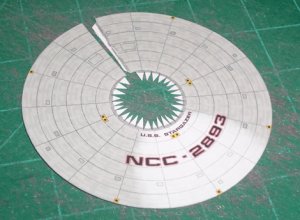
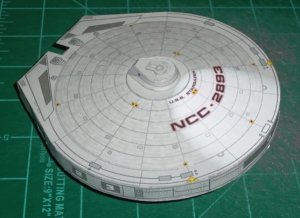
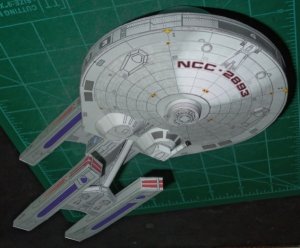
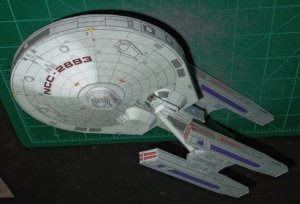
I erased Martin's registry numbers and recreated them in Illustrator using a more correct Starfleet font so they would look sharp when I scaled up the model. I also added numbers to the shuttlebay doors to match the filming model.

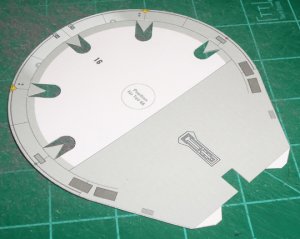
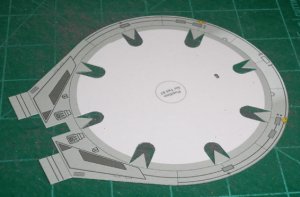
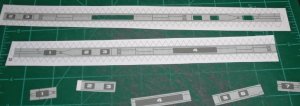
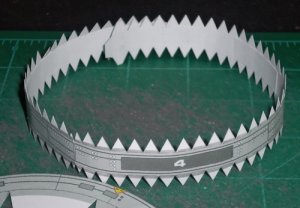
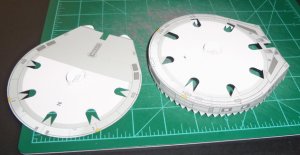
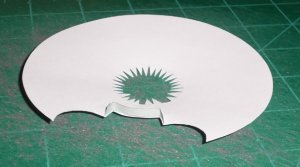
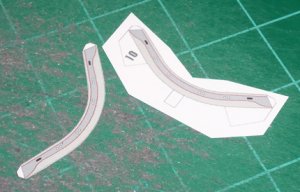
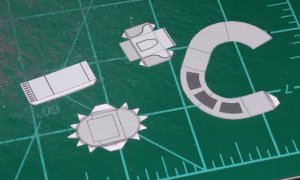
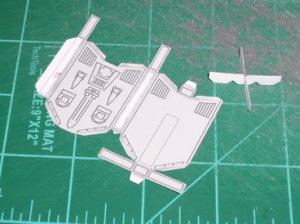
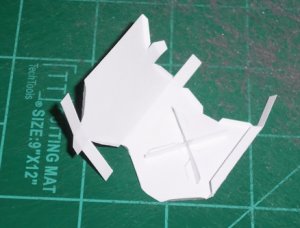
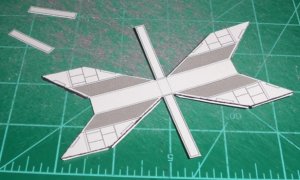
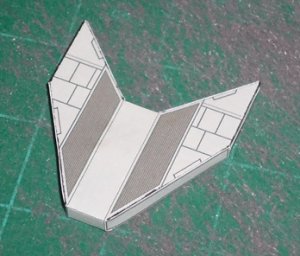
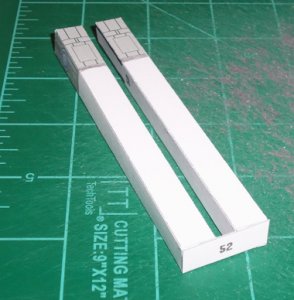
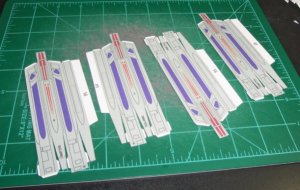
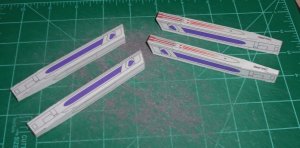
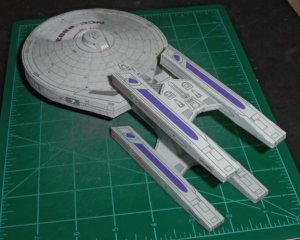
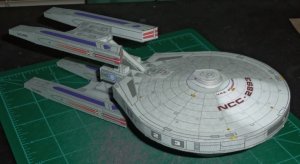
This model is your basic score, cut, fold and glue project. As usual, I removed some tabs (bases of certain parts) and kept the rest, edge coloring with Sharpies where needed. At the size I printed it, I couldn't get the saucer edge in one piece, so I printed multiple pieces and spliced them together. To give it a little depth I cut out the shuttlebay doors and glued new ones on the back.
 

Attachments

  • 001.JPG
    001.JPG
    175.3 KB · Views: 7
  • 002.JPG
    002.JPG
    166.3 KB · Views: 6
  • 003.jpg
    003.jpg
    82 KB · Views: 7
  • 004.JPG
    004.JPG
    152.1 KB · Views: 54
  • 005.JPG
    005.JPG
    166.3 KB · Views: 6

bgt01

Exemplary Confidant
Jan 26, 2012
576
843
93
Ohio
I built the bottom of the saucer next. I cut extra tabs at the base to give the lower cap more area to glue to. Then glued in the back piece and strengthen, then finished up.

Upper and lower bridges assemble the same. I glued some of the bridge and lower saucer pieces to 1mm chipboard for depth. The two housings on the lower hull also assemble the same, except one gets a barrel. I painted the end of a toothpick red and glued it in the barrel for strength and make it look like an actual part.
 

Attachments

  • 006.jpg
    006.jpg
    94.4 KB · Views: 5
  • 007.JPG
    007.JPG
    58.9 KB · Views: 54
  • 008.JPG
    008.JPG
    146.4 KB · Views: 5
  • 009.JPG
    009.JPG
    168.6 KB · Views: 5
  • 010.jpg
    010.jpg
    81.1 KB · Views: 6
  • 011.JPG
    011.JPG
    107 KB · Views: 53
  • 012.JPG
    012.JPG
    128.4 KB · Views: 53
  • 013.JPG
    013.JPG
    158.3 KB · Views: 6
  • 014.JPG
    014.JPG
    51.4 KB · Views: 53
  • 015.JPG
    015.JPG
    63.8 KB · Views: 54

bgt01

Exemplary Confidant
Jan 26, 2012
576
843
93
Ohio
Added the accent pieces and the bottom is done.

Top of the saucer is easy. Glued a tab under the back edge to reduce the seam, cut extra tabs where the upper cap goes, added the strengthener, glue it all together.
 

Attachments

  • 016.JPG
    016.JPG
    188.6 KB · Views: 6
  • 017.jpg
    017.jpg
    95.9 KB · Views: 5
  • 018.JPG
    018.JPG
    159.2 KB · Views: 57
  • 019.jpg
    019.jpg
    76.6 KB · Views: 5

bgt01

Exemplary Confidant
Jan 26, 2012
576
843
93
Ohio
The engine pylon area comes with "X" style strengtheners for the pylon parts. You don't need to use them, but I did anyway. Just assemble as shown, but pay attention to parts 50 and 51. They do get turned a certain way, and there are little square areas that show where two accent pieces go, You can see them in the picture.

Warp engines are simple score, cut, fold and glue.
 

Attachments

  • 020.JPG
    020.JPG
    116.8 KB · Views: 55
  • 021.JPG
    021.JPG
    128.2 KB · Views: 54
  • 022.jpg
    022.jpg
    88.9 KB · Views: 5
  • 023.JPG
    023.JPG
    120.3 KB · Views: 53
  • 024.JPG
    024.JPG
    146.6 KB · Views: 54
  • 025.JPG
    025.JPG
    178.5 KB · Views: 6
  • 026.jpg
    026.jpg
    97.9 KB · Views: 8
  • 027.jpg
    027.jpg
    93.4 KB · Views: 7

bgt01

Exemplary Confidant
Jan 26, 2012
576
843
93
Ohio
Final assembly and you are ready it initiate the Picard Manuever - Warp Factor 9! Engage!
 

Attachments

  • 028.jpg
    028.jpg
    77.2 KB · Views: 7
  • 029.jpg
    029.jpg
    87.2 KB · Views: 8
  • 030.jpg
    030.jpg
    86.3 KB · Views: 7
  • 031.jpg
    031.jpg
    92.1 KB · Views: 8
  • 032.jpg
    032.jpg
    94 KB · Views: 8
  • 033.jpg
    033.jpg
    105.6 KB · Views: 7
  • 034.jpg
    034.jpg
    106 KB · Views: 7

Rhaven Blaack

!!!THE MAN BEHIND THE CURTAIN!!!
Staff member
Administrator
Moderator
Jun 12, 2009
12,522
9,898
228
Oregon
www.deviantart.com
Your building skills are getting better and better with each model that you make.
You did a GREAT JOB on this model. All of the lines are clean and crisp.
I like how you recessed the hanger bay doors. It looks like you are on your way to start practicing some more greebling.


KEEP UP THE GREAT WORK!!!