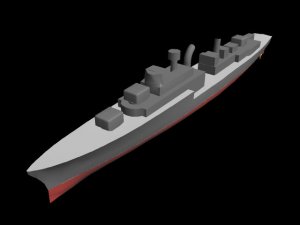
The Daring Project

jaffro

Long term member
Jun 18, 2007
386
1
16
53
Melbourne, Australia
The title to this thread is appropriate for 2 reasons...

1. I am going to build a Daring Class destroyer.

2. I am going to dare to scratchbuild it in paper/card with no prior experience in design, 3D software or scratchbuilding in general.

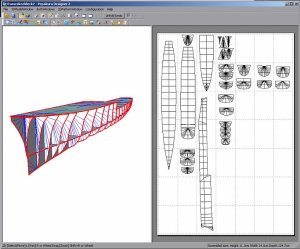
I have a great set of plans thanks to some kind individuals, and thanks to forum member "barry" of USS Tarawa fame, I now have a full hull complete with formers and side plating on which to base the whole project and give me the kickstart i needed.

Huge thanks to Barry for his time and effort on this one, I couldn't have done anywhere near the kind of job he did for me, no matter how hard I tried.

To be honest I'm really not sure how I'm going to tackle a lot of this build, and I'm still in need of a few more decent reference pictures but I'm slowly making progress there. I want it to be mainly cardstock wherever possible, but I'm not going to be a purist. If I can achieve the level of detail I am looking for without using paper, then so be it, but at the same time I want to use as much paper and card as possible. I will also be clinging to weak excuses like "paper is made from tree pulp so therefore lots of wood is ok" wherever possible... I don't feel I have the skill to design and print the parts I'm going to need digitally... this will be oldschool pencil and paper type stuff, with the "texture" and other colourings most likely being applied later with an airbrush and (hopefully) home made paper decals/signs etc.

Anyhoo enough of the waffling and on to the subject... the Daring Class Destroyer.

I will be building the H.M.A.S. VENDETTA, one of the Australian built Darings, not to be confused with the older British Darings, and also not to be confused with the new British Daring class which I believe has yet to be launched/built.

This is so far the best picture I can find of the Vendetta in the configuration I will be modeling her in.
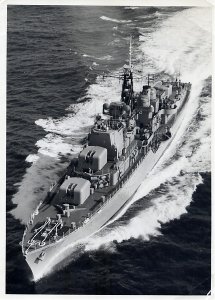
Email0032.jpg

I will be building her in her 1950's-60's configuration, prior to a major refit she underwent in the late 60's. This is the time my partner Joanne's father served on her, this model will be a birthday present for him.... or Christmas if it's not done in about 5 months. :D

VENDETTA was the first and only RAN Daring Class destroyer to go to war. She also made Australian naval history by becoming the first Australian built ship to serve in a combat zone. (Vietnam).

She was the sister ship of a perhaps more famous Daring class, the Voyager, which was sliced in half and sunk by the Australian Aircraft Carrier H.M.A.S Melbourne during a training exercise in 1964.

You can find a lot more info on the Vendetta here: HMAS VENDETTA (II) - HMA Ship Histories (Sea Power Centre - Australia)

Here is an idea of the detail and result i want to try to acheive on this build but this is the Vendetta after the refit, the version I'm modeling here will look more like (or should that be "exactly like") the picture above.
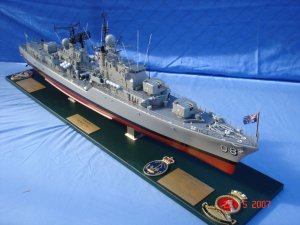
daring172.jpg

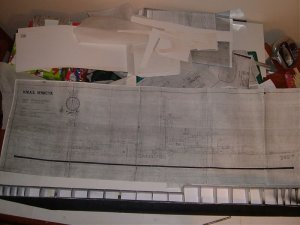
As I mentioned earlier, I have a great set of plans, thanks to the kind and generous help I received from some members of a couple of veterans associations Jo and I contacted while looking for some reference pics etc. The plans are fully detailed and printed out at the same scale I'm building (1:96). I'm hoping that between these and some decent pictures I can scratchbuild this entire ship and achieve a very high level of detail. I'm not entirely sure how to do it, I just feeling quite confident that I can. :p
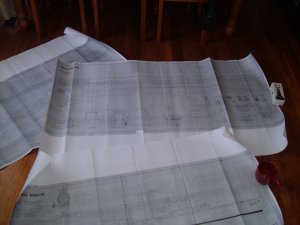
plans.jpg

I haven't quite got all the pics I need but as a last resort, I'm hoping to make it up to Sydney some time soon where the last remaining Australian Daring class, the Vampire, is moored in Darling Harbour at the Maritime Museum. Funnily enough, at the time I was writing this paragraph I received an email from a guy I've been trying to contact regarding some detailed reference shots and a few more leads to follow up... things are starting to look good there now.

So... on with the actual buildy bits... :D
 

jaffro

Long term member
Jun 18, 2007
386
1
16
53
Melbourne, Australia
I've only attempted one ship before this, it was a bit of a disaster but it gave me a start, and after staring for hours on end in wonder at some of the ship hull builds both here and on some of the german/polish card model forums I was very eager to get my hands on barry's efforts and start laminating and cutting.

PDO.jpg

Note those meaurements in the bottom right corner... this puppy is going to be about 125cm when she's done. :D

The frames and keel took up about 24 pages (A4). The keel itself and the flat bit in the middle (waterline deck?) were 5 pages each, I printed it out onto 250gsm card then laminated it onto heavy posterboard resulting in a thickness of about 1.2mm. I laminated the keel twice, leaving it at a thickness of about 2mm.

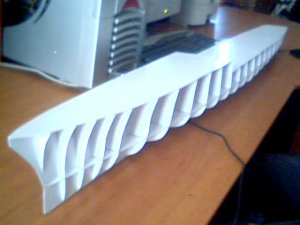
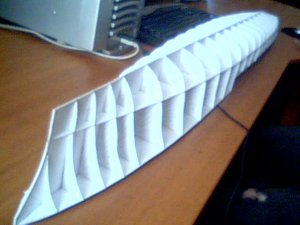
So far I have cut and glued all the bulkheads and decks and I have to say I'm pretty impressed with the fit, it's not going to need a lot of cleaning up to get it all lined up properly... just a bit of sanding here and there.

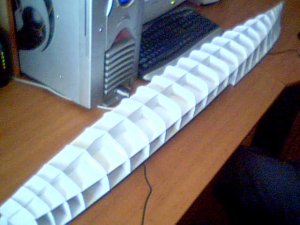
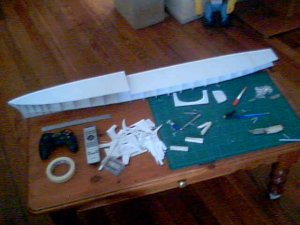
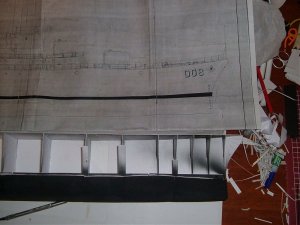
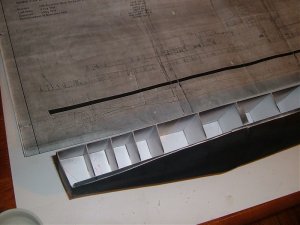
Unfortunately due to the loss of my phone I am now (still) without a decent camera, but not wanting to start a build thread without some build pictures, I managed to talk Joanne's webcam into spitting these out:

2008-01-28-47478.jpg

2008-01-28-47512.jpg

2008-01-28-47715.jpg

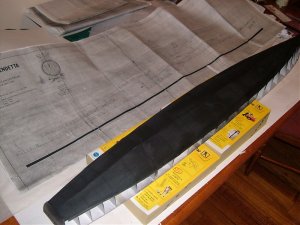
This next pic is an attempt to show of the length of the beast... 125cm in total... she won't get much longer than this, but there's a fair bit of added height on the way :D

2008-01-28-48317.jpg


Now I'm kindof at a standstill until I can get a new can of spray glue to laminate the hull plating, then I'll be moving on to my first attempt at scratch built propeller shafts, props, rudders, and assorted other underwater bits... oh and a stand, so I can stop worrying about it being knocked off tables by wayward cats (of which we have 5).
 

Lex

Dollmaker
Dec 1, 2006
645
1
36
Oxford, UK
Conguratulations on completing the hull Jaffro! (well, save for the skins) I wonder if the skin is to be scratchbuilt or designed by CAD?
 

jaffro

Long term member
Jun 18, 2007
386
1
16
53
Melbourne, Australia
The hull skin has also been designed by barry in a seperate PDO, I've printed it all out, 18 pages, I've run out of spray glue for now so I can't laminate the skins yet.

Once the hull is skinned i'll scratchbuild all the props, rudders and shafts etc, after that I'm on my own with no idea what to tackle first... but I think that's half the fun of it. :D
 

RogerP

New Member
Aug 13, 2006
26
0
6
Bendigo, Victoria, Australia.
Greetings 'Jaffro' from up the Calder,

I congratulate you on tackling what, for me will be an interesting project. While my main interest is Allied Coastal Forces, this is followed by the RAN so I'll be following your progress quite closely and I wish you well with the project.

I'm wondering, are you considering making this model available commercially? I would definately be interested. I have resin kits (350 & 700 scales) of Vampire and Vendetta, so I would do the card model in 144th to match the WW2 stuff I'm starting. See the "Coastal Forces in Paper" posts.

If you care to, would you please give me a call on 5447 8693? or if you prefer send an e-mail to

debrogerp@hotmail.com

Roger Pearson,
Bendigo.
 

jaffro

Long term member
Jun 18, 2007
386
1
16
53
Melbourne, Australia
Thanks for the comments guys...

Roger, as much as I would love to release this as a kit for others to build, I somehow doubt at this point that I will be able to do so. I'm going to be designing and building parts the old fashioned way, using the plans and pencil and paper, probably borrowing a few of Paragon's techniques along the way, so unless I keep track (and copies) of what I do as I go, I can't see it happening, sorry... but seeing as there is now some interest, I will indeed try.

Another idea I had, due to my inability to do my own 3D design etc, was to try and "farm out" the design of the whole ship, part by part, to anyone who wanted to have a go at it. For example, barry was kind enough to design the hull for me... I could try to find willing helpers to each do a little part here and there for the ship so I could throw it all together as the parts come in. The only thing stopping me from taking that route right now is that I feel like I'd be cheating. I think I can do this without 3D software, so I aim to at least try.

Still no spray glue to be had at my local supplier... shouldn't be long now before I can start skinning.
 

barry

Active Member
Jan 28, 2004
1,557
1
36
86
Brighton Uk
Well that's a beautiful job you did on the hull mate I'm impressed! Are you sure 250 gsm is not strong enough for the hull sides and keel. Not to teach granny to suck eggs but I assume you will sand a sharp edge to the bow.

As your plans are in 1/96th using a scanner would allow you to keep copies and save a lot of hard work just draw over the plan lines and play with one of the cheap (free) paint shop programs.

If you succeed with the plating I may even think of releasing a couple of ships.

I shall watch this one with great interest.

You could actually design most of the superstructure in Metasequoia just using the primatives it's pretty angular anyway.

ps ignore my email if you laminate the sides and keel

barry
 

jaffro

Long term member
Jun 18, 2007
386
1
16
53
Melbourne, Australia
Hi barry and thanks again!

You're right, 250gsm (it's actually 220 I just noticed) would probably be enough, but I just seem to like working with the thicker stuff, not to mention, I ran out of the 220gsm matte card halfway through printing the skins. So I decided to print the hull sides on the card and the keel skins/lower hul onto 80gsm paper. Both will then be laminated onto (i think) 450gsm posterboard or something of the sort... it's semi gloss on one side and matte on the other, I usually glue to the matte side. Not sure what thickness it'll give me but it is flexible enough to shape around the formers without too much hassle and at the same time it's thick enough to stand up to any mistakes i make while sanding it before painting. :D

Got spray glue today so the shipyard is back in action again. :thumb:
 

Lex

Dollmaker
Dec 1, 2006
645
1
36
Oxford, UK
Eager to see progress... And yea, I suppose it doesn't take long to learn to 3D model superstructures, it's worth the effort ^^ Go Jaffro!
 

barry

Active Member
Jan 28, 2004
1,557
1
36
86
Brighton Uk
Just a thought leave a good overlap vertically on the keel plates I did not allow for that much thickness of card..............just check with the first couple please

regards

barry
 

jaffro

Long term member
Jun 18, 2007
386
1
16
53
Melbourne, Australia
barry, I'm not sure I understand what you mean... but if I do, I will be allowing for the thickness of the card when cutting, I plan to cut a good 1-2mm outside the lines on the top and bottom of each plate then trim them back if I need to... I'll post again later today to show how it's going.

I just noticed the work I've done so far has warped along the spine from a dodgy angle it sat on overnight after being moved by "someone" :(

I'm hoping the skin will pull it all back into line though, shouldn't be a major issue. Anyhoo, I just got some free time to spend on it so I best not waste it at the keyboard... :D
 

jaffro

Long term member
Jun 18, 2007
386
1
16
53
Melbourne, Australia
Seeing as I'm doing my first scratchbuild, it's a bit annoying that I don't have a decent camera to document the progress... so I've borrowed one off a friend, hopefully they won't want it back in a hurry so I can get pics of as much of my trial and error as possible. :D

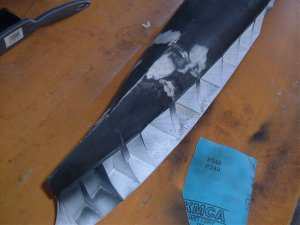
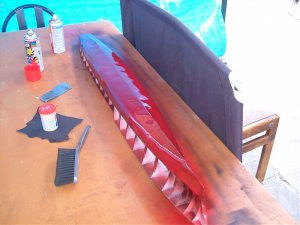
The hull is now skinned below the waterline, I didn't have too many hassles here, I cut everything oversize and trimmed it back, the only real mistake I made here was at the stern, it wasn't quite wide enough, but seeing as I'm filling, sanding and painting, I'm not really concerned about that yet.

In usual impatient fashion I have jumped ahead a bit to start painting the below-waterline section, before I've even built it all. Tonight i'll be making my props, rudders and bilge keels but today I'm going to see how my idea for how to paint it turns out.

You know how some products suggest you "try it out on a small sample area first"? well how many of you actually do it? I'm using "the whole boat" as my sample. :D

Before I waffle on too much, here's a couple of pics...

hull1.jpg

hull2.jpg


I used a bit of wood putty to fill some gaps but there weren't as many bad areas as I expected to get, there was a big mistake made in the middle of the hull on one side, as you can see above.

Why black I hear you ask? Black is the new white!!! 90% of my clothes are black so it seemed appropriate... it's my favourite colour. :p

Also, I got a good deal on some cheap red spray cans, not quite the red I wanted but I'm on a tight budget here so I'm hoping the black base will help darken the red I add later on. If not I'll try to find the red I do want and give it a final couple of coats later if it needs it.

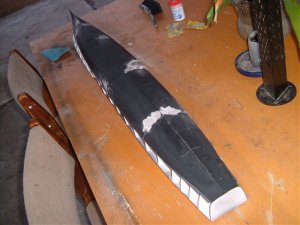
hull3.jpg

hull4.jpg


It's now fairly smooth and fairly black, I'll hit it with a few coats of red today and see how that looks.

hull5.jpg

hull6.jpg
 

jaffro

Long term member
Jun 18, 2007
386
1
16
53
Melbourne, Australia
Thanks barry, I'm pretty happy with it so far.

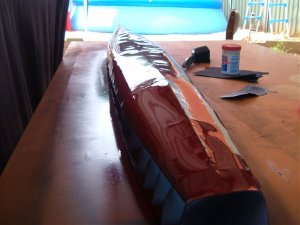
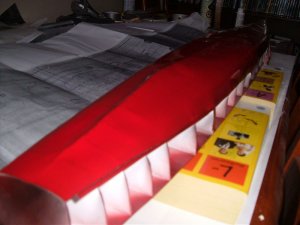
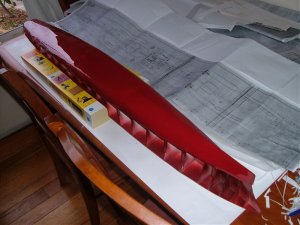
There's nothing like a coat of gloss to show you all the bumps and ripples though :D These first two shots were taken after the first coat of red. Before this there were about 3 coats of matt black, each coat was sanded back with 240 grit wet and dry sandpaper (dry for obvious reasons :p). The black paint also came in handy when sanding back the filler putty I used which was a neutral white colour.


hull7.jpg

hull8.jpg


As you can see I'm working outside... if it was winter I'd possibly get away with doing this inside, but wouldn't hear the end of it until the following winter. :D

Here she is after the second and third coats were applied, both at the same time to save coming back out later.

hull9.jpg

hull10.jpg

Next up it's back outside for some more sanding and prep before the final coat, but first I need to make some props and rudders etc.
 

jaffro

Long term member
Jun 18, 2007
386
1
16
53
Melbourne, Australia
Thanks Lex,

I have noticed a small problem today while sizing up my props... the whole thing is just a bit too long. I was assuming it was the same size as my printed plans and didn't check up until now, and it appears to be about 3 or 4cm too long.

I could cut the stern shorter, but then the stern keel would be in the wrong spot... I have no intention of cutting the bow shorter, that would be way too much of a mess. The only real option would be to cut a section out of the middle and rejoin it together.

The chances of me pulling that off without totally stuffing things up are pretty slim, so I've decided to go with the "i'll just throw it all together and hope nobody notices" method that has served me very well in the past. :D


That's all for now... I just thought I'd share that with you. :p
 

jaffro

Long term member
Jun 18, 2007
386
1
16
53
Melbourne, Australia
Thanks barry, got the email. :thumb:

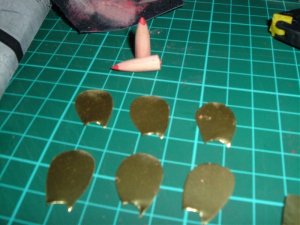
just a quick pic of the start I've made on the props... paper purists might want to shield your eyes about now, I used brass sheet. :eek:

The blades came out fine, I drew the shape by eye then traced around it 6 times on some brass sheet I picked up from a hobby shop. As for the "bullet" shaped bits, I'm not having a good time trying to get my brass into this shape at this scale. I decided to sand the end of a pencil into the shape I needed then wrap the brass around it in some way... this idea didn't give me the desired results either, I really want that part to have as few seams as possible. I've tried resizing a few of the props from other ship kits but it's just not working for me.

That's why there's now 2 bullet shaped pencil ends in the pic, cos I found an "easy way out" now I just need some gold paint. :D

props1.jpg

I just hope my props come out a decent size and shape after shaping and gluing, because i really didn't have a good view of them on the plans. If the plans are trying to show me... I can't see it.
 

jaffro

Long term member
Jun 18, 2007
386
1
16
53
Melbourne, Australia
The props are on hold until I can find some gold paint or something to paint my pencil bullet thingies.

In the mean time, I should really be designing the superstructures etc but I really had no idea where to start.

Once again, I am very pleased to say that barry has come to the rescue, offering to continue on with some more structure, so he too can build a Daring of his own.

I can not even begin to say how gracious and lucky I am to have barry's help on this, the more I looked at the plans, the more I realised just what I was trying to do here. I've always been fairly confident of scratchbuilding small stuff like extra details, and all the various "clutter" that will be scattered around the decks, but now that I see just what barry is going through trying to turn the plans into a 3D model, the more I realise how unprepared I was.

Seriously Barry, I can't thank you enough!!

So, while barry wrestles with the model, and I chase down as much reference material as I can get my hands on (you really never can have too much of that) here's a pic of where it's up to now.

Actually it's a bit further than this, but more on that later. :D

daringbasics.jpg