Raketoplán (Space shuttle) Endeavour STS-49 / ABC 1:100 / L. Badalec
- Thread starter wedge
- Start date
You are using an out of date browser. It may not display this or other websites correctly.
You should upgrade or use an alternative browser.
You should upgrade or use an alternative browser.
The progress that you are making and the level of detail and greebling that you are putting into this project is AMAZING!
You are the masters of supporting ☝️
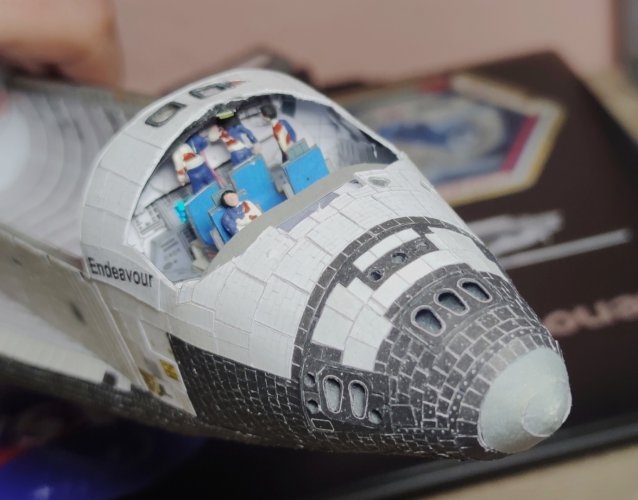
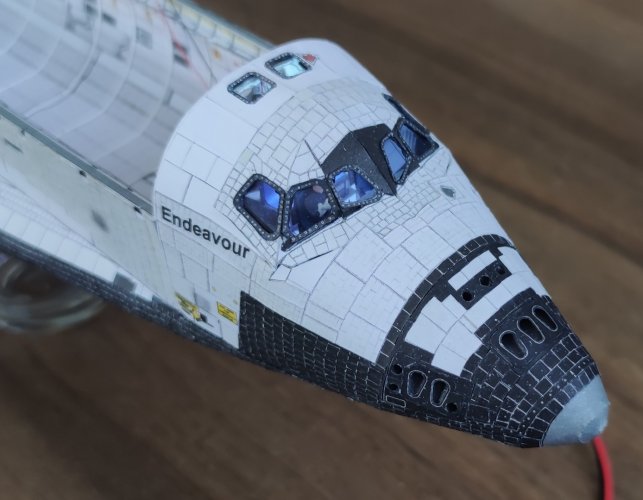
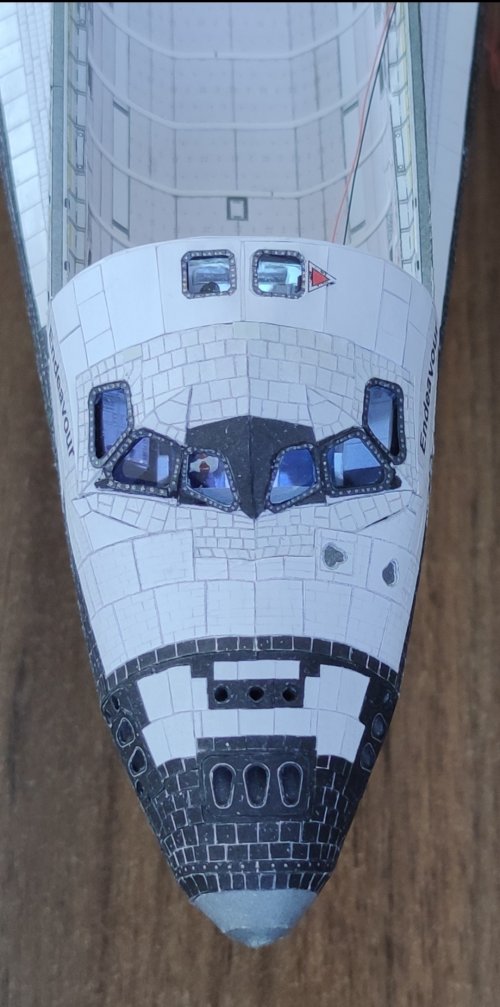
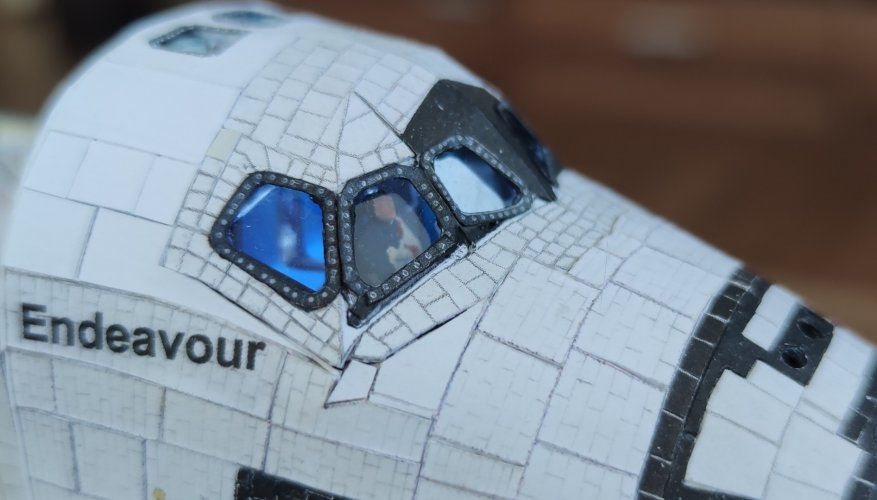
I was not really very happy with windows transparency so I decided to take a risk and cut off the cabin and change the windows tables. There were some scratches and some glue visible from the inner side. hopefully it was not a mistake. We will see tomorrow.
Meanwhile I will also make the upper windows a little bit wider (and maybe change them beck to the normal size afterwards ) and I will try to fill the rest of the gaps where the interior lights is visible
The good thing is, that I can check if the crew is doing their job ☝️
Attachments
Last edited:
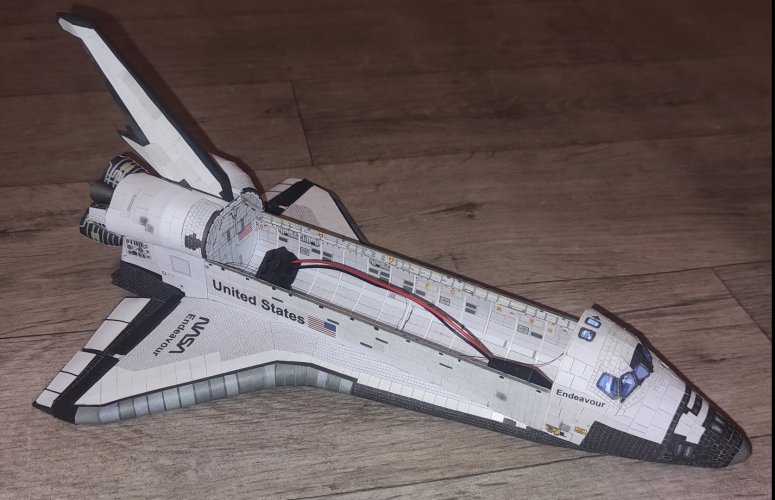
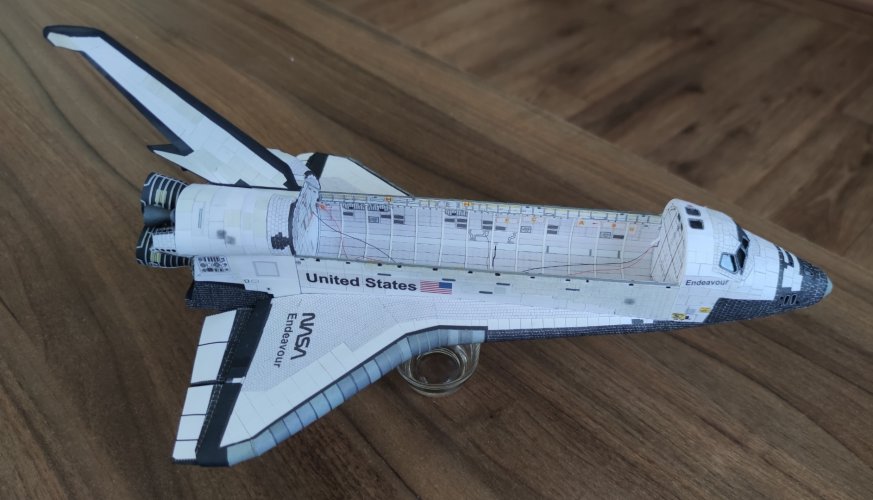
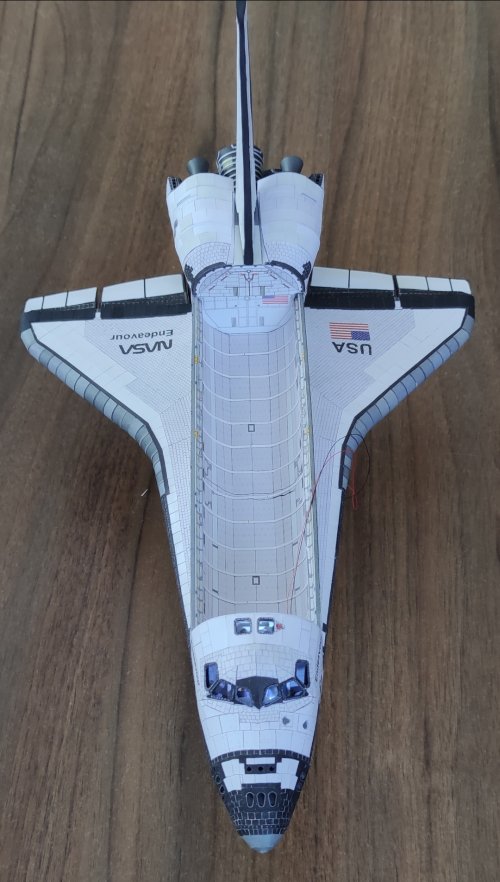
Because I am still taking pictures during the night using the artificial light, I was never happy with the quality and the proper colours.
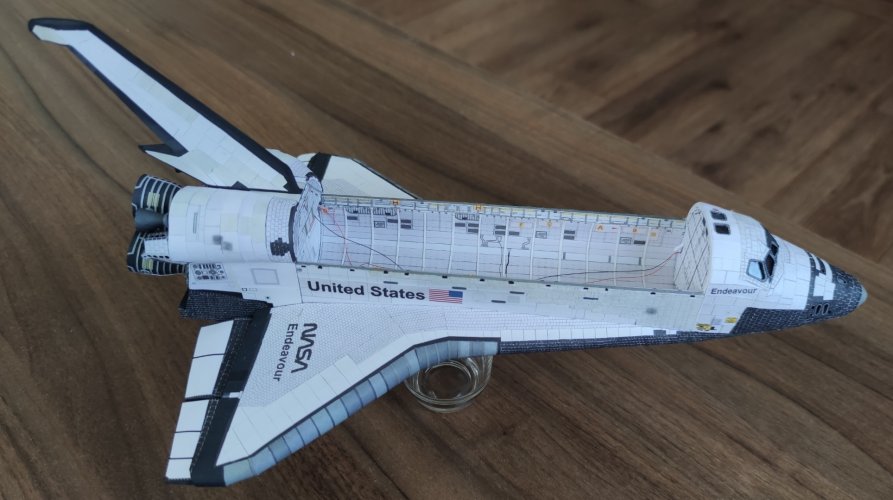
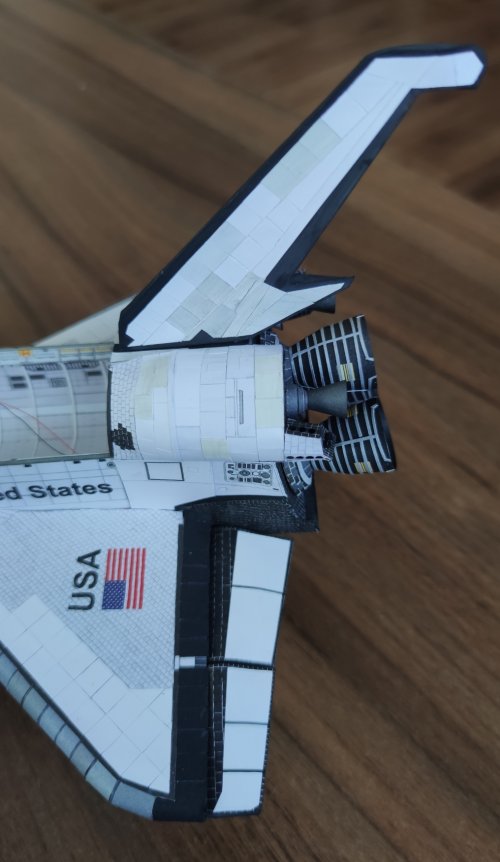
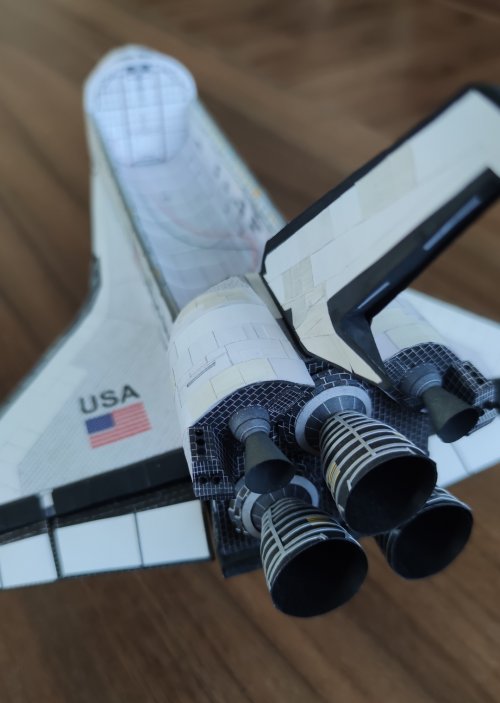
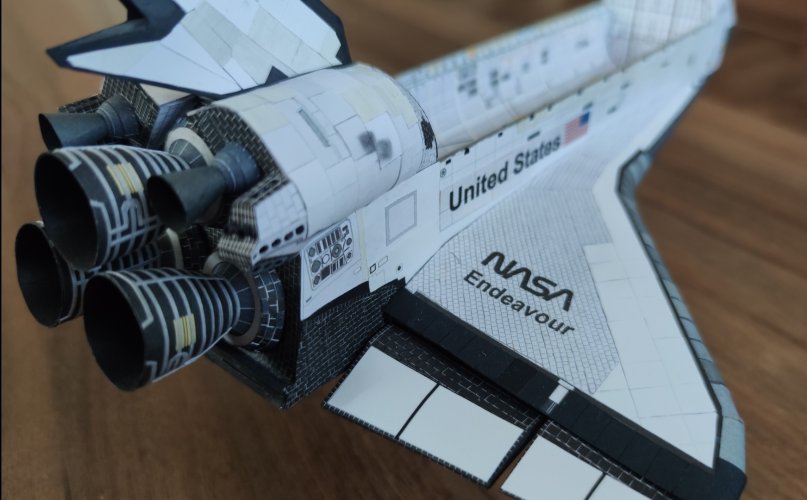
I decided to take a shuttle for a walk to the living room during the daylight and show you the current look of this model.
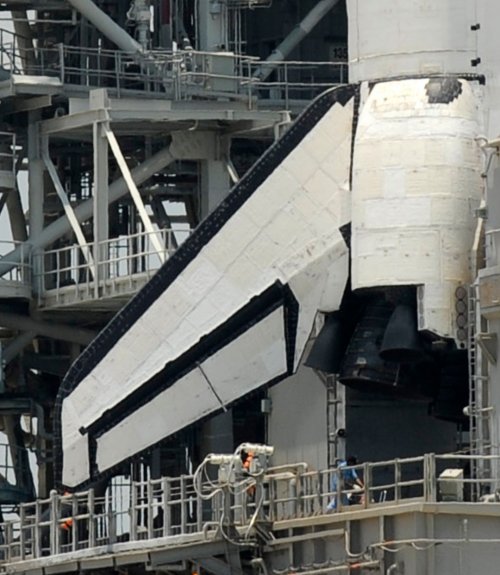
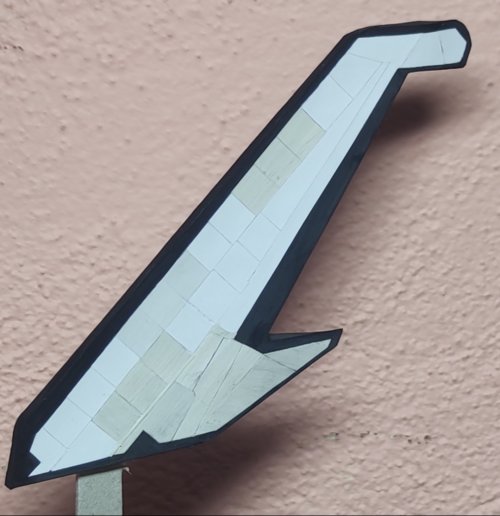
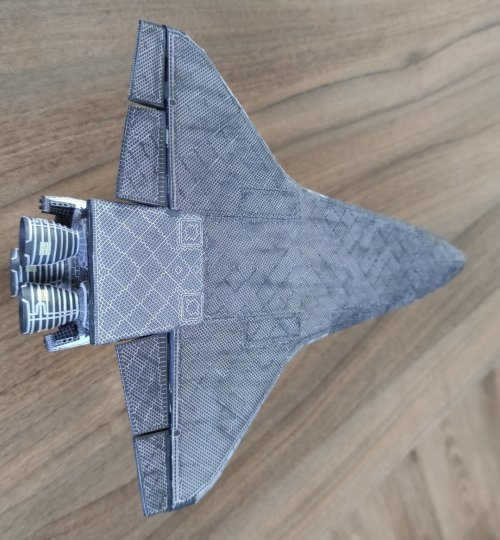
On the orbiter itself, I still need to finish the rear part of the belly, the vertical stabilizer and I will make hopefully better nose cone. Then it will be mostly scratch building the cargo bay, satellite and all the stuff that was in the cargo bay during STS-49.
The last part will be the stand and the whole display.
P. S. Zathros - the LED is already inside")
I decided to take a shuttle for a walk to the living room during the daylight and show you the current look of this model.
On the orbiter itself, I still need to finish the rear part of the belly, the vertical stabilizer and I will make hopefully better nose cone. Then it will be mostly scratch building the cargo bay, satellite and all the stuff that was in the cargo bay during STS-49.
The last part will be the stand and the whole display.
P. S. Zathros - the LED is already inside
Attachments
-
 IMG_20231229_121614.jpg634.3 KB · Views: 7
 -
 IMG_20231229_121659.jpg703.8 KB · Views: 7
 -
 IMG_20231229_121730.jpg408.6 KB · Views: 7
 -
 IMG_20231229_121809.jpg660.1 KB · Views: 5
 -
 IMG_20231229_121835.jpg516.7 KB · Views: 6
 -
 IMG_20231229_122229.jpg697.2 KB · Views: 6
 -
 IMG_20231229_122141.jpg525.6 KB · Views: 6
 -
 IMG_20231229_122047.jpg498.3 KB · Views: 6
 -
 IMG_20231229_122426.jpg624 KB · Views: 6
 -
 IMG_20231229_122351.jpg440.1 KB · Views: 6
 -
 IMG_20231229_122325.jpg370.7 KB · Views: 5
 -
 IMG_20231229_122308.jpg526.1 KB · Views: 6
Last edited:

Hello guys, I am slowly working on the payload bay, but The "work" is more like brainstorming all the ideas how to implement the electronics to the cargo bay without looking it kinda unreal. I thing I have found a way, but first I need to work on the payload bay itself, which is harder than I thought. Anyway, I am doing a small progress, but I need to quit the idea of finishing it in a month and be able to take the complete model to the show.
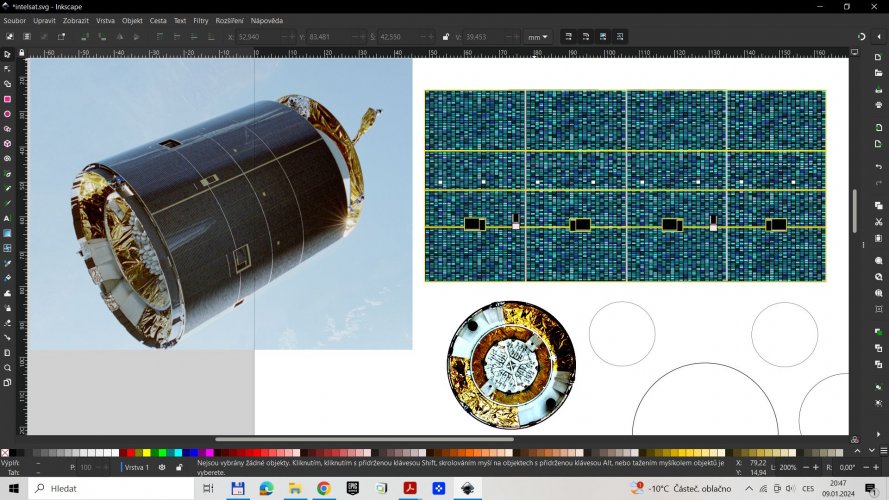
Meanwhille , I did a little progress on the Intelsat VI itself...
Meanwhille , I did a little progress on the Intelsat VI itself...