R5-D4 BETA TEST BUILD

Rhaven Blaack

!!!THE MAN BEHIND THE CURTAIN!!!
Staff member
Administrator
Moderator
Jun 12, 2009
12,531
9,914
228
Oregon
www.deviantart.com
I know that it has been awhile since I have build a "Star Wars" related model. Recently, @Revell-Fan contacted me and said that he is working on a template for R5-D4 (This astromech was first featured in the first "STAR WARS" movie ("STAR-WARS": A New Hope); and asked me if I was interested in conducting a beta test build. Of course, I could not refuse! :cool:
 

Attachments

  • R5-D4_Sideshow.png
    R5-D4_Sideshow.png
    680.3 KB · Views: 4
  • R5D4-AG.png
    R5D4-AG.png
    723.8 KB · Views: 4

Rhaven Blaack

!!!THE MAN BEHIND THE CURTAIN!!!
Staff member
Administrator
Moderator
Jun 12, 2009
12,531
9,914
228
Oregon
www.deviantart.com
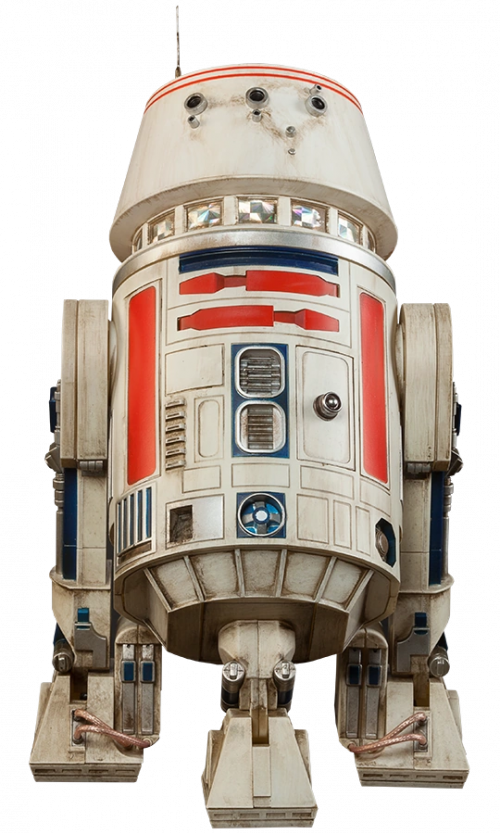
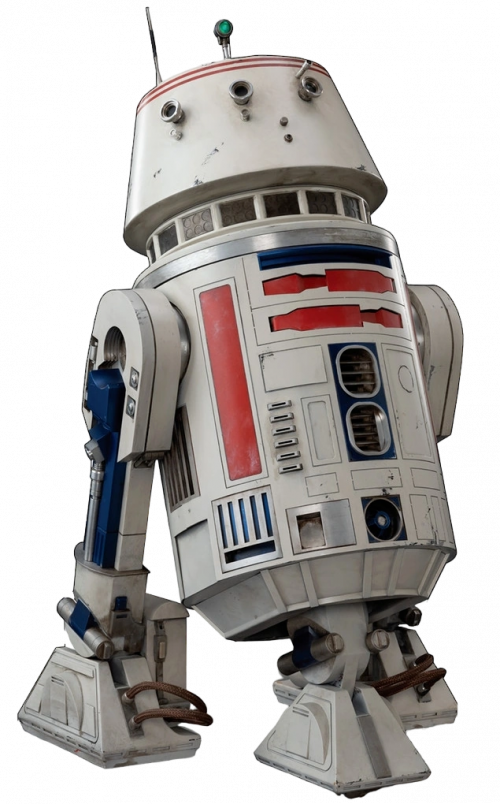
The main body that is being used for this template is the same one that Shunichi Makino designed for his template for R2-D2 (however, the body was repainted to match R5-D4). The head was a reimage (and revision) of another template.

I started with the head. Here are the parts for the head. As you can see by the template, there are recessed components that you can make for the head, or just leave them as "printed texture".
20231211_131232.jpg

This is the recessed components for the head.
20231211_195048.jpg

20231211_195703.jpg

All of the recessed components are assembled.
(*NOTE* As you can see, there are enough parts to make four. However, only three are needed).
20231211_204249.jpg

Moving on to the main part of the head. I have formed the top part for the head.
20231211_215813.jpg

The top part of the head is assembled.
20231211_222705.jpg

The recessed components are attacked.
20231211_222722.jpg

20231211_222744.jpg

20231211_222813.jpg

20231211_222851.jpg

Here is the bottom part of the head.
20231211_223224.jpg
The top part and bottom parts are attached.
20231211_223758.jpg

Here is the neck piece.
20231211_224459.jpg

The neck piece is assembled and attached to the head.
20231211_230521.jpg
 

Rhaven Blaack

!!!THE MAN BEHIND THE CURTAIN!!!
Staff member
Administrator
Moderator
Jun 12, 2009
12,531
9,914
228
Oregon
www.deviantart.com
Now for the greebling parts. These parts are for the "eyes".
20231211_230619.jpg

Here are the mounting posts for the three main "eyes".
20231211_232125.jpg

The mounting posts for the three main "eyes" are attached in place.
20231211_232551.jpg

Here are the parts for the three main "eyes".
20231211_232728.jpg

Here are the parts for the other "eyes".
20231211_233600.jpg

The parts for the three main "eyes" and other "eyes" are attached in place.
20231211_233828.jpg

This is the antenna.
20231212_000711.jpg

The antenna is assembled.
20231212_001326.jpg

The antenna is attached.
20231212_001626.jpg
 

micahrogers

Moderator "Where am I, and how did I get here?"
Staff member
Moderator
Jul 12, 2012
3,773
4,639
113
Shannon GA
Looking fantastic! What scale will he be? I need an R5-D4 to sit with my Bandai Mando.
 

Revell-Fan

Co-Administrator
Staff member
Administrator
Moderator
Aug 1, 2009
11,616
12,357
228
Vreden
Thank you all for your comments! :)

@Rhaven Blaack : Thank you very much for tackling this beast. It is looking great so far. :)

@micahrogers : The droid will be in line with Shunichi's R2 unit. The goal is to rescale it to 1/12 later but first we have to see how tall the model really is. IIRC the scale of the original is 1/6. At 1/12 it should be 119mm high. Since RB is known for absolute accuracy I have no doubt that together we'll get this done right. :)
 

Rhaven Blaack

!!!THE MAN BEHIND THE CURTAIN!!!
Staff member
Administrator
Moderator
Jun 12, 2009
12,531
9,914
228
Oregon
www.deviantart.com
Thank you all for your comments! :)

@Rhaven Blaack : Thank you very much for tackling this beast. It is looking great so far. :)

@micahrogers : The droid will be in line with Shunichi's R2 unit. The goal is to rescale it to 1/12 later but first we have to see how tall the model really is. IIRC the scale of the original is 1/6. At 1/12 it should be 119mm high. Since RB is known for absolute accuracy I have no doubt that together we'll get this done right. :)
1702405888330.png
 

Rhaven Blaack

!!!THE MAN BEHIND THE CURTAIN!!!
Staff member
Administrator
Moderator
Jun 12, 2009
12,531
9,914
228
Oregon
www.deviantart.com
Moving on to the body. As mentioned before, I am building this "AS-IS" (meaning no extra greebling).

Here are the parts for the body.
20231212_142329.jpg

The body is assembled.
20231212_143814.jpg

20231212_143833.jpg

Here are the part for the "neck" mount for the head and the mounting component for the center leg.
20231212_150331.jpg

The mounting component for the center leg is attached in place.
20231212_151712.jpg

The "neck" mount for the head is attached in place.
20231212_151720.jpg

I attached the head (*NOTE* Do not glue the outer neck piece to the inner neck pieces, so that the head can move.).
20231212_151737.jpg

Next, will be the legs.
 
Last edited:

Rhaven Blaack

!!!THE MAN BEHIND THE CURTAIN!!!
Staff member
Administrator
Moderator
Jun 12, 2009
12,531
9,914
228
Oregon
www.deviantart.com
OK. Moving on to the legs.
Here are the parts for the center leg.
20231212_181706.jpg

20231212_223624.jpg


20231213_111320.jpg

The center leg is fully assembled.
20231213_111501.jpg

Here are the parts for the right leg.
20231214_141923.jpg

The right leg is assembled and the axle is attached.
20231214_195008.jpg

The left leg is assembled.
20231216_202329.jpg

The legs are attached and the project is finished!
20231216_205643.jpg

20231216_205654.jpg

20231216_205703.jpg

20231216_205712.jpg

The only real difference between the assembly of this one and Shunichi's R2-D2, is the head. Everything else is the same.
Thank you for watching. I hope that you enjoyed this thread.