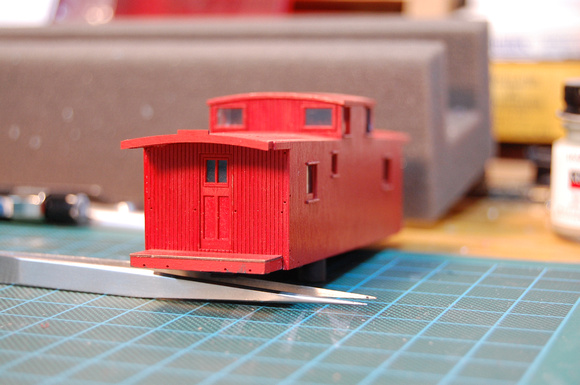
These cabooses, when originally built, had wooden roofs covered by canvas coated with an asphalt based water proofing material. Later they were replaced with metal roofs. I chose to try to imitate the canvas using some type of tissue paper. And was pleasantly pleased with the outcome.
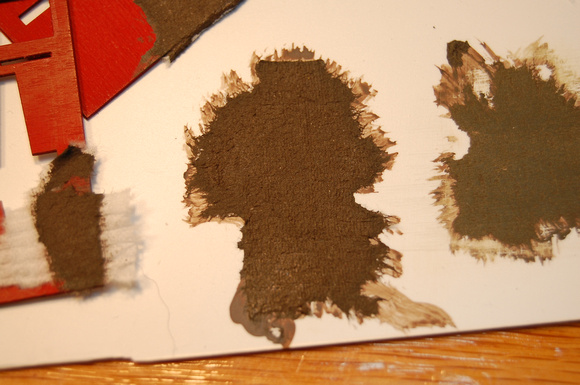
As I had never tried this before, the first photo shows some practice attempts (materials and color). What I learned from this is that toilet tissue probably wouldn't be the best material; I was concerned the "quilting", may show through.
Other practice attempts using kleenex type tissue bypassed the quilting concern and I was also happier with the texture. For color I decided on a mixed paint that turned out to look more or less like grimy black.
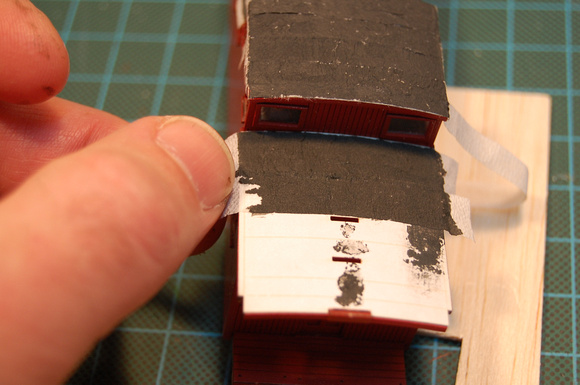
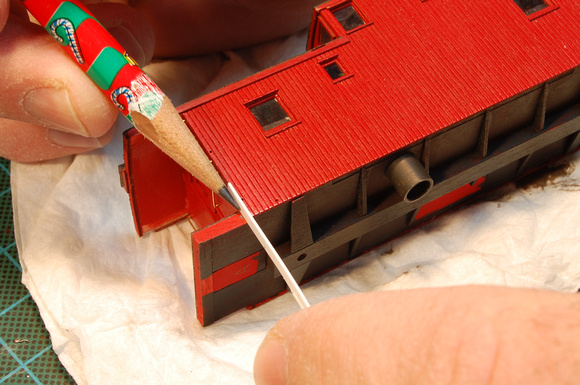
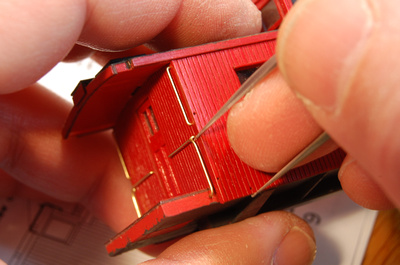
To attach, I cut strips of tissue about .3" wide and applied these across the roof to simulate the seams in the canvas. The paint was applied by dabbing drops directly to the tissue and allowing it to wick through the material. It also doubled as the adhesive.
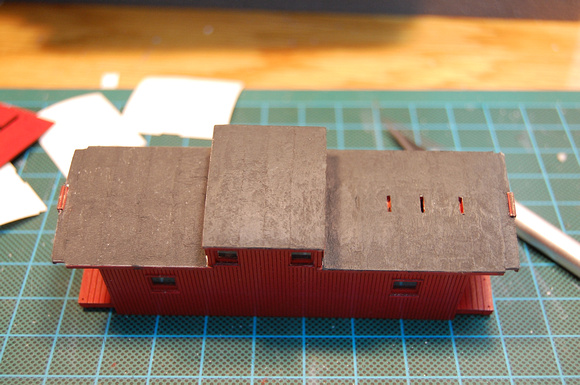
Frankly, I was unhappy with the work as it progressed; the paint was going on too thick, the texture wasn't showing through and it was difficult to prevent the tissue from bunching up.
I stumbled on a better solution by accident. After completing the longer ("A") end and the cupola roof, I took a break and forgot to cover the paint. When I returned, the surface of the paint had begun to set up, I scraped this off and thinned the remainder; as it turned out, it was significantly thinner than the original paint - Voila! The thinner paint wicked faster and left the texture much more visible.
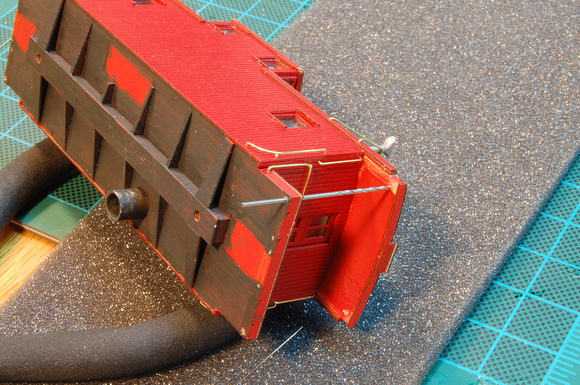
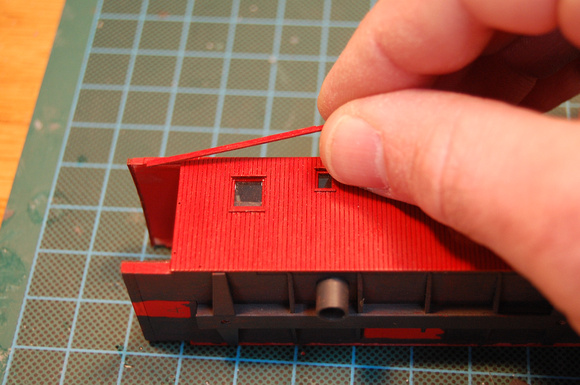
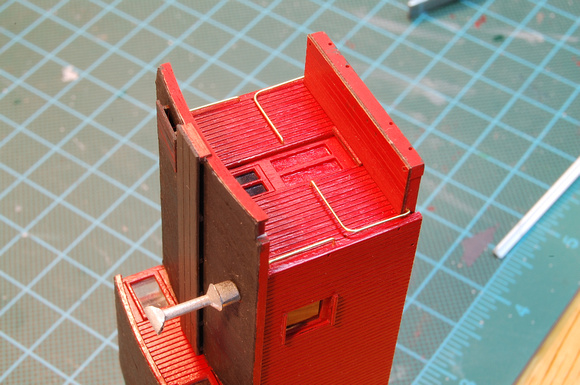
Incidentally, the white surface was another peel and stick piece - the lines crossing the crown are index lines if you want to add a "steel" seam (also peel and stick)
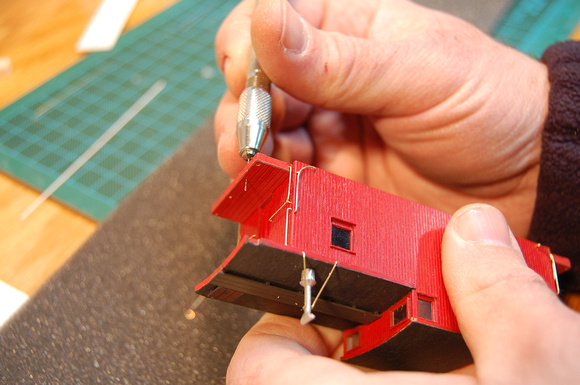
The tissue was still bunching up, so the final step in this learning process was to "stretch" the strips to prevent and remove wrinkles while applying the paint with the other hand. Note the lack of wrinkles in the piece being stretched compared to the strip next to and on top of the cupola. I was please as punch at this point.
The process went something like this:
1) Apply "canvas" strip with a slight overlap of the previous piece.
2) Dab paint at the roof crown to anchor it
3) Alternately apply the thinned paint to one side then the other while stretching the tissue.
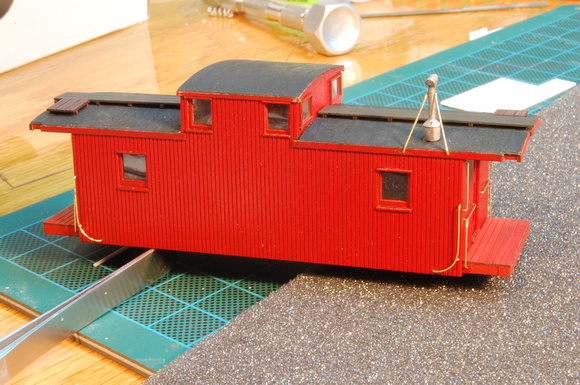
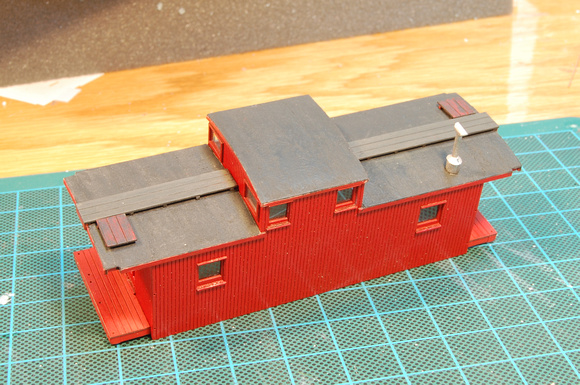
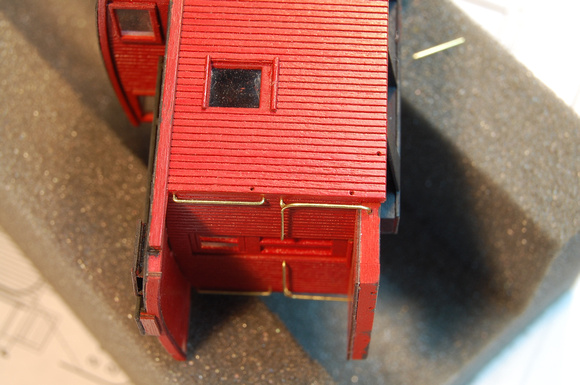
After all the canvas was applied and paint was dried, I removed the overhanging strips by filing along the roof-facia corner at an angle with a flexi-file. This cut the tissue nicely without damaging the facia. The last photo shows the crispness of the result.
I also used a flexi-file (great tools) to knock down the high spots on the first two roof sections I completed (see previous cupola-top picture as an example), and finished off with a coarse file to put some texture back into it. The result wasn't perfect, but very much improved the situation on those surfaces and will be very difficult to see once roof walks and other details are added.
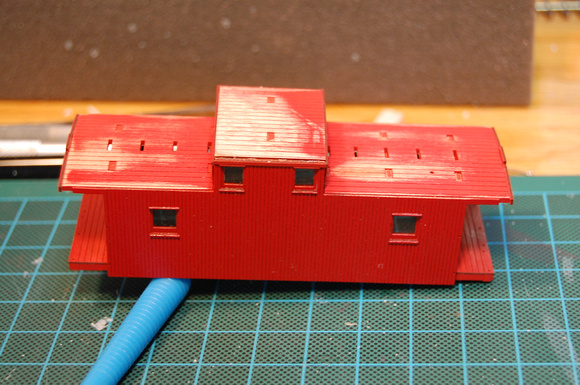
Lastly (after the final picture was taken), I applied a final paint touch up to the filed corners, high spots that were filed down (and a little shiny), etc., then applied a thinned white glue layer for stability. All and all I am very pleased with the result.
My apologies for the lengthy post!
Fluesheet


")