This was my most recent build. Embarrassingly I started it about 18 months ago with grandiose visions of building a fully functional toy from just a relatively simple free template found online. I’ve always wanted to include retractable landing gear in one of my models and therefore embarked upon discovering the best way to make this work. The major trick was to have the landing doors to open and the gear extend in one motion. This took many attempts because of all of the parameters of the task. The mechanics had to fit not only within the confines of the model but also had to have a connection to the forward gear and still fit a cockpit on top of it. Needless to say this took many months to figure out and I think I was able to come up with solutions for each set of gear but after connecting everything, there were problems and by that time I just wanted to get the model done. I did take a video of what seemed to be working that I’ve tucked away before moving on to close up the model.
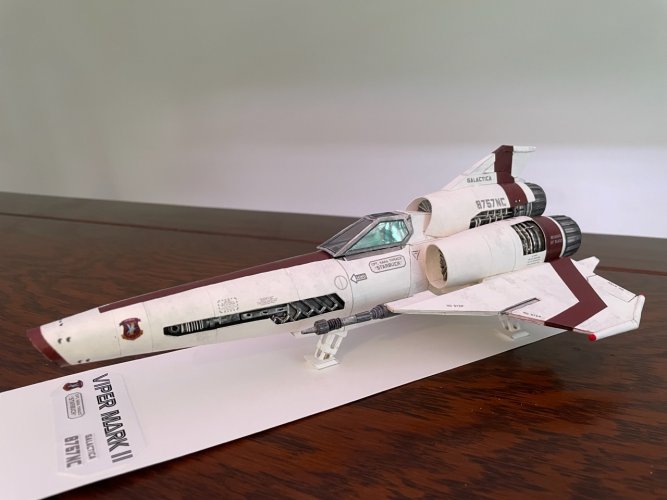
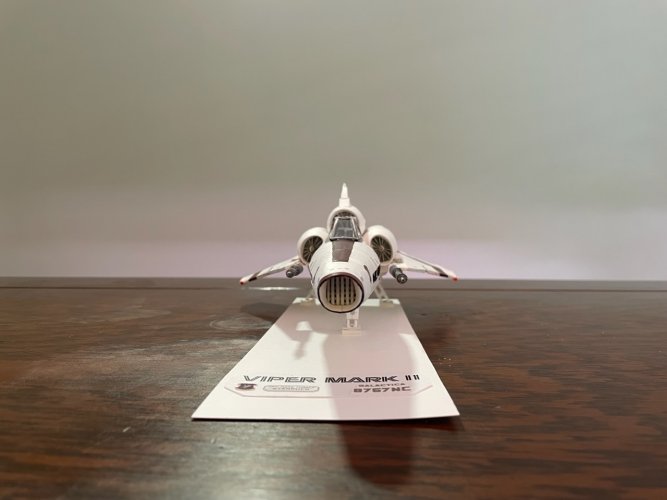
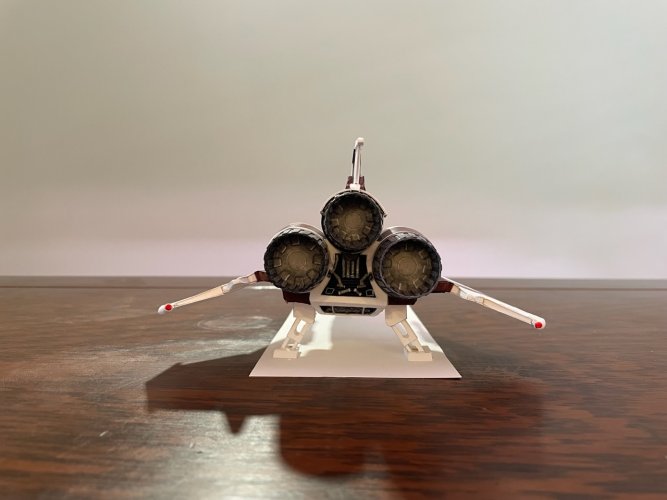
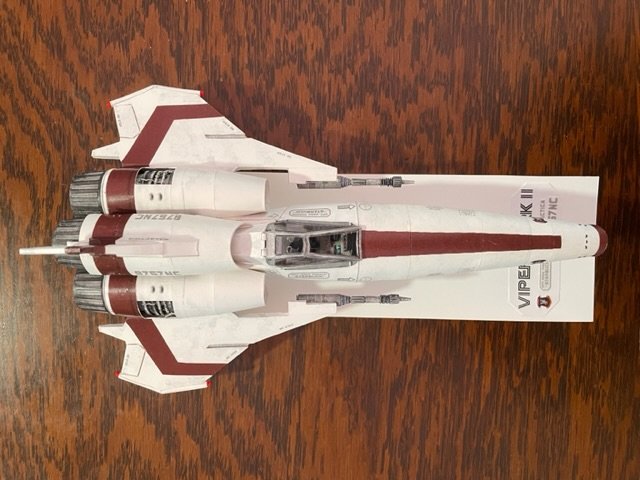
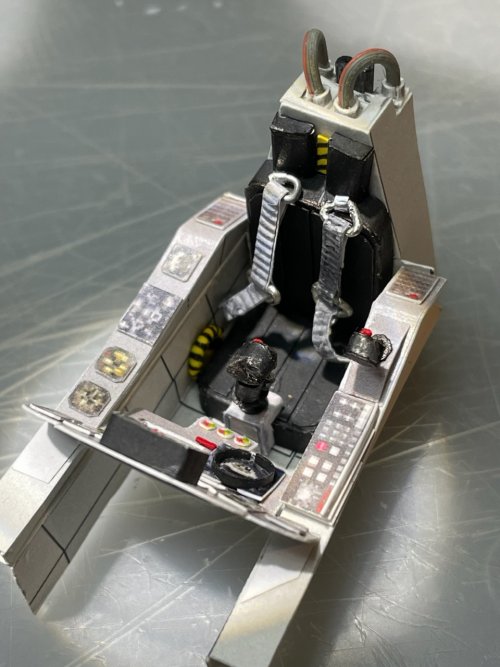
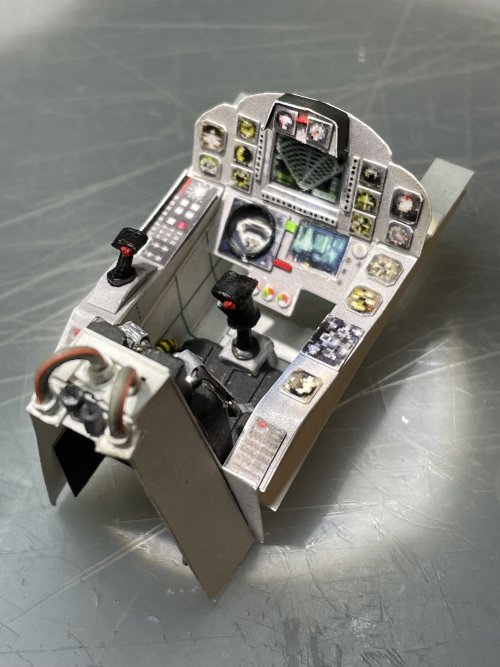
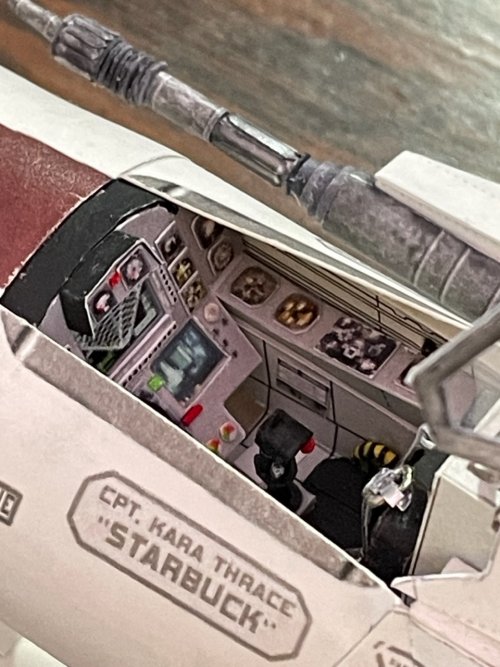
Also before closing up the model, I wanted to build the cockpit which was not part of the template I used. I used the tiny pilot figure from the 70’s Viper toy that I have to size out the basic shape of the cockpit. A seat was built from some black card stock and then it came time to build the control and side panels. I used various pics of the cockpit to piece together instruments and screens in Gimp and had it printed out at the print shop. Some extra details were added like the joysticks, top seat tubes, seat belts and the ejection handles.
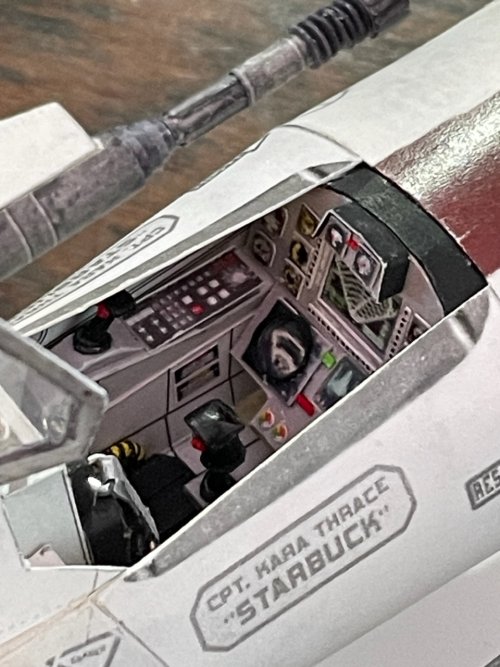
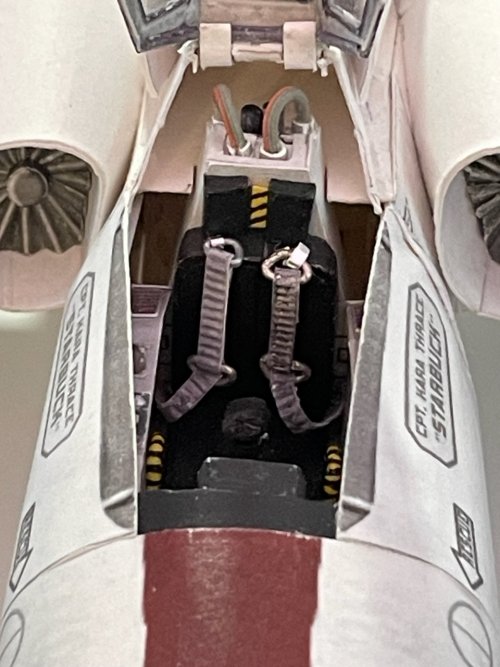
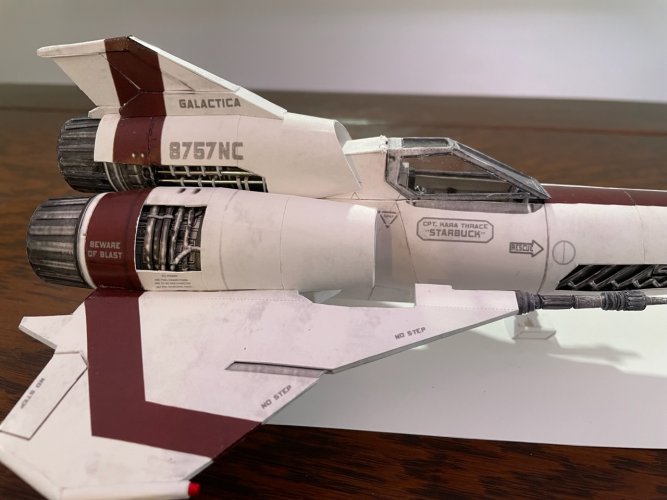
The cockpit was then inserted and an opening canopy constructed from the original template with the blacked out windows replaced by clear plastic (from a muffin container).
The last to be built were the wings with added contouring (not on the original template) and the cannons again with added contouring. Throughout the build added details were built into some of the recessed panels on the fuselage sides, inside the engine nacelles and on the back of the craft.


Also before closing up the model, I wanted to build the cockpit which was not part of the template I used. I used the tiny pilot figure from the 70’s Viper toy that I have to size out the basic shape of the cockpit. A seat was built from some black card stock and then it came time to build the control and side panels. I used various pics of the cockpit to piece together instruments and screens in Gimp and had it printed out at the print shop. Some extra details were added like the joysticks, top seat tubes, seat belts and the ejection handles.


The cockpit was then inserted and an opening canopy constructed from the original template with the blacked out windows replaced by clear plastic (from a muffin container).


The last to be built were the wings with added contouring (not on the original template) and the cannons again with added contouring. Throughout the build added details were built into some of the recessed panels on the fuselage sides, inside the engine nacelles and on the back of the craft.


