working on the frog#1
After the stock rails are spiked down and the first two rails of the frog are filed to a point I put in enough spikes to hold those rails in gauge with the stock rails near the estimated point of frog.. at that time the rails are loose enough so they can be slid forward and backward. This is important for finding the exact point of frog. as I said before, at the frog I like the gauge to be at the minimum allowable; that is as tight as the NMRA standards gauge will allow, so that the truck won't have any slop to try to pick the point. This assumes that the wheels are perfectly in gauge, but they need to be anyway.
I move the rails coming into the diverging side of the frog back and forth, as I test the gauge on each rail, until I have them touching each other tightly; with them both in gauge with their corresponding stock rail, and as close as they can possibly get to the throw bar location while still being in gauge. That is the point of frog.
once the rails are there, then I can spike them down to my hearts content everywhere but right where the wing rails are going to go in the frog- Don't want them in the way there.
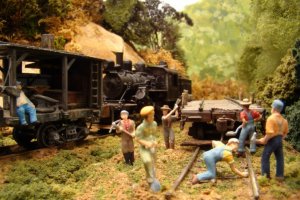
Now for the photos, which are not in order, I am going to start having to name my photos 1, 2 &3 or something so I can get them in the order I want- one more thing I need to figure out!
The first photo shows the diverging rails @ the frog spiked down and ready to slide forward and back to find the point of frog. Note that they are very close to the estimated point of frog which we (I) located with the pencil lines using the flangeway gauge on the standards gauge as guide.
Next we go to the second from last photo, which shows the gauge being check on one side of the frog. that side is just right as tight as the gauge will allow, the other side has been checked too and is right also, so this is out official point of frog. note how close it is to the pencil line approximation of POF (point of Frog). if either side was not just right we would slide the rail forward to back to move the point of frog.
With the point of frog established we bend up a wing rail. (See the second photo) when making the bends in the wing rail it helps to have a small pair of pliers with straight jaws. If you grap the rail to bend it with a tapered pair of pliers, it is easy to introduce a subtle twist to the rail, and we don't want that, the web (base of the rail) needs to set dead flat on the ties, or there will be pain and suffering.
getting the exactly correct angle of bend on the wing rail is tricky and critical. one leg of the wing rail must be perfectly parallel to the opposite stock rail so that gauge can be maintained, and the other leg must be perfectly Parallel to the adjacent diverging rail in the frog to maintain a perfect flange way, and both of these must be just right for a perfectly reliable switch. Don't get flustered if it takes several attempts to get it right, and if has been bent and re bent till it starts to look wavy, don't hesitate to discard it and start over. The creation and placement of the wing rail, and the proper location of the point of frog are the critical heart of the switch, most everything else can be filed on , tweaked ,or adjusted but if you have a bad frog, you have a bad switch; so it is imperative to take the time to do the best you can, and then test it twice at his point. If you don't have time to do it right now, when will you have time to do it over?
The bottom photo shows the NMRA standards gauge being used as a straight edge to insure that it is a straight shot for the flange, following the wing rail, to find its way over that gap at the point of frog in to the opposite flange way, this is why we want the gauge to be tight here, that way the other axle in the truck forces the axle going through the point of frog to do the right thing and find that opposing flange way, rather than picking the point , and speaking of flange ways , two code 100 rails set right next too each other don't make a good flange way. the web of the rail is too wide, and will force the flange way to be to wide. for this reason it is necessary to file some of the web off of the wing rail where it is adjacent to the frog, until that portion of the wing rail can but up against the frog and make a perfect flange way (as measured by the flange way gauge on the MNRA standards gauge. This is critical also folks, the only thing that is worse than a flange way that is too wide is one that is too narrow.
Once we have the wing rail bent to the correct angle,so that it can be in perfect gauge with the opposing stock rail, and flush with the frog with just enough of it's web fled off to make a perfect flange way, we spike it at both ends, so that it is movable fore and aft like the diverging rails of the frog were as we were searching for the perfect point of frog. One note here. sometimes it is necessary to put a spike on one of the diverging rails , in the area where it will be adjacent to the wing rail @ the flange way, in order to keep the two diverging rails together. When it is necessary to do that, the wing rail won't sit flush because the spike is in the way, and it is necessary to notch the web of the wing rail for clearance so that a perfect flange way can be established. When we have that notch, and need to move the wing rail fore and aft, it may be necessary to widen the notch. Alternately the diverging rails @ the point of frog can be soldered together, and the offending spike can be removed before the wing rail is fitted.
with the wing rail loosely spiked we can move it fore and aft. If you look at the third photo you can see that the wing rail has been moved rearward from It's original position until a wheel following the opposite path through the switch, has just enough room to clear that bend in the rail. If that bend is too close to the point of frog, a wheel will have to bump over it, and if it is too far from the point of frog the wheel will fall into that hole between the bend in the wing rail and the point of frog. The larger # the switch the farther that bend in the wing rail is going to be from the point of frog. click on that third photo to enlarge . fixing the final position of the wing rail is something that seems easiest to do with a good truck with metal wheel sets. Rolling it through the switch with it's wheels pushed firmly against the stock rail on the opposite route I can feel for the bump of the wheel contacting that bend in the wing rail. I want that bend to be as close to the point of frog as possible, without having any contact with the wheel at that bend.
I'm out of pictures to explain, and that means that we are done with this weeks lesson. Next week we bend and place that other pesky stock rail, make some gaps, and add some jumper wires to try to make these developing switches DCC friendly (this will be experimental I have never built a switch for DCC before, and I will have to make some modifications to my tried and true DC techniques, so wish me luck).
Bill Nelson