hello this is not papercraft but it has a bit to do with it. This year I started to chain my books that I printed on A5 sheet with my printer. Before, I printed them and sent them to be ringed.
This was done years ago with my grandfather (he bound and I saw) he was a lover of books, things that I and my brother inherited. After his death, I did not bind again until this year.
Here in Argentina, new books or those that are difficult to obtain are expensive, I am content with printing them and ringing them. This year I started binding out of nostalgia and because I wanted to give color to my library, and thus not see only ringed spines with nothing to say which book is which.
Notice that it is only a basic loose-leaf binding with a hard cover and very cheap materials.
The book in question that I present for this binding is "three dwarfs and a peak" by angel sanchidrian. I highly recommend that you read it, you will laugh on every page as it destroys every cliché of fantasy.
It is a book that I read on the computer a year after it came out and it is one of my favorite fantasy books.
I couldn't buy this book in any of its printed formats and I didn't use it either because it's very expensive and that's why I decided to print it on A5 sheets and bind it, this isn't the first book I've bound, but it's the one I'm showing you here.
This new or used book in Argentina today has a price of 7,000 to 12,000 Argentine pesos and with my imperfection and binding I don't spend more than 1,000 pesos.
well without further introductions I present a basic binding of loose sheets in A5

.jpeg")
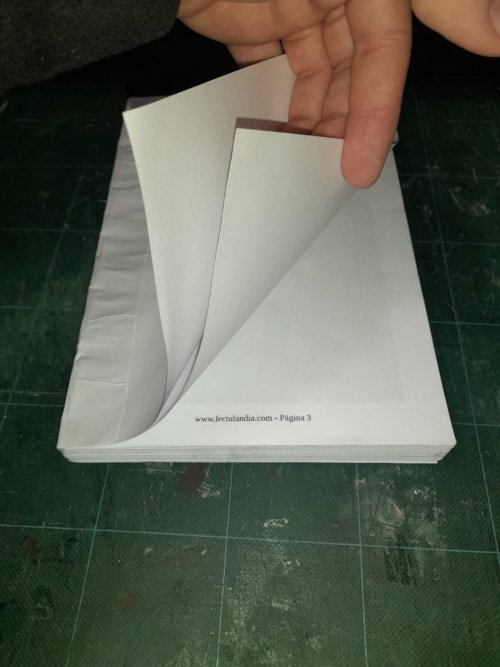
As I said, print the PDF book on an A5 sheet and in all the photos I will censor the page from which I downloaded


Once printed, I aligned it as best I could and I put it in the homemade press that I made when I started with this. It is necessary that it be aligned correctly, especially on the slime, and then glue it with white plastic glue
.jpeg")
.jpeg")

.jpeg")
Between layer and layer of glue, let it dry for 20 minutes and in total I made 5 layers with the white plastic. He noted that the first two layers were diluted to 10% with water for better penetration and the last two I put pure.
.jpeg")
.jpeg")
Once the glue has dried, the cut marks are made starting from the edges at 1 cm, from that it is marked in half and then divided in two and we proceed to cut with a saw two millimeters deep in each cut
then with some cotton or waxed thread we count four sections of the length of the book
.jpeg")
.jpeg")
more glue is put between the slots of the cut and the sewing is done by dividing the thread in two and the middle is placed in the first slot, then a simple knot is made and before closing it, it is placed in the next slot and stretched the thread to close the knot inside the groove. so until you have all the slots
They should look more or less like the last photos. Tomorrow when I cut the covers and buy more glue (haha I ran out and I didn't realize hahahaha) I finished the book binding.
I hope you like this publication and its continuation
This was done years ago with my grandfather (he bound and I saw) he was a lover of books, things that I and my brother inherited. After his death, I did not bind again until this year.
Here in Argentina, new books or those that are difficult to obtain are expensive, I am content with printing them and ringing them. This year I started binding out of nostalgia and because I wanted to give color to my library, and thus not see only ringed spines with nothing to say which book is which.
Notice that it is only a basic loose-leaf binding with a hard cover and very cheap materials.
The book in question that I present for this binding is "three dwarfs and a peak" by angel sanchidrian. I highly recommend that you read it, you will laugh on every page as it destroys every cliché of fantasy.
It is a book that I read on the computer a year after it came out and it is one of my favorite fantasy books.
I couldn't buy this book in any of its printed formats and I didn't use it either because it's very expensive and that's why I decided to print it on A5 sheets and bind it, this isn't the first book I've bound, but it's the one I'm showing you here.
This new or used book in Argentina today has a price of 7,000 to 12,000 Argentine pesos and with my imperfection and binding I don't spend more than 1,000 pesos.
well without further introductions I present a basic binding of loose sheets in A5
As I said, print the PDF book on an A5 sheet and in all the photos I will censor the page from which I downloaded
Once printed, I aligned it as best I could and I put it in the homemade press that I made when I started with this. It is necessary that it be aligned correctly, especially on the slime, and then glue it with white plastic glue
Between layer and layer of glue, let it dry for 20 minutes and in total I made 5 layers with the white plastic. He noted that the first two layers were diluted to 10% with water for better penetration and the last two I put pure.
Once the glue has dried, the cut marks are made starting from the edges at 1 cm, from that it is marked in half and then divided in two and we proceed to cut with a saw two millimeters deep in each cut
then with some cotton or waxed thread we count four sections of the length of the book
more glue is put between the slots of the cut and the sewing is done by dividing the thread in two and the middle is placed in the first slot, then a simple knot is made and before closing it, it is placed in the next slot and stretched the thread to close the knot inside the groove. so until you have all the slots
They should look more or less like the last photos. Tomorrow when I cut the covers and buy more glue (haha I ran out and I didn't realize hahahaha) I finished the book binding.
I hope you like this publication and its continuation


.jpeg")

.jpeg")