

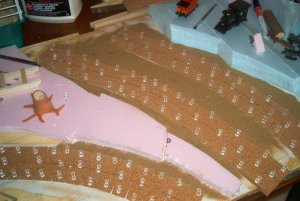
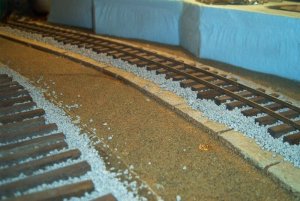
After all the great suggestions, tracklaying has started on my small logging area. Here is a shot of the cork laid. As I'm so cheap, I just buy it by the foot at my local Revy Home store. Push pins hold it in place until it's dry. Since I have all that glue about, I tossed some sand down just for the texture.
And So, Work Begins On The Logging Area...
- Thread starter Lighthorseman
- Start date
You are using an out of date browser. It may not display this or other websites correctly.
You should upgrade or use an alternative browser.
You should upgrade or use an alternative browser.


I think that's really going to be neat, Steve! I love seeing the "work in progress" shots; no better way for others to learn...
Next Up...
Shamus--So far, I think yes, the heel boom will go there. Of course, anything can happen.
Jon--Thanks!
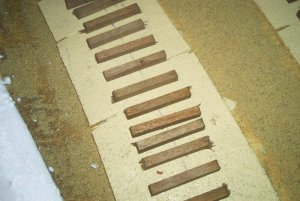
The next step for me was to cut and stain the ties. Instead of last time when I tried to stain each tie individually with a paint brush, this time I dipped them en masse into a jar, shook them up, and let them sit a while to soak up the stain. They were then driedand placed down mostly just to see what I was going to do. Happily, the track centre line was not totally covered by the latex paint.
Shamus--So far, I think yes, the heel boom will go there. Of course, anything can happen.
Jon--Thanks!
The next step for me was to cut and stain the ties. Instead of last time when I tried to stain each tie individually with a paint brush, this time I dipped them en masse into a jar, shook them up, and let them sit a while to soak up the stain. They were then driedand placed down mostly just to see what I was going to do. Happily, the track centre line was not totally covered by the latex paint.
Attachments

Re: Spike Delivery...
Your track is looking really good. Funny that you had problems keeping your track aligned on you diorama. I had exactly the same problem on my little test layout, seems to be a "beginners problem"")
http://www.the-gauge.com/forums/showthread.php?s=&threadid=4345
I think that ballasting immediately while the glue is wet is the right way to do it. I didn't do it as I was not sure how to weather it afterwards, but I will do it next time.
Again, looking really good.
Jesper
Originally posted by Lighthorseman
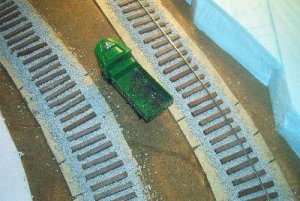
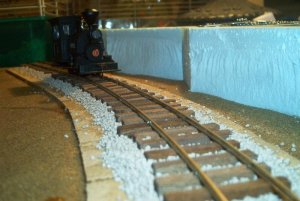
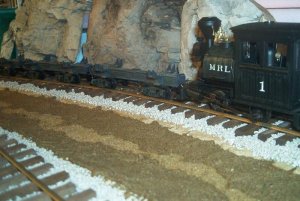
First track was laid and spiked. After having spiked the rail too far to one side on my display diorama, I tried to be more careful with the rail placement this time.
Your track is looking really good. Funny that you had problems keeping your track aligned on you diorama. I had exactly the same problem on my little test layout, seems to be a "beginners problem"
http://www.the-gauge.com/forums/showthread.php?s=&threadid=4345
I think that ballasting immediately while the glue is wet is the right way to do it. I didn't do it as I was not sure how to weather it afterwards, but I will do it next time.
Again, looking really good.
Jesper
The little Porter chugged happily up and down the short stretch of track.
That little porter should be happy, that's some nice lookin' track to chug on.
Ground "Goop"?
Thanks, Pete! Having seen your work, I take that as a serious compliment.
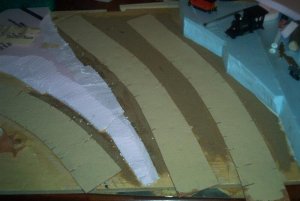
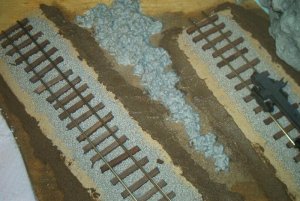
There was a thread about ground "goop", and I remember someone mentioned using a cellulose-type insulation. I tried this and was not happy. While it is likely GREAT for larger areas, it just didn't work here. It clumped up and I think that I had wanted something with a finer texture. Due to it's bulky nature, I think that this stuff definitely has uses...
Thanks, Pete! Having seen your work, I take that as a serious compliment.
There was a thread about ground "goop", and I remember someone mentioned using a cellulose-type insulation. I tried this and was not happy. While it is likely GREAT for larger areas, it just didn't work here. It clumped up and I think that I had wanted something with a finer texture. Due to it's bulky nature, I think that this stuff definitely has uses...
Attachments
What I wound up doing...
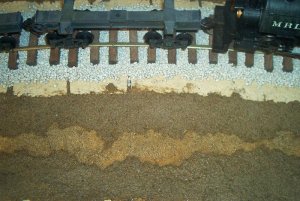
So,I ended up making a mixture of sifted dirt, white glue and water. I stirred it all up, and was able to spread it about with a spoon. I hope to be able to cover it in most places, and still be able to have "bare" spots where the dirt shows right through. It was also very handy for filling in the transition between the cork and the plywood, something the cellulose insulation simply could not do.
So,I ended up making a mixture of sifted dirt, white glue and water. I stirred it all up, and was able to spread it about with a spoon. I hope to be able to cover it in most places, and still be able to have "bare" spots where the dirt shows right through. It was also very handy for filling in the transition between the cork and the plywood, something the cellulose insulation simply could not do.
Attachments
Steve, I absolutely LOVE the rustic look of the ties. Hafta have you c'mon down to Cobblers Knob and hand lay a coupla hundred feet of HO fer me
Great progress Steve. I always admire those that handlay their track. It takes skill that I haven't devloped.
Looks great, Steve. Please keep the progress pics coming. They really help a newbie like myself understand the whole building process. What a great time to be learning a new hobby what with all the great on-line info available.
Cheers, Jim
Cheers, Jim