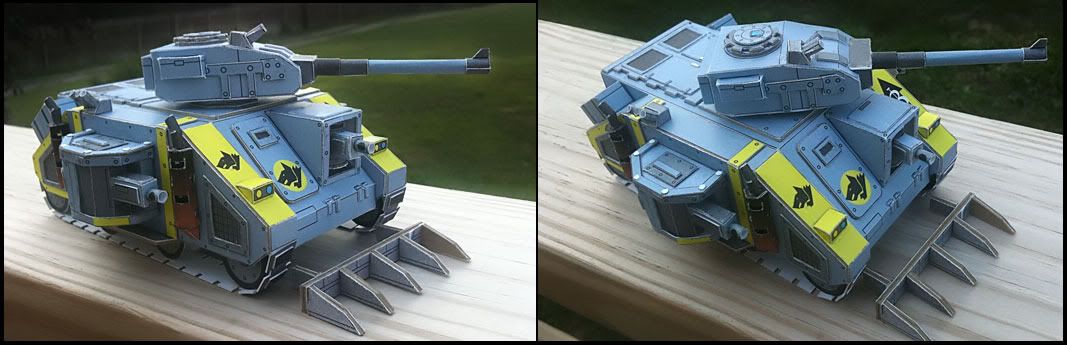
A few days ago I started a build of the older Predator Mk_I using the outstanding patterns developed by Elli Patoroch. And seeing that there are so few build photos available I decided to document my construction here. Nothing fancy, just photos during the build taken from my phone. I'll intersperse notes as they apply.
I used the colored version of the model I just prefer this to the b/w versions. And will continue this with all his models. Although I do plan to paint the models to my various army colors.
Tools:
-110lb Cardstock & an empty Cereal Box for the thicker laminates.
-X-acto Knife, 4 blades
-Alieen's Tacky Glue (Fast Grab PVA\white glue)
-Metal Ruler & a Black Marker
-Micro Screwdriver for coiling the various cylinders needed in the build.
6-7 hours of time to build. A couple of hours over a few evenings.
In addition to some omitted items... I also added my own glue flaps to a few parts to help with the application. I'll note when/where possible.
The 1st thing I had to do was to reformat the parts for the US Letter page. And luckily Elli provides all his templates in PDF but they are all vector parts. And you can easily manipulate and alter them as desired! So I fired up Adobe Illustrator and reformatted the pages, and re-saved it as a multi-page PDF document. I then printed the patterns onto the cardstock from a color laser printer. I also spray my pages with a Matte Acrylic varnish before cutting and building.
The next thing I did was look at the parts detail of the models in the diagrams provided at the beginning of the PDf. I do this to determine what pieces I need to collect and glue to the cerealbox card in order to provide the thicker parts, such as hatches/doors and armour plates. And what I can get away with just double folding the cardstock for a medium thick appearance, such as raised window ports & hand holds and various othergreebles.
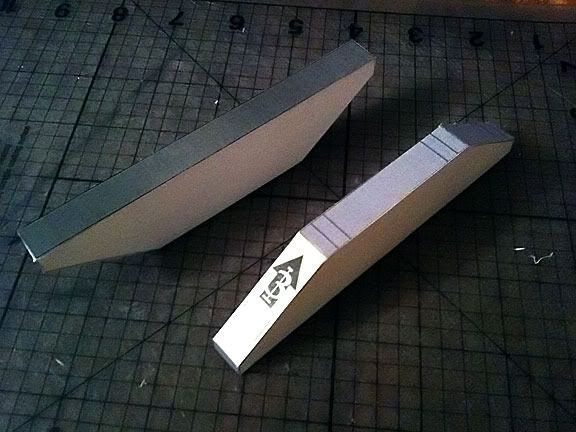
I started with the hull of the predator. Cutting and scoring as needed, but I left it flat as I like to mount all the aforementioned laminated pieces this way so that a have a nice flat, sturdy surface to get an even bond and no warping.


The 110lb cardstock holds up very well and the enclosed hull is very sturdy.
These 2 builds (parts #11) were also sturdy as is. But I did decided to laminate both the inner and outer side-plates((part #,12 & #13) seen in the picture below) on the cereal box cardboard before mounting them to finished track pods.
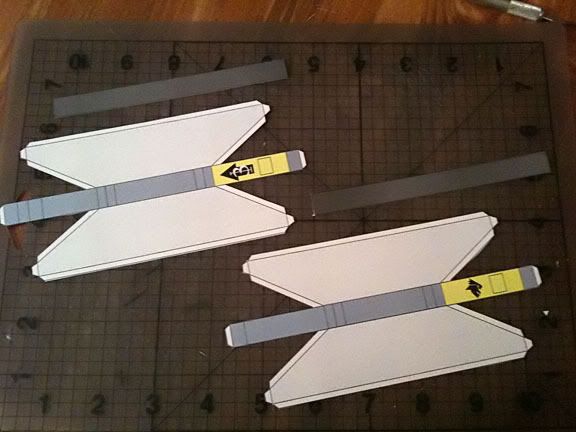
Note: In the picture below I did the wheel spacers differently. I made strips of paper the same width as the squares provided (part #17) and just rolled them into *tubes. This seemed a lot quicker and sturdier imo.

I also laminated the side vents seen on the lower ends of each front facing side plates. (Part #15).
I found it easier to cut out the center part first before removing the frames completely do the the thinness of the part this help prevented any warping and kept the angles true. They were then glued onto each of the outer side plates. (parts #13) (seen below)
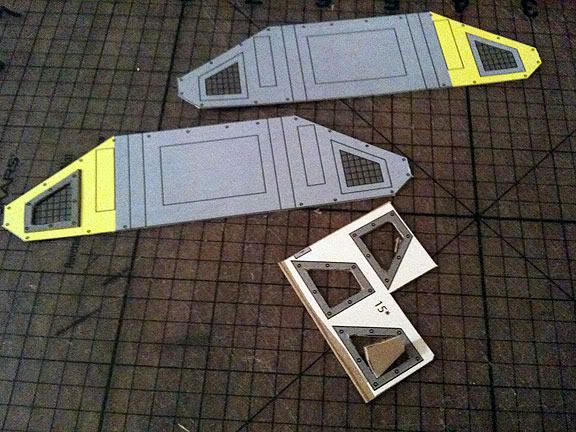
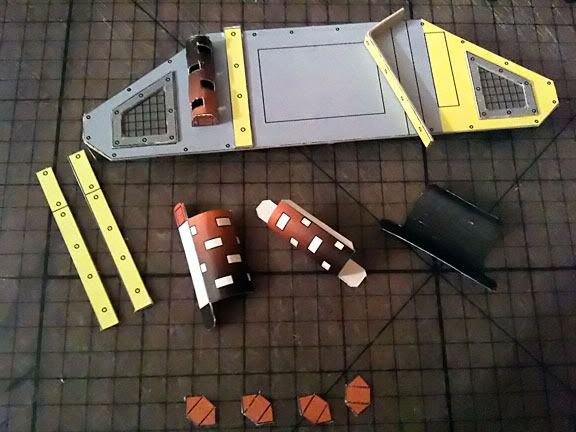
(Part #14, the horizontal yellow side pieces) has been laminated onto Cereal Box cardboard and set to dry while I worked on the 4 exhaust pipes and their associated parts. (Parts #12,22, but I did not use part #23, the flat exhaust pipe tops). I used a micro screw driver to coil the exhaust stacks (part #21). I then used a black marker to color the reverse side black. As I did not think I'd like to try paint inside this area after it was assembled.
Note: Cut out all the ventilation slots on the exhaust stacks before gluing them to the back flap.
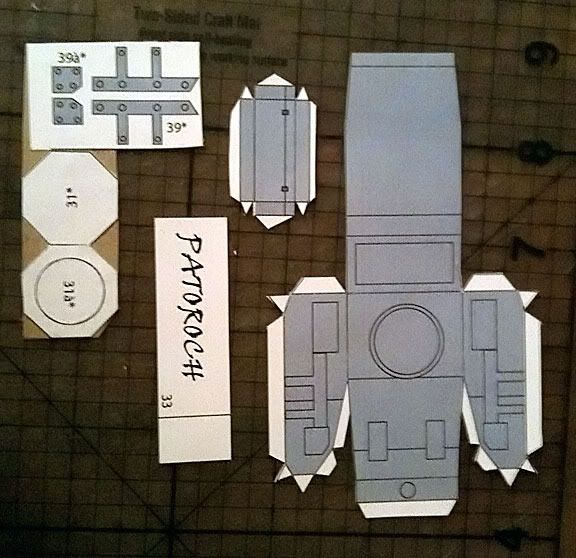
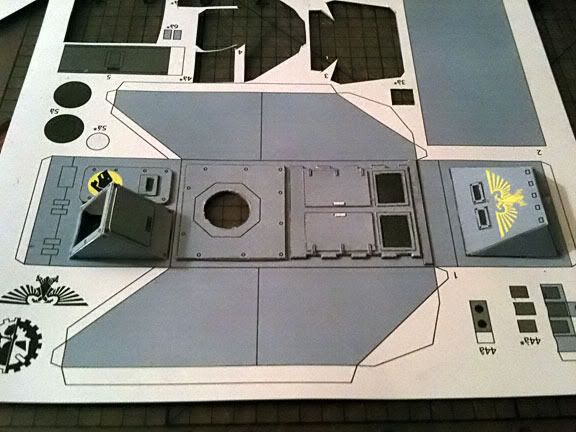
The turret is pretty straight forward although this is where I encountered some issues and had to adjust some parts. Namely (part #39) it had to be trimmed to fit between (part#39a) and the boxes (part #37) on each side of the turret.
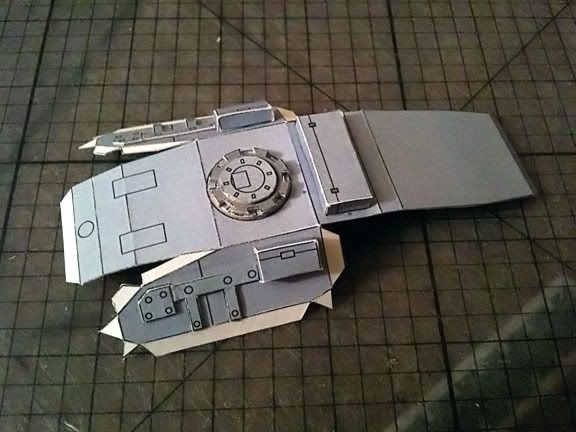
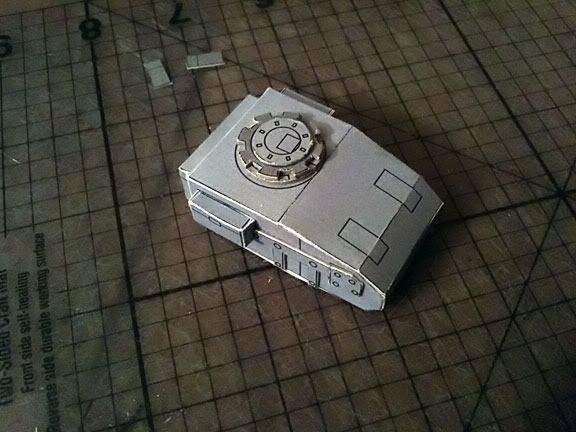
Note: Always dry fit everything first! Also parts (#39 & #31 - were laminated to the Cereal box cardboard). And (part #33) rolled into the cylinder used to mount the turret to the hull. It is a tight fight, which is good as it allows friction to keep the turret in place when turned.
The actual Auto-cannon assembly is not shown but is very straightforward, I had no issued with these parts. The only thing I might do is add some reinforcement inside the gun tube mount (part #35) as it seems like it won't take much to rip that gun right off the turret.

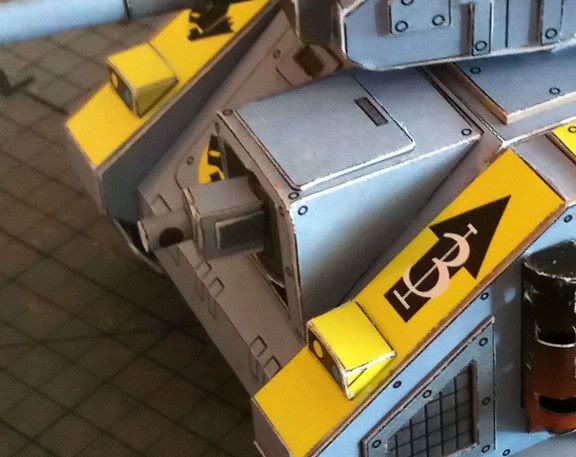
The two side weapon sponsons went together fairly easily. Though I was/am confused about exactly where (part #29) actually goes. It seems like it is supposed to sit caddy corner to the front rear of the sponson and act as the weapon rotation tube (part #28 ) spacer. At any rate I omitted them. I centered those tubes in the open port on the sponson. Glued them and then glued the tops into place. I then glued on (part #27) which was first laminated to cereal box card.


The sponsons were mounted on the sides of the vehicles and then the heavy bolter assemblies were centered and glued into place. I offset my bolters... I wish I had set them both forward and closer to the sides of the vehicle, because they don't turn and I can see them easily coming off in storage. Next time I'll cut out the slots in the Weapon rotation tube and then recess the guns into that part a bit then glue. And as mentioned before I'll probably add magnets so that part is rotatable.
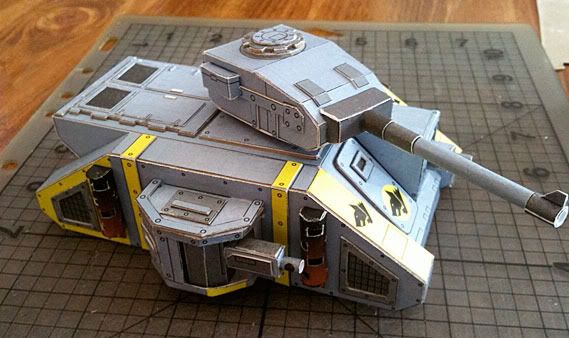
Something I forgot to do till after this was finished, was mount the front facing Heavy Bolter. I had already cut and prepped the holes but forgot to insert the weapon tube and bolter assembly. This was ok though, as there is ample room to mount it simply by inserting one end in first at and angle. And then gluing the mount to the top of the turret housing. I also took this time to mount the front headlights.
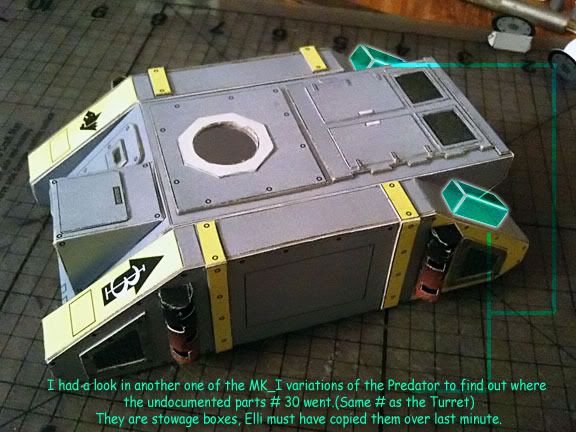
Now, there were two mystery parts left over. One was (part #16), and upon inspecting the other Elli Patoroch Predator Mk_I build I noticed they are the old style running boards found on the Mk_I series Rhinos. I'll be laminating and mounting these.
And the other is illustrated below...
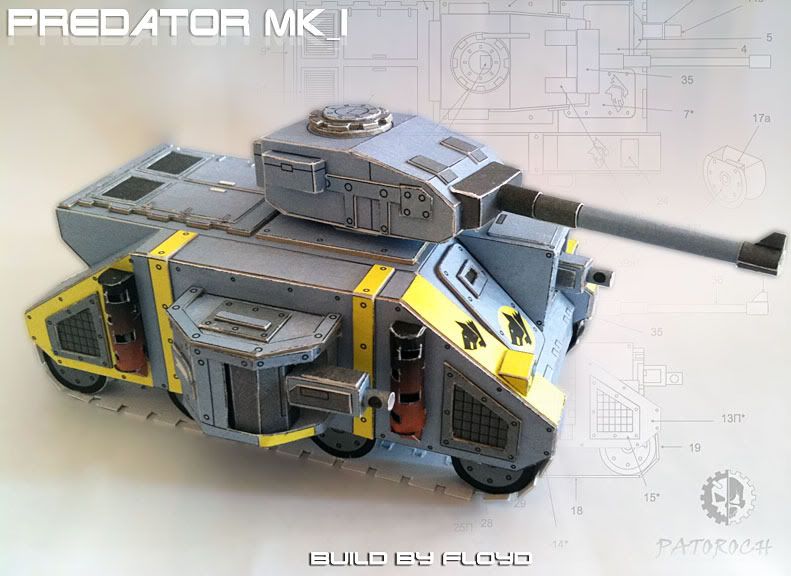
And so my (almost) finished assembly. What I haven't done yet is add the center raised track parts (part #20). And I am going to follow SilverOxide's little example on how to make the Smoke/Grenade launchers out of rolled paper tubes. I might either make straight tubes for the exhaust ports or simply leave them off altogether... Oh I also haven't attached the Bolter mount near the top port opening. Nor the Exhaust tops.
I bought a 1/16 hole punch to make all the tiny rivets as well.
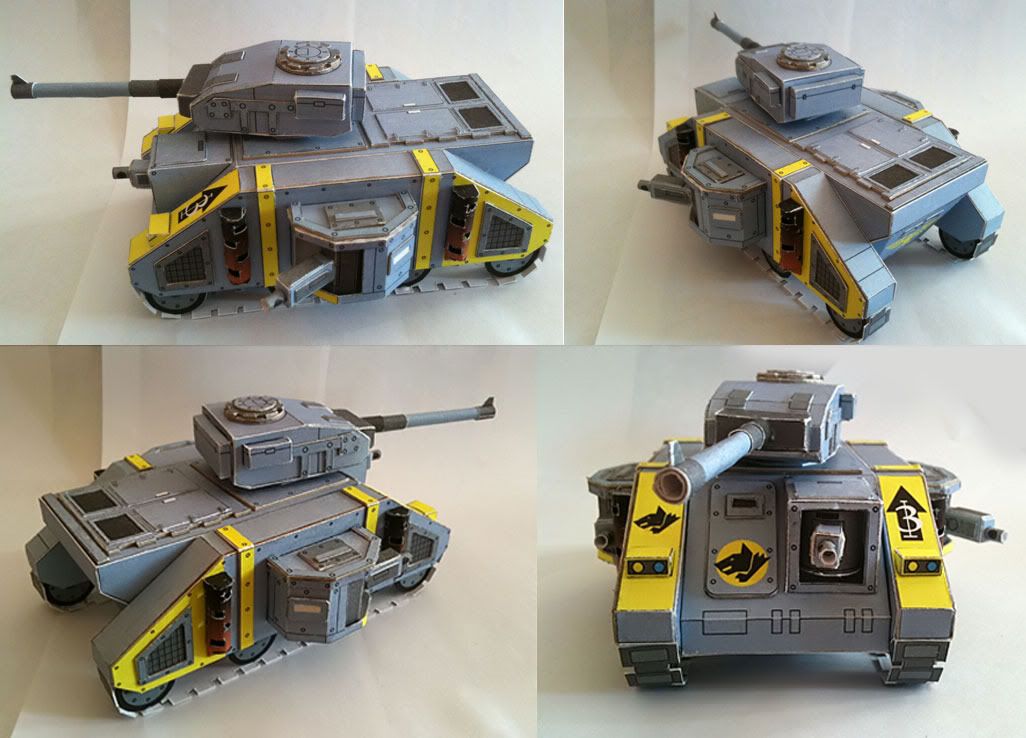
Then it gets a paint job in codex UltraMarine blue, detailed and decal-ed. Then varnished.
* - this is apparently how Elli decided to do it in the later versions of this model.
I used the colored version of the model I just prefer this to the b/w versions. And will continue this with all his models. Although I do plan to paint the models to my various army colors.
Tools:
-110lb Cardstock & an empty Cereal Box for the thicker laminates.
-X-acto Knife, 4 blades
-Alieen's Tacky Glue (Fast Grab PVA\white glue)
-Metal Ruler & a Black Marker
-Micro Screwdriver for coiling the various cylinders needed in the build.
6-7 hours of time to build. A couple of hours over a few evenings.
In addition to some omitted items... I also added my own glue flaps to a few parts to help with the application. I'll note when/where possible.
The 1st thing I had to do was to reformat the parts for the US Letter page. And luckily Elli provides all his templates in PDF but they are all vector parts. And you can easily manipulate and alter them as desired! So I fired up Adobe Illustrator and reformatted the pages, and re-saved it as a multi-page PDF document. I then printed the patterns onto the cardstock from a color laser printer. I also spray my pages with a Matte Acrylic varnish before cutting and building.
The next thing I did was look at the parts detail of the models in the diagrams provided at the beginning of the PDf. I do this to determine what pieces I need to collect and glue to the cerealbox card in order to provide the thicker parts, such as hatches/doors and armour plates. And what I can get away with just double folding the cardstock for a medium thick appearance, such as raised window ports & hand holds and various othergreebles.
I started with the hull of the predator. Cutting and scoring as needed, but I left it flat as I like to mount all the aforementioned laminated pieces this way so that a have a nice flat, sturdy surface to get an even bond and no warping.
The 110lb cardstock holds up very well and the enclosed hull is very sturdy.
These 2 builds (parts #11) were also sturdy as is. But I did decided to laminate both the inner and outer side-plates((part #,12 & #13) seen in the picture below) on the cereal box cardboard before mounting them to finished track pods.
Note: In the picture below I did the wheel spacers differently. I made strips of paper the same width as the squares provided (part #17) and just rolled them into *tubes. This seemed a lot quicker and sturdier imo.
I also laminated the side vents seen on the lower ends of each front facing side plates. (Part #15).
I found it easier to cut out the center part first before removing the frames completely do the the thinness of the part this help prevented any warping and kept the angles true. They were then glued onto each of the outer side plates. (parts #13) (seen below)
(Part #14, the horizontal yellow side pieces) has been laminated onto Cereal Box cardboard and set to dry while I worked on the 4 exhaust pipes and their associated parts. (Parts #12,22, but I did not use part #23, the flat exhaust pipe tops). I used a micro screw driver to coil the exhaust stacks (part #21). I then used a black marker to color the reverse side black. As I did not think I'd like to try paint inside this area after it was assembled.
Note: Cut out all the ventilation slots on the exhaust stacks before gluing them to the back flap.
The turret is pretty straight forward although this is where I encountered some issues and had to adjust some parts. Namely (part #39) it had to be trimmed to fit between (part#39a) and the boxes (part #37) on each side of the turret.
Note: Always dry fit everything first! Also parts (#39 & #31 - were laminated to the Cereal box cardboard). And (part #33) rolled into the cylinder used to mount the turret to the hull. It is a tight fight, which is good as it allows friction to keep the turret in place when turned.
The actual Auto-cannon assembly is not shown but is very straightforward, I had no issued with these parts. The only thing I might do is add some reinforcement inside the gun tube mount (part #35) as it seems like it won't take much to rip that gun right off the turret.
The two side weapon sponsons went together fairly easily. Though I was/am confused about exactly where (part #29) actually goes. It seems like it is supposed to sit caddy corner to the front rear of the sponson and act as the weapon rotation tube (part #28 ) spacer. At any rate I omitted them. I centered those tubes in the open port on the sponson. Glued them and then glued the tops into place. I then glued on (part #27) which was first laminated to cereal box card.
The sponsons were mounted on the sides of the vehicles and then the heavy bolter assemblies were centered and glued into place. I offset my bolters... I wish I had set them both forward and closer to the sides of the vehicle, because they don't turn and I can see them easily coming off in storage. Next time I'll cut out the slots in the Weapon rotation tube and then recess the guns into that part a bit then glue. And as mentioned before I'll probably add magnets so that part is rotatable.
Something I forgot to do till after this was finished, was mount the front facing Heavy Bolter. I had already cut and prepped the holes but forgot to insert the weapon tube and bolter assembly. This was ok though, as there is ample room to mount it simply by inserting one end in first at and angle. And then gluing the mount to the top of the turret housing. I also took this time to mount the front headlights.
Now, there were two mystery parts left over. One was (part #16), and upon inspecting the other Elli Patoroch Predator Mk_I build I noticed they are the old style running boards found on the Mk_I series Rhinos. I'll be laminating and mounting these.
And the other is illustrated below...
And so my (almost) finished assembly. What I haven't done yet is add the center raised track parts (part #20). And I am going to follow SilverOxide's little example on how to make the Smoke/Grenade launchers out of rolled paper tubes. I might either make straight tubes for the exhaust ports or simply leave them off altogether... Oh I also haven't attached the Bolter mount near the top port opening. Nor the Exhaust tops.
I bought a 1/16 hole punch to make all the tiny rivets as well.
Then it gets a paint job in codex UltraMarine blue, detailed and decal-ed. Then varnished.
* - this is apparently how Elli decided to do it in the later versions of this model.