

I got to work right away on this model as I've been salivating over doing a scratch build Heavy Tank ever since I got my Armor Cast BaneBlade/Shadow Sword combo back in 96.
This will be more of a visual journal of the build rather than a detailed step by step.. SilverOxide has that market cornered...and I am not sure anything I could do would be anywhere close to that level of granularity.
I am hoping that you, like me, wished there were nice photos of assembled versions of all of Elli's wonder templates. Well I'll contribute as many as I can.
Build Time - 8 Hours * in progress* - assembling Turret & Treads
Tools
- 110lb Cardstock
- cereal box card for heavy laminates
- x-acto knife and lots of blades
- metal ruler
- 1/16" hole punch for rivets
- micro screw driver and pin vice drill bits for coiling paper tube barrels
- Aieleen's Tacky Glue (white pva)
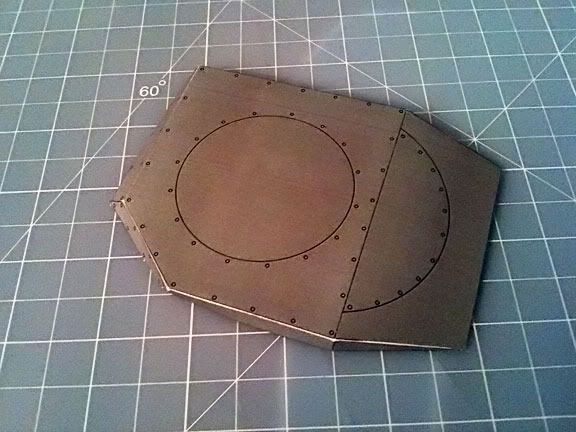
First things first, as with most of the Elli Patoroch templates I've had to shuffle some parts around to fit properly for us USLetter paper printers. And this was a BIG model. So big I had to separate the back flap from the main body and put it on a separate page.

Luckily that was the only piece on the entire model that I had to do this with.
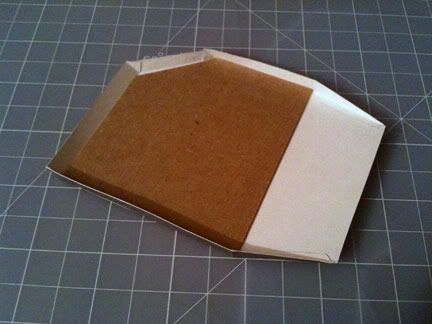
The next part (part #12) built quite easily though I found it odd that one piece had to be glued onto the rest of it. I don't know why he didn't at least attach one end of that part. (part 12a ) is the part in question.
And the base of it was laminated to cereal card. This is something I did quite a bit on this model. Nearly every flat surface on the base and track assembly was laminated. As it is so large I wanted to reinforce the structure as much as possible. I don't want to have spent 10 hours on it only to discover a major warp or find that its structural integrity was compromised.
I don't show it but when I mounted (part #12) onto the main body, I made a card spacer to fill the volume in its center. Again to prevent warp.
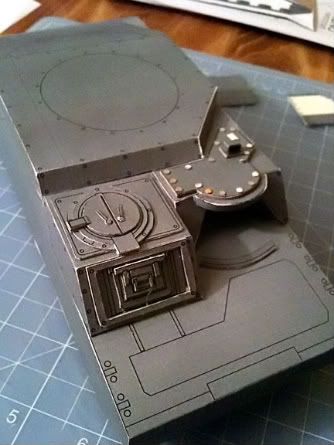
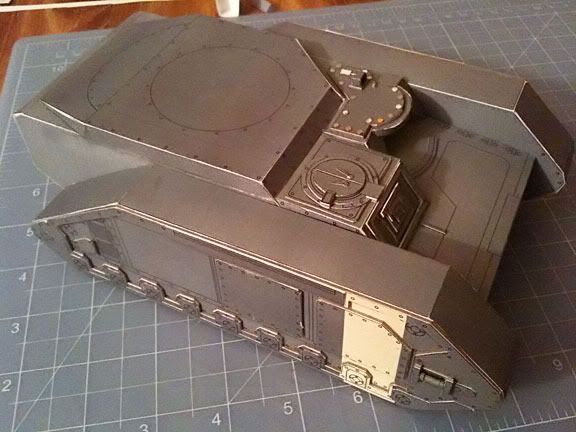
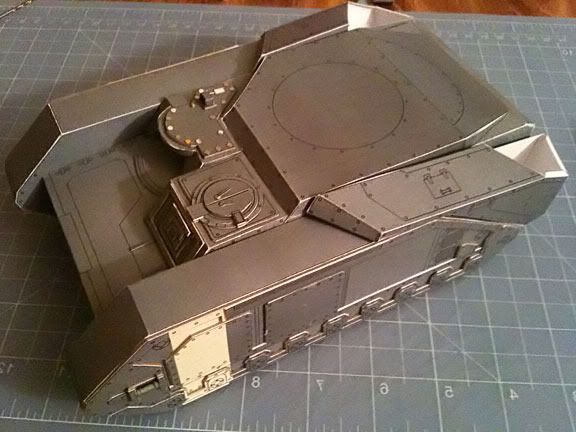
Various bits of detailing to the mostly completed Hull. I have some smaller rivets to place as well...
The Tracks components in progress... almost finished with the lamination and detail bits.
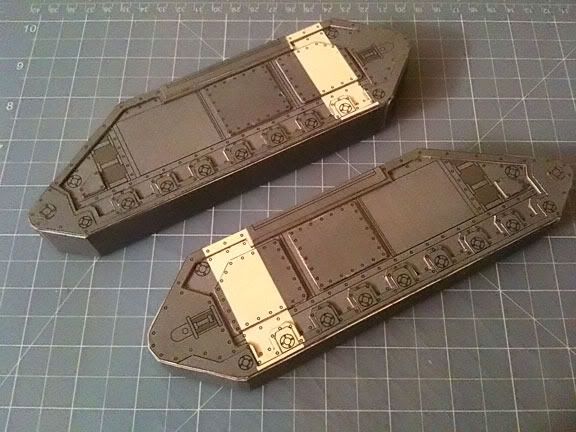
Gluing each track, one at a time to the Hull. Detailed bits finished except for a few minor extras.
I am dry fitting the upper hull(?) extension parts that extend over the track parts. I had to add some glue flaps for the separate under pieces needed to complete each side. Be sure to do this if you are building from cardstock, it has made all the difference.
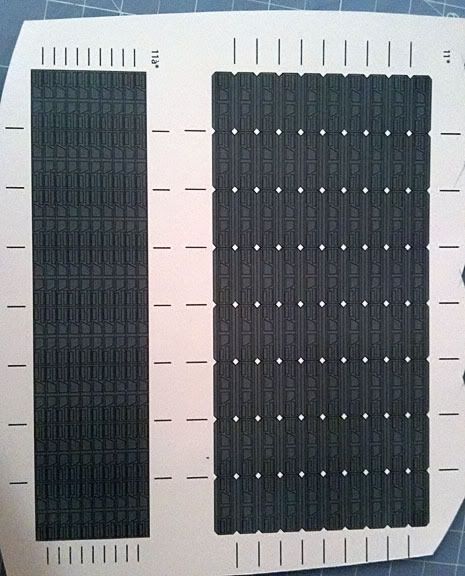
Here is what I've started doing for all tracks that have multiple piece laminates. It saves paper space and reduces the amount of cutting and trimming tremendously.
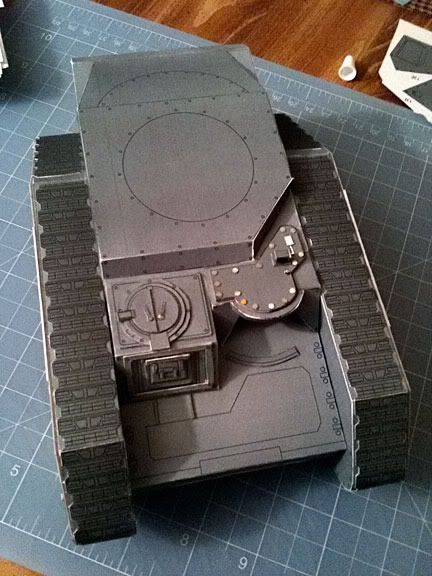
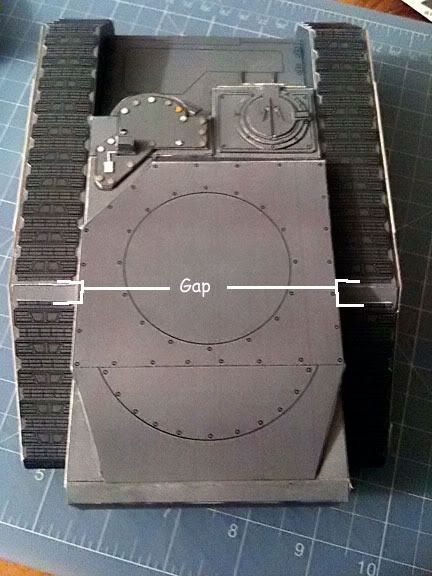
I've applied the treads but there was a gap on both sides. I placed the gape in a spot underneath the upper hull covering and n a corner so it will not be noticeable.
Tomorrow I'll cut and glue the laminates and mount the upper hull and turret.
~F
This will be more of a visual journal of the build rather than a detailed step by step.. SilverOxide has that market cornered...and I am not sure anything I could do would be anywhere close to that level of granularity.
I am hoping that you, like me, wished there were nice photos of assembled versions of all of Elli's wonder templates. Well I'll contribute as many as I can.
Build Time - 8 Hours * in progress* - assembling Turret & Treads
Tools
- 110lb Cardstock
- cereal box card for heavy laminates
- x-acto knife and lots of blades
- metal ruler
- 1/16" hole punch for rivets
- micro screw driver and pin vice drill bits for coiling paper tube barrels
- Aieleen's Tacky Glue (white pva)
First things first, as with most of the Elli Patoroch templates I've had to shuffle some parts around to fit properly for us USLetter paper printers. And this was a BIG model. So big I had to separate the back flap from the main body and put it on a separate page.
Luckily that was the only piece on the entire model that I had to do this with.
The next part (part #12) built quite easily though I found it odd that one piece had to be glued onto the rest of it. I don't know why he didn't at least attach one end of that part. (part 12a ) is the part in question.
And the base of it was laminated to cereal card. This is something I did quite a bit on this model. Nearly every flat surface on the base and track assembly was laminated. As it is so large I wanted to reinforce the structure as much as possible. I don't want to have spent 10 hours on it only to discover a major warp or find that its structural integrity was compromised.
I don't show it but when I mounted (part #12) onto the main body, I made a card spacer to fill the volume in its center. Again to prevent warp.
Various bits of detailing to the mostly completed Hull. I have some smaller rivets to place as well...
The Tracks components in progress... almost finished with the lamination and detail bits.
Gluing each track, one at a time to the Hull. Detailed bits finished except for a few minor extras.
I am dry fitting the upper hull(?) extension parts that extend over the track parts. I had to add some glue flaps for the separate under pieces needed to complete each side. Be sure to do this if you are building from cardstock, it has made all the difference.
Here is what I've started doing for all tracks that have multiple piece laminates. It saves paper space and reduces the amount of cutting and trimming tremendously.
I've applied the treads but there was a gap on both sides. I placed the gape in a spot underneath the upper hull covering and n a corner so it will not be noticeable.
Tomorrow I'll cut and glue the laminates and mount the upper hull and turret.
~F

