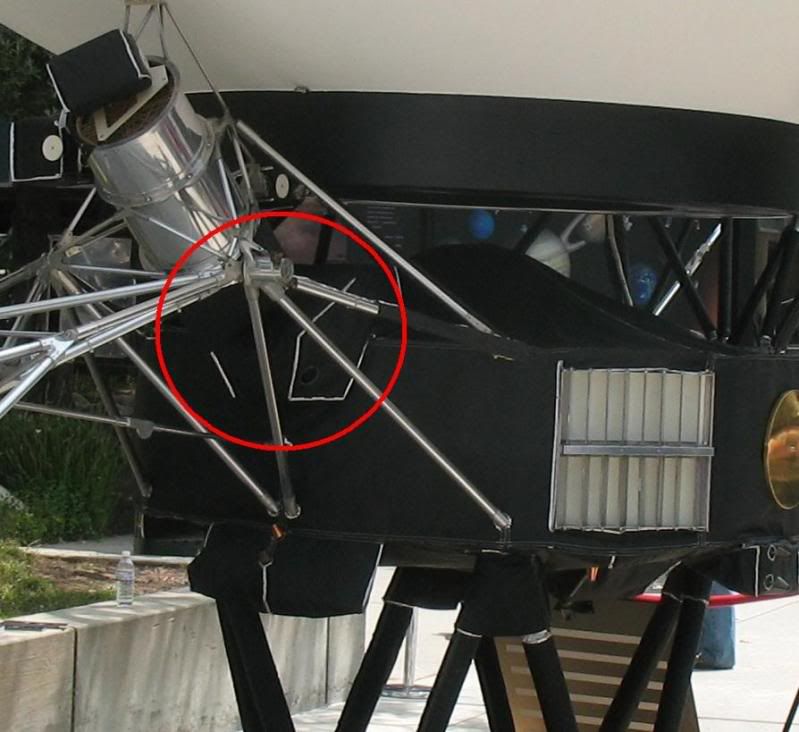
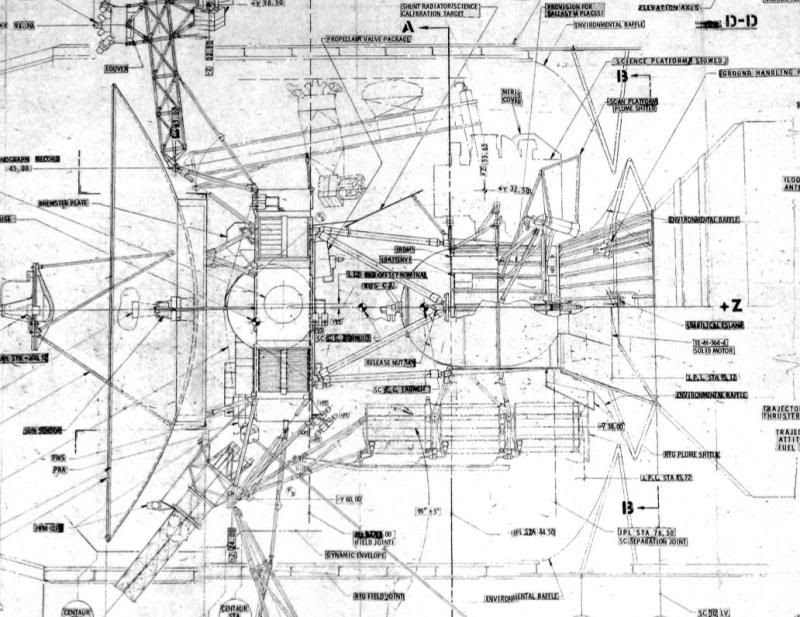
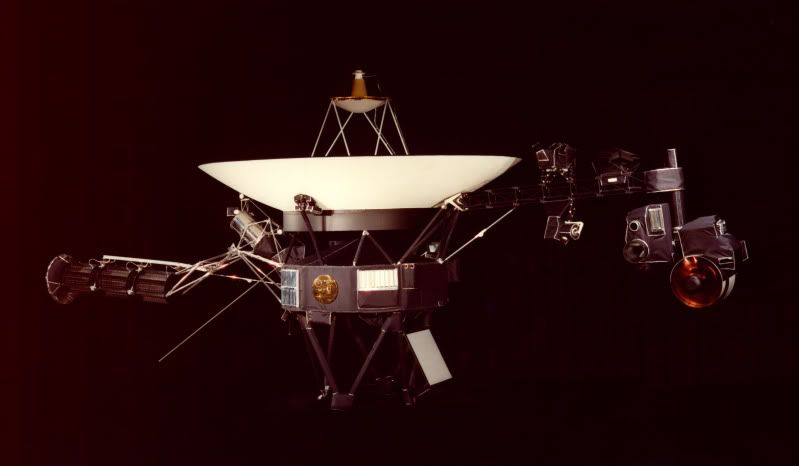
Hello all. Most everyone has probably seen Ton Noteboom's 1/24 scale Voyager spacecraft at jleslie's site, but so far I don't know if anyone else has built it. The actual spacecraft:
I myself built one last summer, which turned out fine by my own standards, but I decided to try something new with it and add more detail.
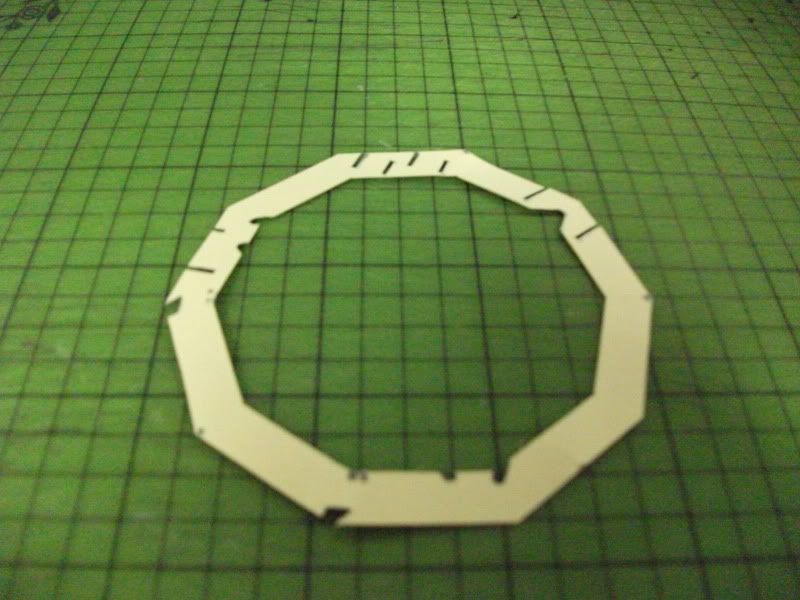
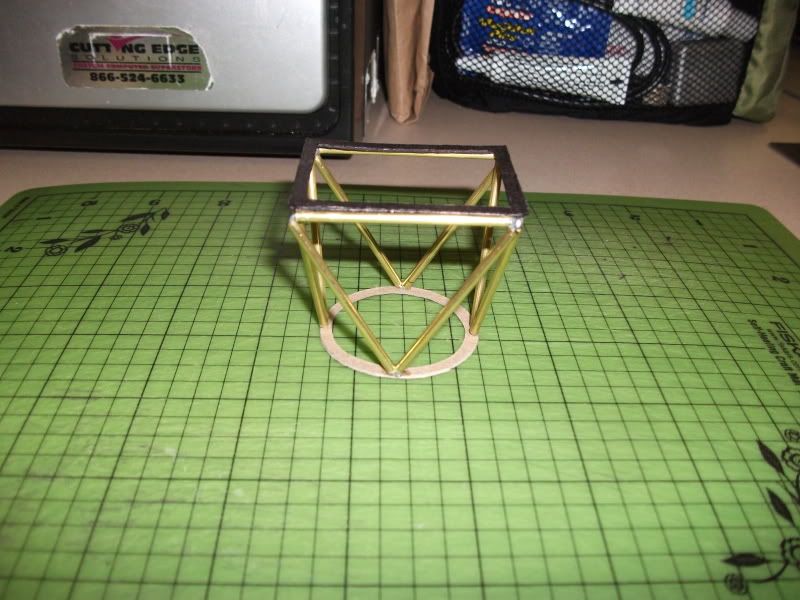
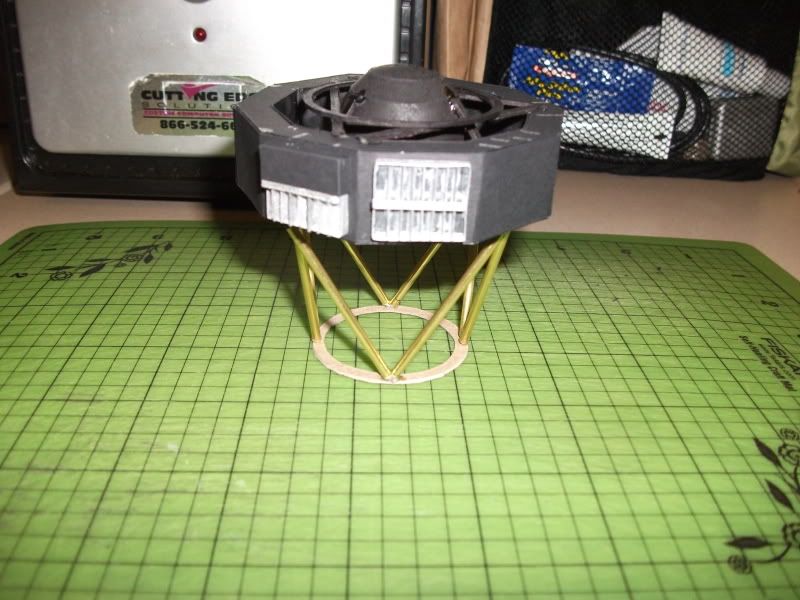
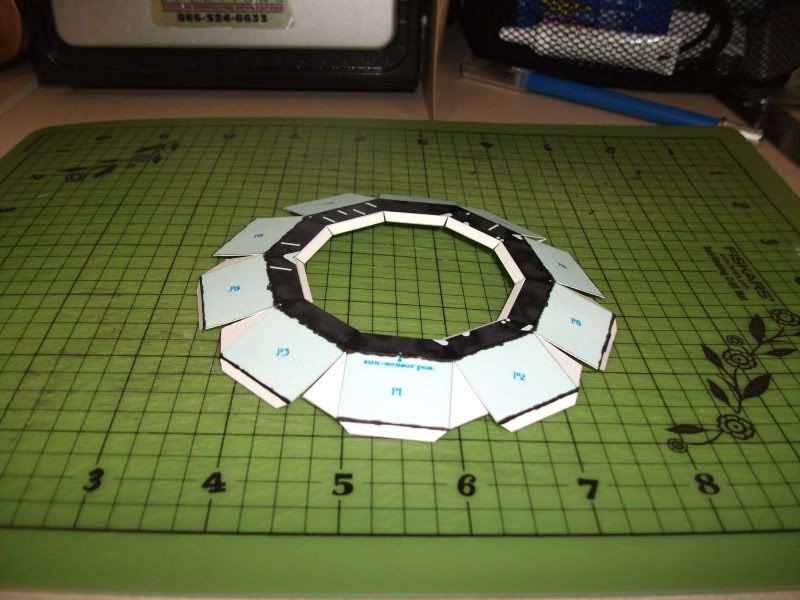
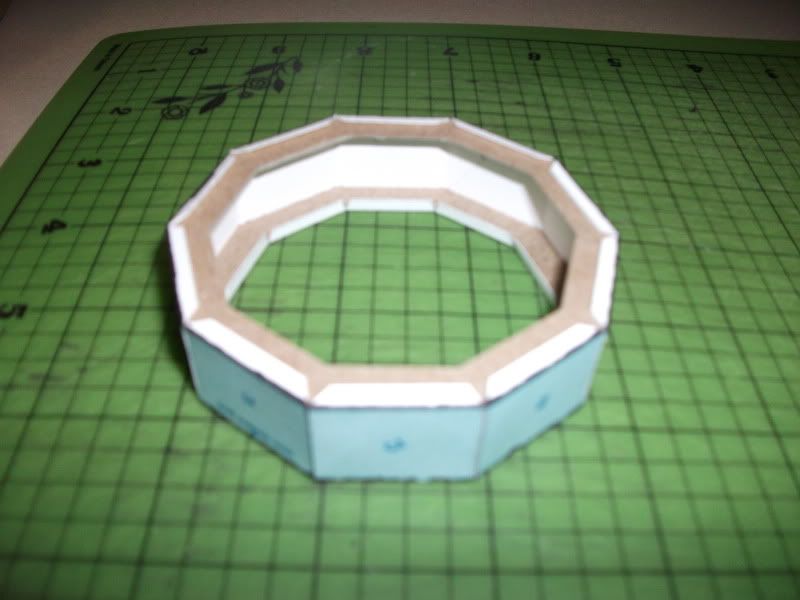
I started with the spacecraft bus.
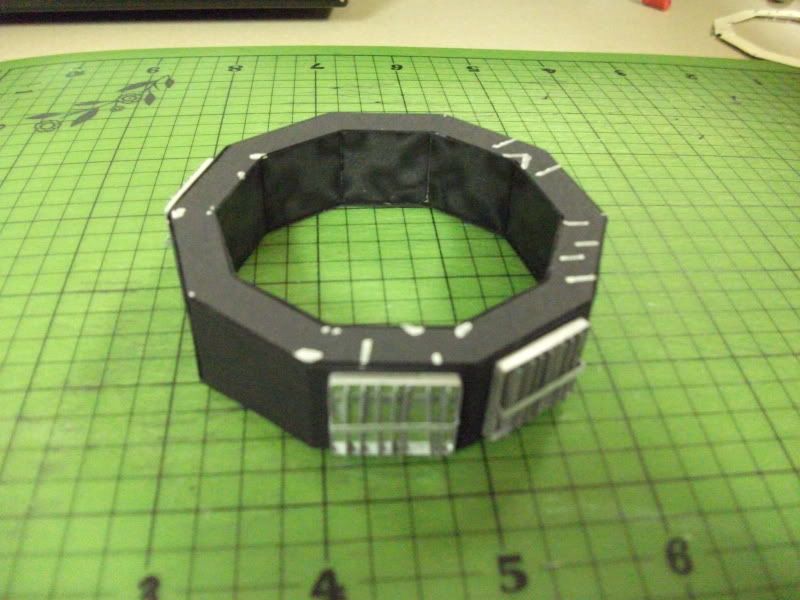
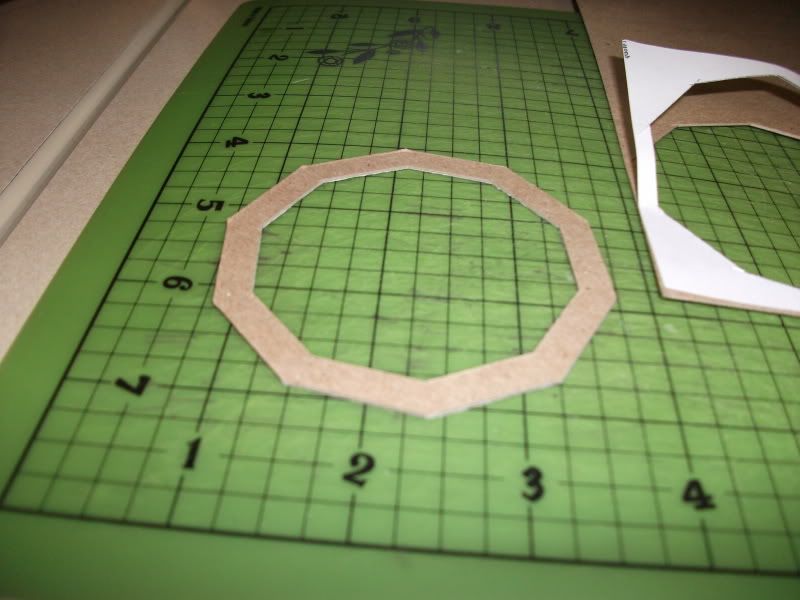
From my own experience, the bus can warp slightly after a time, so I bulked up the inside top and bottom with 1 mm card.
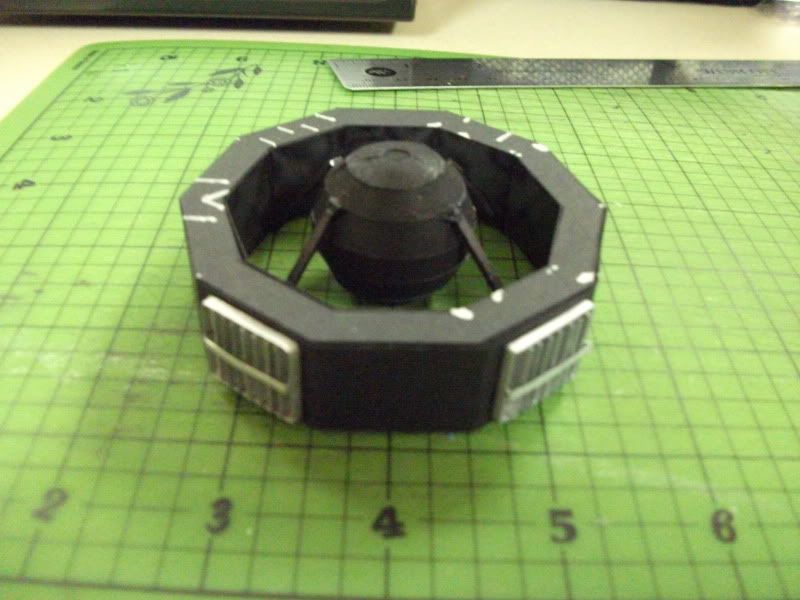
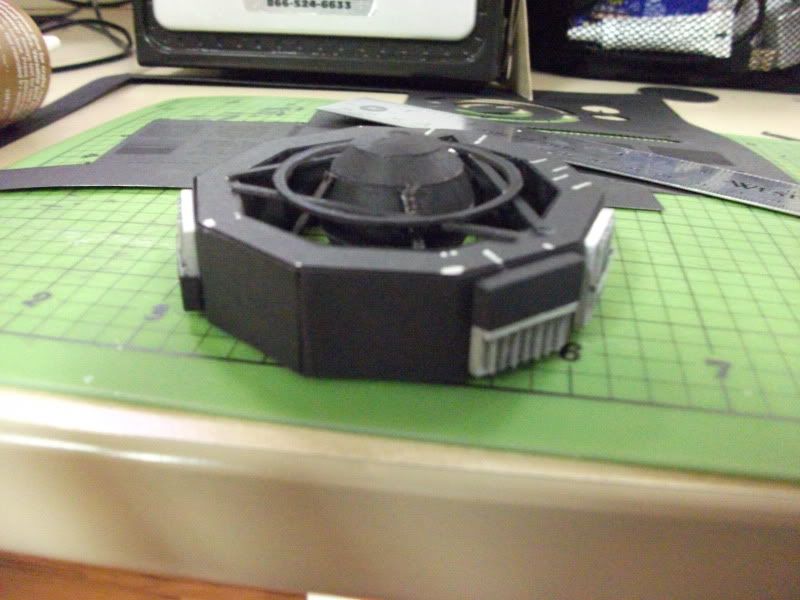
I covered the bus with black cardstock after assembly. Ton has a graphic representation of the blanket material, but I decided to use something else since the actual spacecraft's thermal blankets are matte in appearance. I did not score the edges of the cardstock, since the cloth doesn't sharply cover the edges of the spacecraft bus.
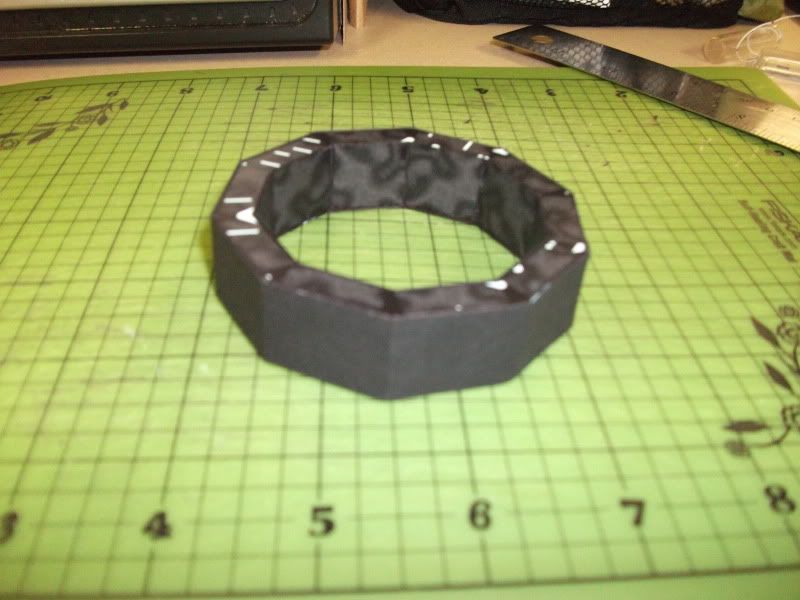
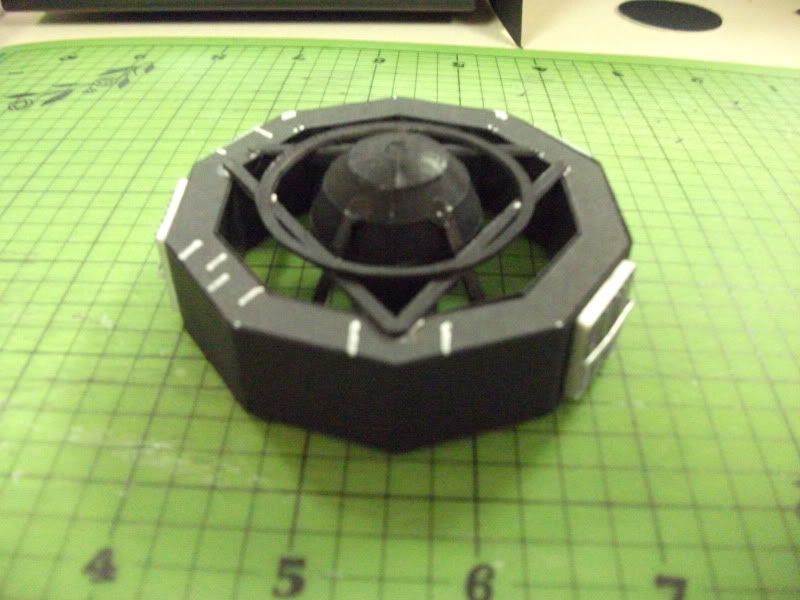
Top and bottom also were covered with a layer of black cardstock. Be warned that this will cover up all of the placement makings, so adding equipment later will require plenty of reference to the original patterns.
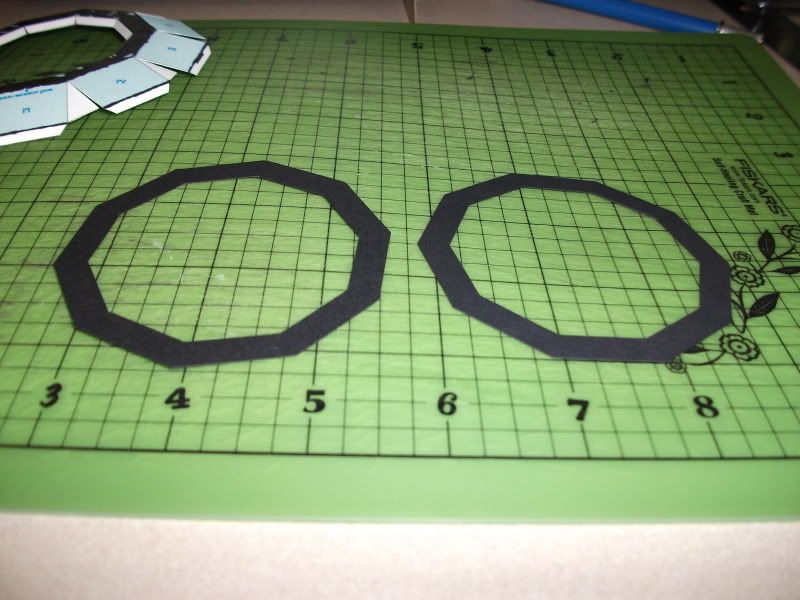
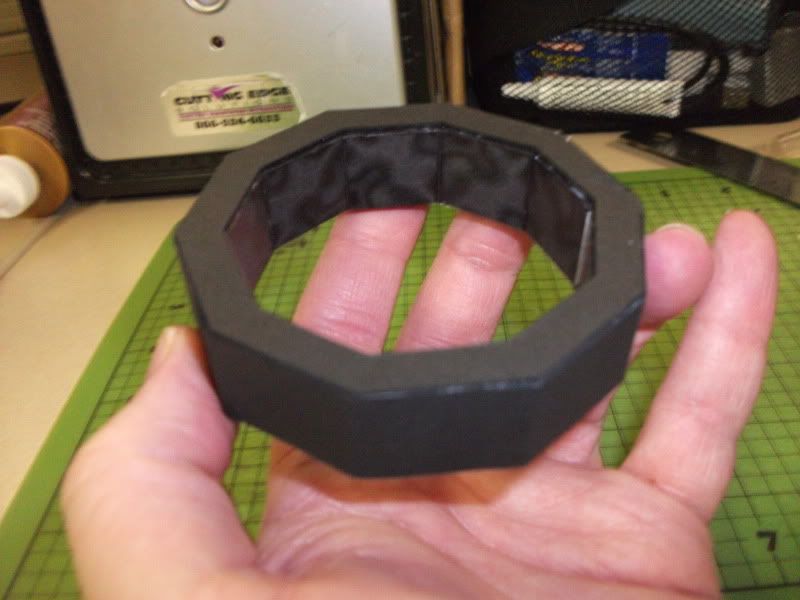
The central panels were not covered with extra card, as they won't be very visible later.
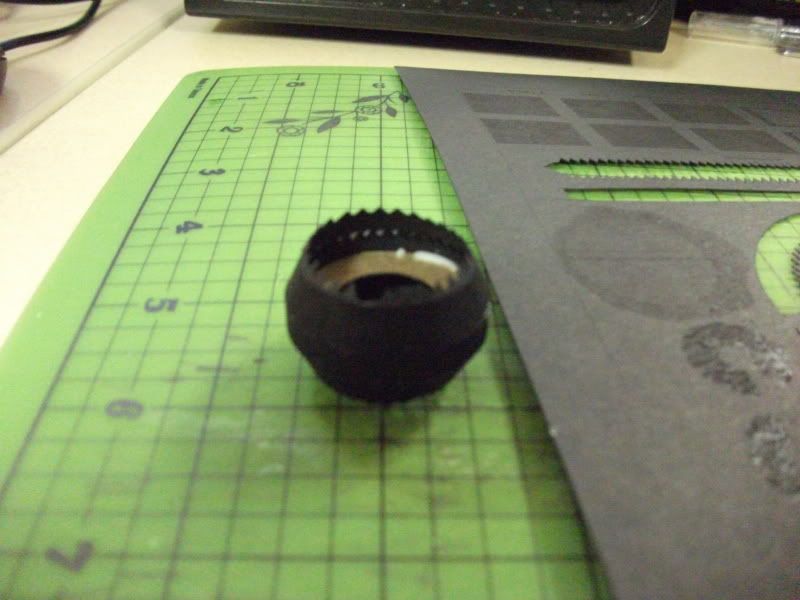
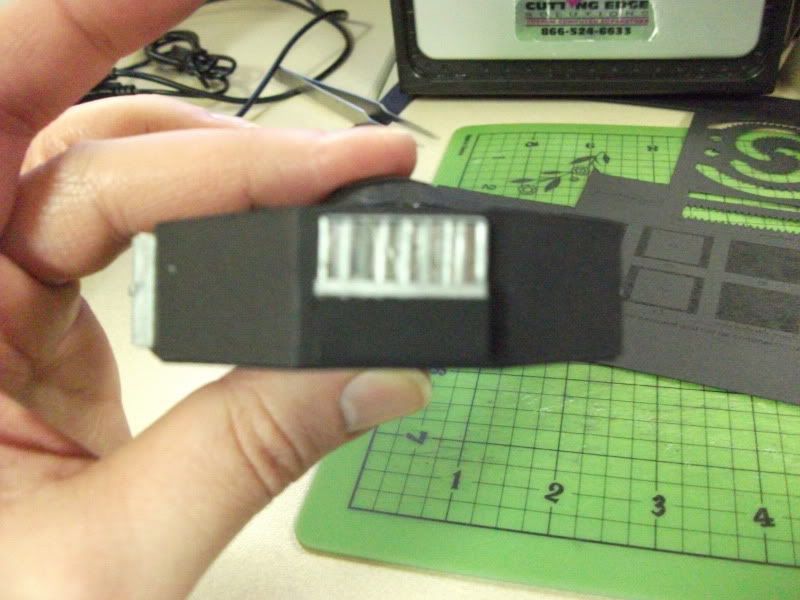
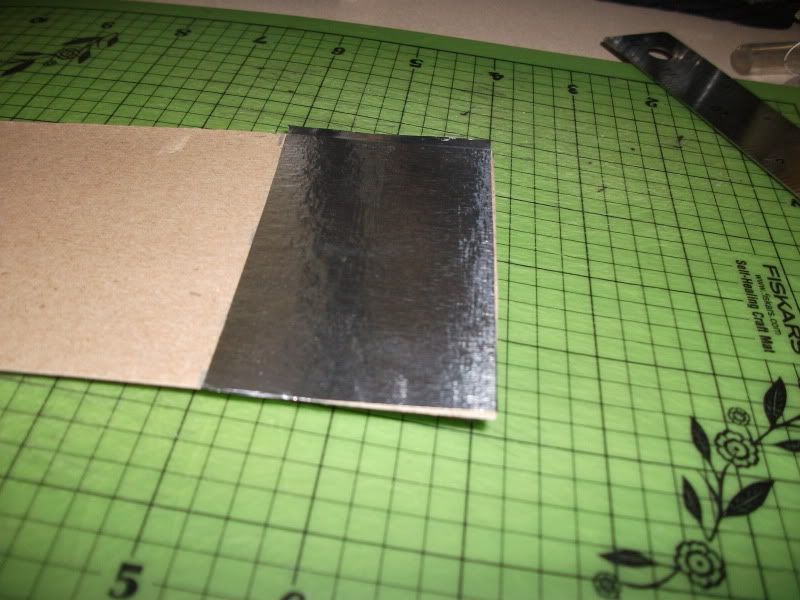
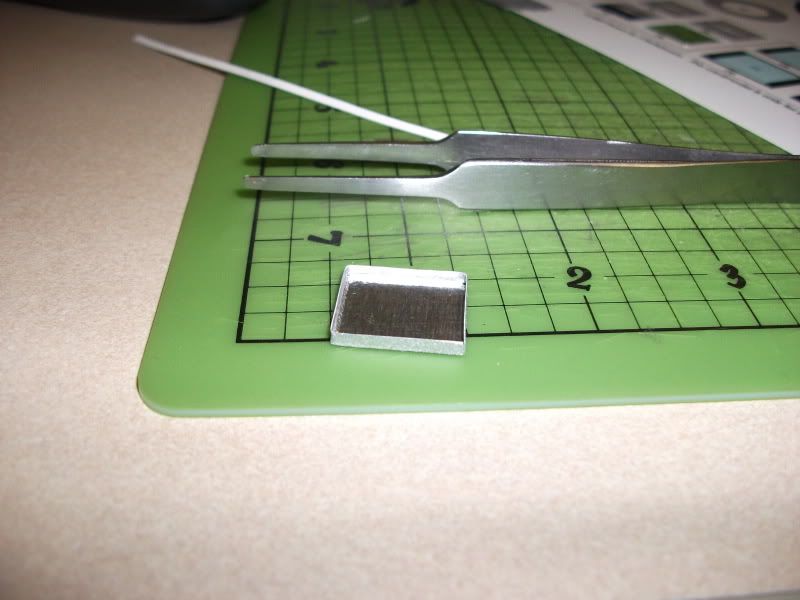
I decided that the thermal louvers on the spacecraft needed some three-dimensional detail, so I laminated aluminum foil to card and cut out the same size and shape provided for the louvers in the kit.
Using a 3 mm strip of card (colored with a metallic Sharpie) I built the louver into a box.
I then used more 3 mm strips to build up the louver's fins...
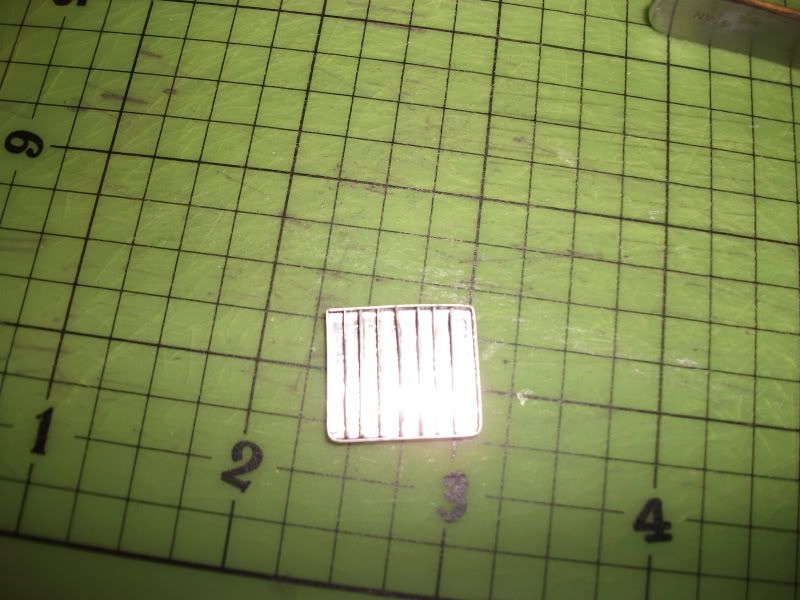
...and topped that off with another strip running horizontally across the fins.
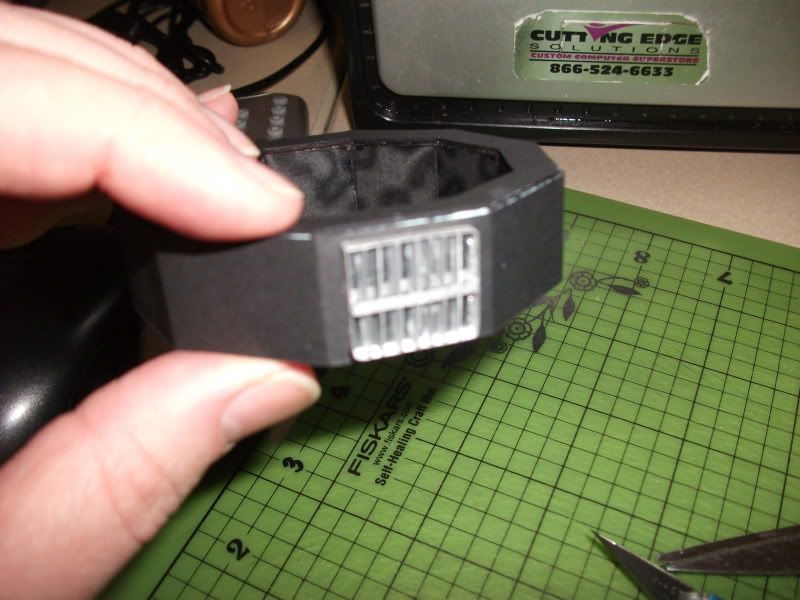
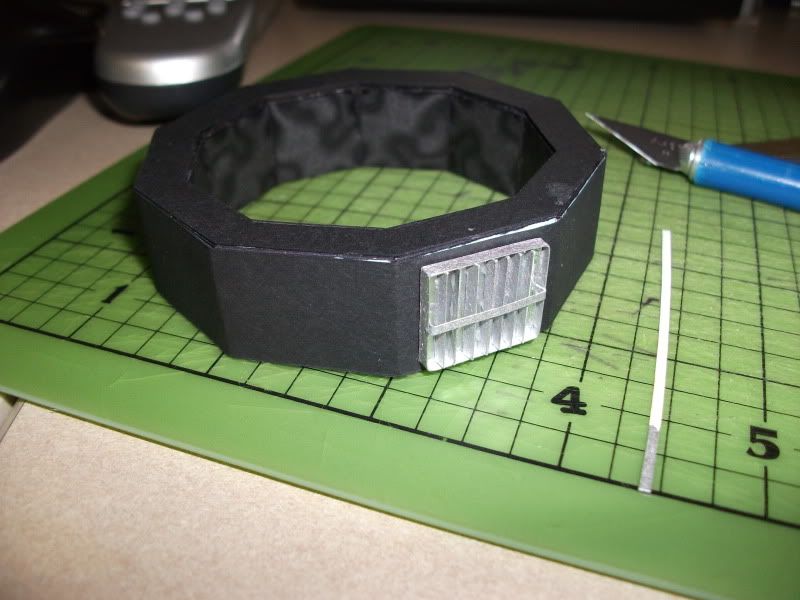
It's really not that crooked. The front bar juts out slightly in front of the fins, which makes it look a little off. :mrgreen:
I'd say it looks like a decent representation:
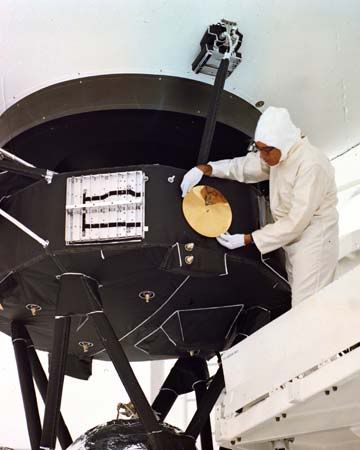
(The record cover is going to present challenges as well. The kit uses a photograph printed onto the bus, but I'm thinking about using the line diagram of the cover, shrinking it down, and printing it on gold stock. I want it to shine like the louvers do. As to how I'm going to shrink it to the correct size, I'm still trying to figure out.)
Some idiot then grabbed for his Xacto knife without paying attention. ops: I'm allowing the blood to clot before I build the next three louvers and move on to the hard parts: everything else.
Spoiler alert: I'm going to allow the booms to articulate, and there's going to be something attached to the bottom of the probe as well. Yogi can probably guess what that will be...")
I myself built one last summer, which turned out fine by my own standards, but I decided to try something new with it and add more detail.
I started with the spacecraft bus.
From my own experience, the bus can warp slightly after a time, so I bulked up the inside top and bottom with 1 mm card.
I covered the bus with black cardstock after assembly. Ton has a graphic representation of the blanket material, but I decided to use something else since the actual spacecraft's thermal blankets are matte in appearance. I did not score the edges of the cardstock, since the cloth doesn't sharply cover the edges of the spacecraft bus.
Top and bottom also were covered with a layer of black cardstock. Be warned that this will cover up all of the placement makings, so adding equipment later will require plenty of reference to the original patterns.
The central panels were not covered with extra card, as they won't be very visible later.
I decided that the thermal louvers on the spacecraft needed some three-dimensional detail, so I laminated aluminum foil to card and cut out the same size and shape provided for the louvers in the kit.
Using a 3 mm strip of card (colored with a metallic Sharpie) I built the louver into a box.
I then used more 3 mm strips to build up the louver's fins...
...and topped that off with another strip running horizontally across the fins.
It's really not that crooked. The front bar juts out slightly in front of the fins, which makes it look a little off. :mrgreen:
I'd say it looks like a decent representation:
(The record cover is going to present challenges as well. The kit uses a photograph printed onto the bus, but I'm thinking about using the line diagram of the cover, shrinking it down, and printing it on gold stock. I want it to shine like the louvers do. As to how I'm going to shrink it to the correct size, I'm still trying to figure out.)
Some idiot then grabbed for his Xacto knife without paying attention.
ops: I'm allowing the blood to clot before I build the next three louvers and move on to the hard parts: everything else.Spoiler alert: I'm going to allow the booms to articulate, and there's going to be something attached to the bottom of the probe as well. Yogi can probably guess what that will be...