

hi guys!!!I´ve taken getter1 model and modified it to get it transformable......so far I have chest, back, nose, cockpit interior and head mechanism ready. pictures will come soon as soon as I get my camera back....se you in a few days..
Vf-1a max tv transformable
- Thread starter maximiliano
- Start date
You are using an out of date browser. It may not display this or other websites correctly.
You should upgrade or use an alternative browser.
You should upgrade or use an alternative browser.
This is going to be interesting. Are you 'redesigning' or 'adapting' the parts to work?
How are you going to overcome the 'floppy factor' once you have got it working? I say this because even plastic models like transformers tend to come apart after a bit.
How are you going to overcome the 'floppy factor' once you have got it working? I say this because even plastic models like transformers tend to come apart after a bit.
I´m adapting the parts from getter model....I´m taking parts from the 3 modes....about the "floppy factor", I was thinking in using magnets....the prototipe won´t have magnet, so I can figure it out were to put them to get the finished model steady in fighter mode as in the other modes. the one thing that worries me are the hinges.....are made out of paper. I was thinking on making them with acetate....but I decided for paper...lets see how this works...
P/S: pictures will come soon...
P/S: pictures will come soon...
updates....
back pack is done
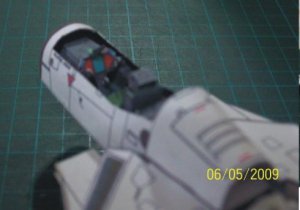
cockpit allready glued to the torso
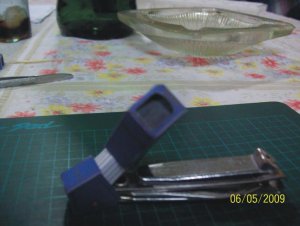
I decided to take pictures with my cell phone....the cuality if not the best, but I guess it would be enough to show the progress....BUT I CAN´T CONECT MY PHONE TO THE PC!!!!!a friend promesed to lend me his bloototh adapter..so in a few days I´ll give you the progress pictures
back pack is done
cockpit allready glued to the torso
I decided to take pictures with my cell phone....the cuality if not the best, but I guess it would be enough to show the progress....BUT I CAN´T CONECT MY PHONE TO THE PC!!!!!a friend promesed to lend me his bloototh adapter..so in a few days I´ll give you the progress pictures
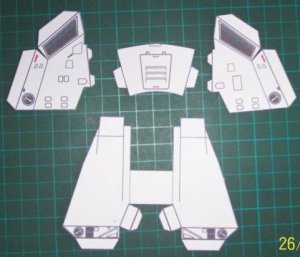
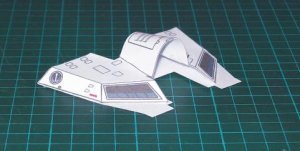
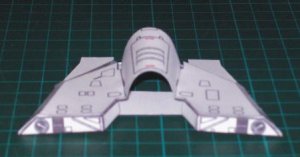
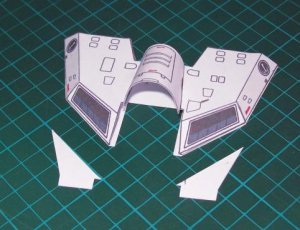
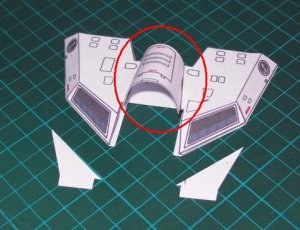
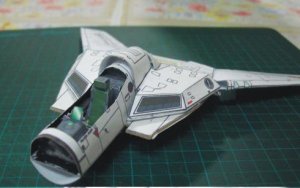
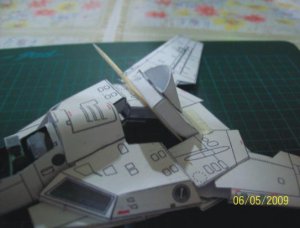
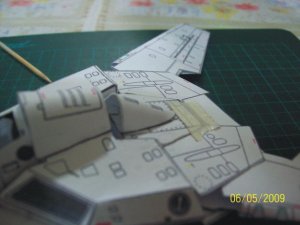
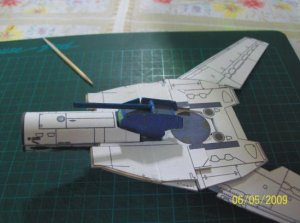
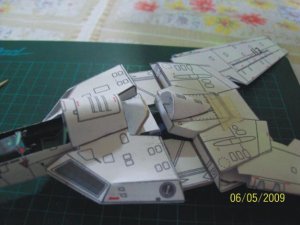
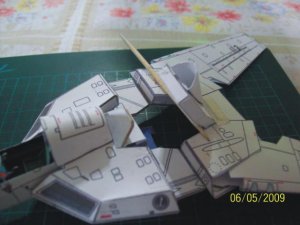
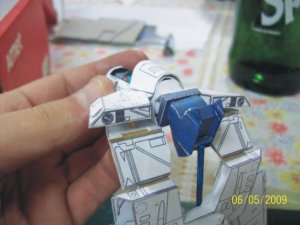
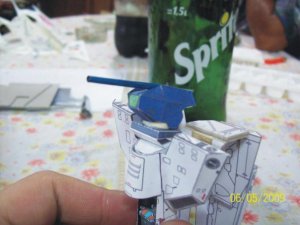
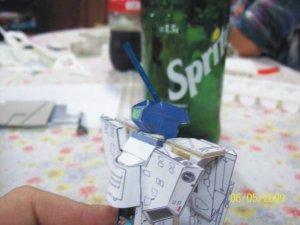
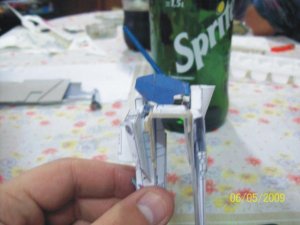
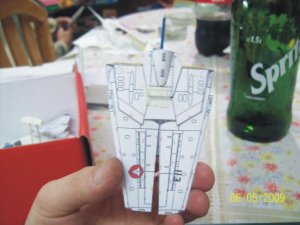
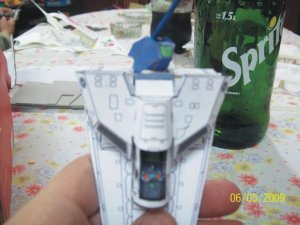
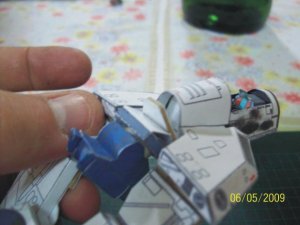
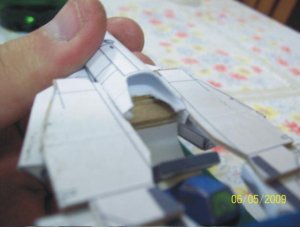
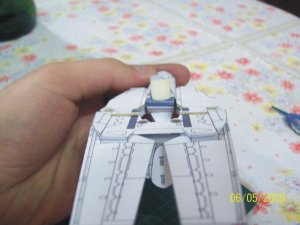
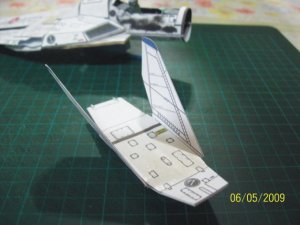
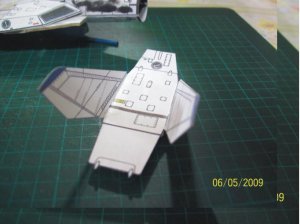
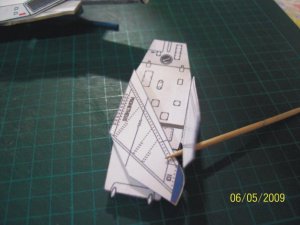
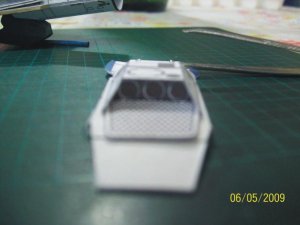
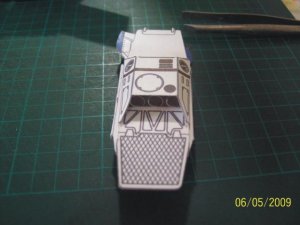
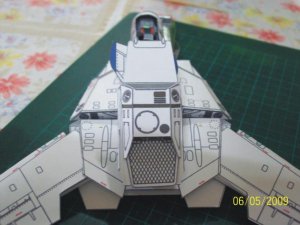
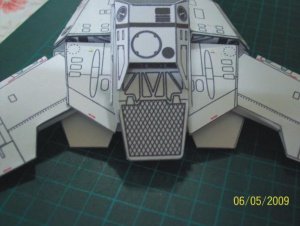
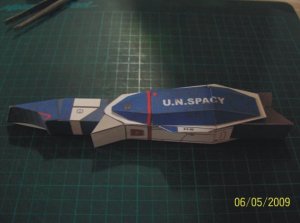
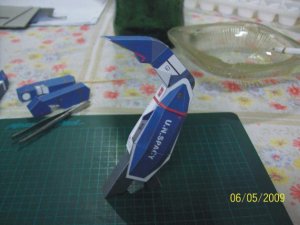
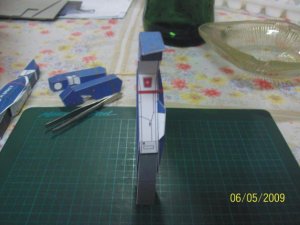
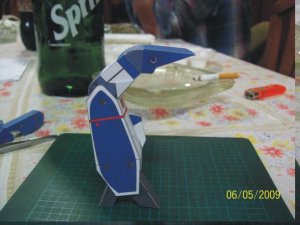
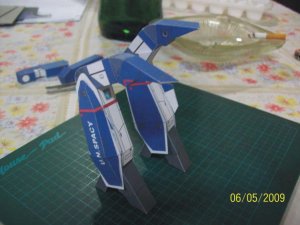
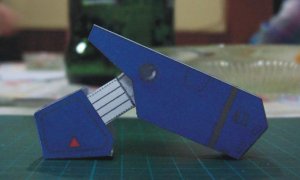
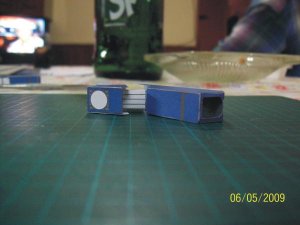
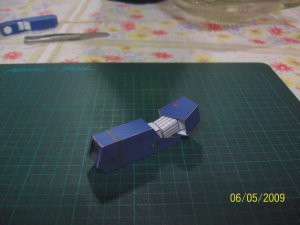
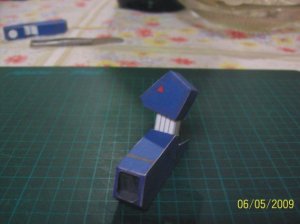
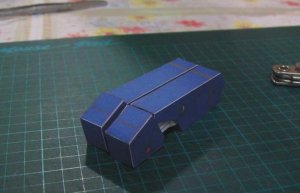
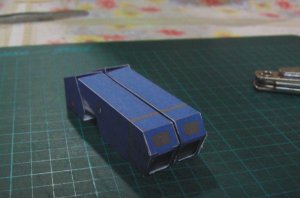
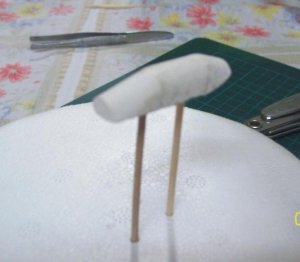
ok!!as promesed.....PICTURES!!!
note that this is just the "prototipe model" and have no magnets to hold it together in the diferent modes.....this is just to find out were to put the magnet....
on to the pictures....
note that this is just the "prototipe model" and have no magnets to hold it together in the diferent modes.....this is just to find out were to put the magnet....
on to the pictures....
Attachments


Max,
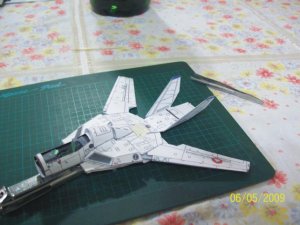
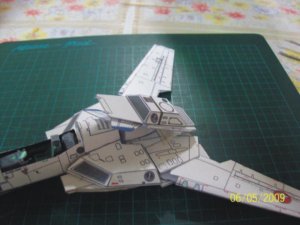
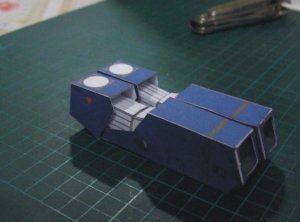
Impressive so far. That part you pointed out is actually supposed to tuck in on the chest. The nose section's attachment level was different in Battroid mode from the Fighter mode. You could tuck that in and then trim down the rear part of the spine to match it. That would give you a better look IMO.
The head block's mechanisim looks more complicated than it has to be. I think there's an easier way from the look of things in your pics.
PM me if you're intrested in my thought on the head block. I can send you a sketch.
The upper torso hinges look like they need a re-design for function as well as a re-texture to match the functioning feature.
Also keep in mind the posable arms are bigger than the Fighter mode ones as well as the Battroid ver. B.Pak so those may pose a problem for you. The smaller B.Pak may be needed and the arms should work as is but they will limit the clearance for the GU-11 (much like the old 1/72 plastic transforming kits).
I take it you will use the extention bar method for the legs? That's probably your best bet there")
You still have a very long way to go still but things are looking promising Keep up the good work.
G1
Impressive so far. That part you pointed out is actually supposed to tuck in on the chest. The nose section's attachment level was different in Battroid mode from the Fighter mode. You could tuck that in and then trim down the rear part of the spine to match it. That would give you a better look IMO.
The head block's mechanisim looks more complicated than it has to be. I think there's an easier way from the look of things in your pics.
PM me if you're intrested in my thought on the head block. I can send you a sketch.
The upper torso hinges look like they need a re-design for function as well as a re-texture to match the functioning feature.
Also keep in mind the posable arms are bigger than the Fighter mode ones as well as the Battroid ver. B.Pak so those may pose a problem for you. The smaller B.Pak may be needed and the arms should work as is but they will limit the clearance for the GU-11 (much like the old 1/72 plastic transforming kits).
I take it you will use the extention bar method for the legs? That's probably your best bet there
You still have a very long way to go still but things are looking promising
Keep up the good work.G1
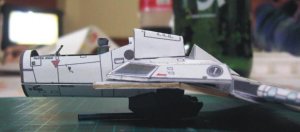
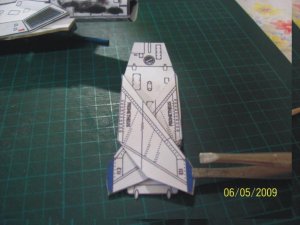
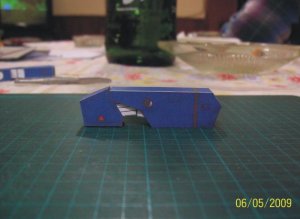
I haven´t been working on this proyect this days.....my job is killing me....but here are more pictures of what I made so far..hope you like it
Attachments
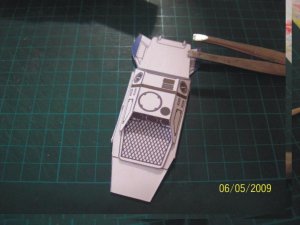


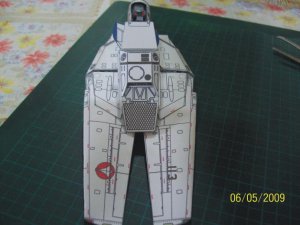
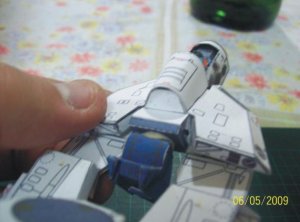
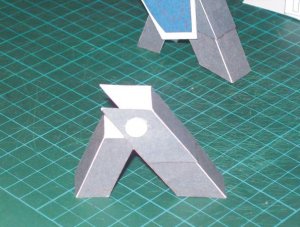
more...note that the foot is kind of twisted...this is because it hasn´t been glued. this way it can be poseable and because it fits tight inside the leg it won´t fall...I have tested this...
Attachments
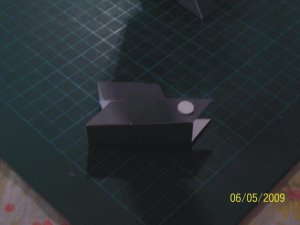

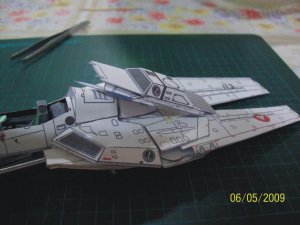
more...this are diferent views fo the arms....the last picture is the mold for the canopy...I´ll make this one by vacuforming...I´m building a vacuforming machine. It´s a very simple machine.I´ll send blueprints for that in another thread...
Attachments
ok guys that´s it for today....as soon as job slows a little bit down I´ll continue with this proyect....I know is not perfect, but I JUST LOVE IT!!!!JEJEJE