Scratch Seats
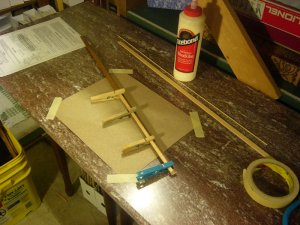
Howdy! Got out the dollhouse stripwood and cobbled together a banister railing and baseboard to make a long bench which was then cut into seats. A preliminary sanding using 100 grit paper taped down to the tabletop flattened one rounded side of the railing (seat bottom) to mate it against the baseboard (seat back). After it had dried I again sanded down the bottom to lower the seats a hair.
I set the Chopper to 3/8", roughly the width I was looking for, and used it to score a mark on the strip which became a pilot mark for the miter saw. A couple popped apart where the wood glue may have been thin but a little sanding and some CA fixed that.
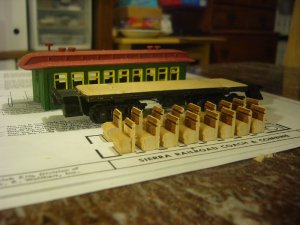
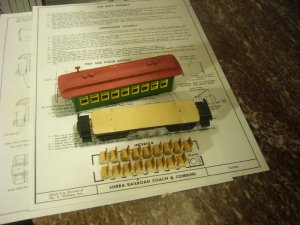
Here are some pictures. The last two show the seats just sitting on the modified plans (enlarged template...why Ulrich just didn't make it full size to begin with doesn't make sense to me...I'm guessing it was to get both coach and combine floor diagrams on the same instruction sheet so they'd only have to print one...) The first is just the two strips clamped while the glue dries.


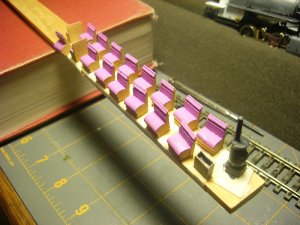
Up next - some touch-up paint on the shell as well as painting the seats and other interior details. We'll see how much I get done tonight before the midnight feeding. Wife and kids are at MOPS tomorrow morning so I'll have a quiet house to maybe do some airbrushing...I want to put a smoother coat on the roof, despite my very smooth brush job. Good excuse to pull out the airbrush and fire up the compressor.
Howdy! Got out the dollhouse stripwood and cobbled together a banister railing and baseboard to make a long bench which was then cut into seats. A preliminary sanding using 100 grit paper taped down to the tabletop flattened one rounded side of the railing (seat bottom) to mate it against the baseboard (seat back). After it had dried I again sanded down the bottom to lower the seats a hair.
I set the Chopper to 3/8", roughly the width I was looking for, and used it to score a mark on the strip which became a pilot mark for the miter saw. A couple popped apart where the wood glue may have been thin but a little sanding and some CA fixed that.
Here are some pictures. The last two show the seats just sitting on the modified plans (enlarged template...why Ulrich just didn't make it full size to begin with doesn't make sense to me...I'm guessing it was to get both coach and combine floor diagrams on the same instruction sheet so they'd only have to print one...) The first is just the two strips clamped while the glue dries.


Up next - some touch-up paint on the shell as well as painting the seats and other interior details. We'll see how much I get done tonight before the midnight feeding. Wife and kids are at MOPS tomorrow morning so I'll have a quiet house to maybe do some airbrushing...I want to put a smoother coat on the roof, despite my very smooth brush job. Good excuse to pull out the airbrush and fire up the compressor.


