UHU02's Tie Interceptor

lyter1958

Esteemed Member
Ok guys
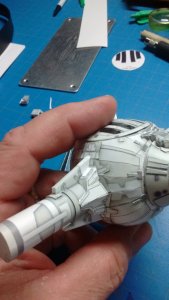
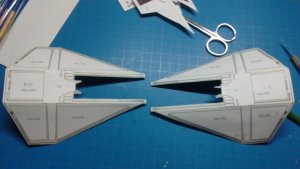
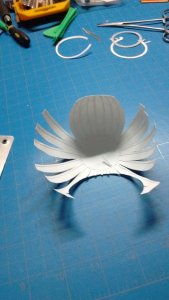
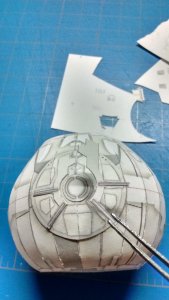
i'm back at it again. this time it's UHU's tie interceptor, you have to have a bad guy to go with the good guy.
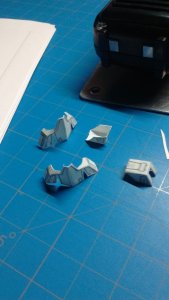
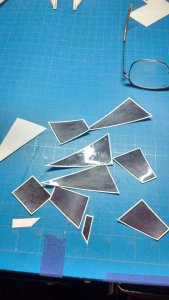
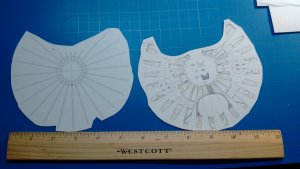
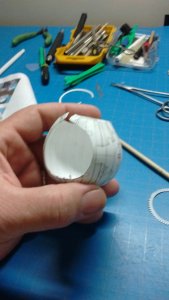
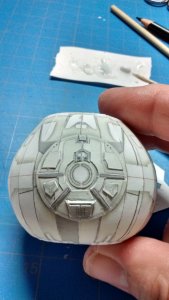
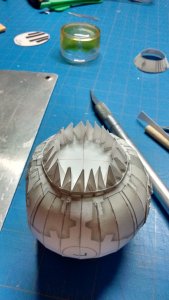
this will not be a fast build like the other one's . i'm ading little things here and there during the build to make it "my own" you could say. IMG_20160612_135512843.jpgthe cockpit just seems drab to me
IMG_20160612_144342947.jpg 
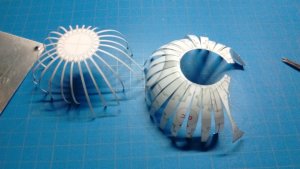
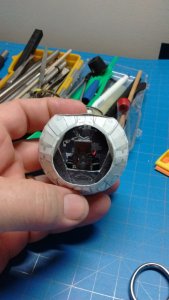
so lets add some wires to make the cables stand out
IMG_20160612_143913607.jpg 
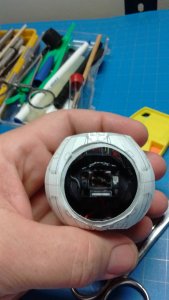
looks better , i think
IMG_20160619_133719049_HDR.jpg done
 

Attachments

  • IMG_20160619_133736627_HDR.jpg
    IMG_20160619_133736627_HDR.jpg
    1.1 MB · Views: 27

lyter1958

Esteemed Member
i'm only getting maybe a hour or so every other day or so to work on it. with it being so nice out and all, i'm told that i should be outside doing things:). like i'm a little kid again...
ok, here are so more pic's of whats been doneIMG_20160619_160636816_HDR.jpg this was a fun time i'll tell you
 

Attachments

  • IMG_20160619_133821946.jpg
    IMG_20160619_133821946.jpg
    1.1 MB · Views: 13
  • IMG_20160619_155158348.jpg
    IMG_20160619_155158348.jpg
    1.3 MB · Views: 16
  • IMG_20160619_161812805_HDR.jpg
    IMG_20160619_161812805_HDR.jpg
    1.1 MB · Views: 13
  • IMG_20160619_164605553.jpg
    IMG_20160619_164605553.jpg
    1.3 MB · Views: 15
  • IMG_20160620_115005563.jpg
    IMG_20160620_115005563.jpg
    1.2 MB · Views: 15

lyter1958

Esteemed Member
and now the "bathtub" is inside the body. and i almost said the heck with it cause it would not fit in right. then realized i was putting it in upside down. no wounder it wouldn't work. too much sunlight i guess.
 

Attachments

  • IMG_20160620_143412354.jpg
    IMG_20160620_143412354.jpg
    1.2 MB · Views: 32
  • IMG_20160620_143430369.jpg
    IMG_20160620_143430369.jpg
    1.2 MB · Views: 20
  • IMG_20160620_150742309_HDR.jpg
    IMG_20160620_150742309_HDR.jpg
    1.2 MB · Views: 22
  • IMG_20160620_152021036_HDR.jpg
    IMG_20160620_152021036_HDR.jpg
    1.2 MB · Views: 22

lyter1958

Esteemed Member
thank guys, its a fun build so far . like i said before that i'm gonna try to do things a little different here and there. here's some more pic's
IMG_20160622_154923978_HDR.jpg using a old flashlight lens to help with the curve in the hatch
IMG_20160624_152727308_HDR.jpg the engine.. just looks drab to me
IMG_20160624_153019103_HDR.jpg some parts left over from the x-wing..hummmm
IMG_20160624_153335537.jpg cut n glue
IMG_20160624_153745248.jpg much better
IMG_20160624_160256553_HDR.jpg a lot better
IMG_20160624_163705721.jpg need to do something here too
IMG_20160624_164901614_HDR.jpg i know, i'll "try" to make a hinge for the hatch. and i said i'll "try"...
 

Attachments

  • IMG_20160624_151628651_HDR.jpg
    IMG_20160624_151628651_HDR.jpg
    1.2 MB · Views: 14

lyter1958

Esteemed Member
well, i went and did it. me scares meself. and it only took me a half an hour to do it. does that mean that i'm starting to do things better???
IMG_20160627_160130924.jpg the hatch and a cut n bent staple
IMG_20160627_160947834.jpg part # 16b , took a pin and punched holes on either side
IMG_20160627_161515616_HDR.jpg 16b glued to 16a
IMG_20160627_161754914.jpg parts glued to body and paperclip moves
IMG_20160627_162645241_HDR.jpg cut some parts off of leftover parts from the x-wing
IMG_20160627_164014342.jpg HOLY CRAPPP... it worked!!!!!
IMG_20160627_164028956.jpg like i said before... me scares me self.:Drinks::Drinks:
 

Rhaven Blaack

!!!THE MAN BEHIND THE CURTAIN!!!
Staff member
Administrator
Moderator
WOW! :surprise::surprise::surprise: CONGRATULATIONS!:Congrats:
I like that you were able to make the hatch work!!! thumbsup :Bravo:
 

lyter1958

Esteemed Member
i know, right.... i'm gonna use it on a couple other builds later on. that is, when i get a chance to do them
 

Gandolf50

Researcher of obscure between war vehicles...
Staff member
Moderator
Great job on the hatch! I think that is the best part of modeling! Having an idea and making it work!
There are so many great models out there that are really great, then the designer goes and only includes the lower half of an engine, when the model is fully able to have a complete engine! I say " re-design on the fly and change the hood, frame, and every thing that needs to and include a full engine, and a hinged hood so you can show your work! Not only does it give you a sense of accomplisment, it helps others with inspiration for their modeling! Great work lyter1958!!:Bravo:
 

lyter1958

Esteemed Member
thanks Gandolf50,
thought i'd give it a try. the other way just looked boring to me. and i'd be the one losing the hatch.
 

Revell-Fan

Co-Administrator
Staff member
Administrator
Moderator
I had to look at UHU's build again to see that the hinge was NOT part of the original kit. Excellent idea! thumbsup
 

lyter1958

Esteemed Member
thanks Revell-Fan
i printed out his build to follow and i didn't see anything there. so i guess it's a first? i'm happy it worked out
ok, a little more of the build. this has a LOT more parts than the x-wing
 

Attachments

  • IMG_20160630_152200928.jpg
    IMG_20160630_152200928.jpg
    1.2 MB · Views: 9
  • IMG_20160630_152207219.jpg
    IMG_20160630_152207219.jpg
    1.2 MB · Views: 8
  • IMG_20160630_161337545.jpg
    IMG_20160630_161337545.jpg
    1.2 MB · Views: 10
  • IMG_20160630_161753030_HDR.jpg
    IMG_20160630_161753030_HDR.jpg
    1.2 MB · Views: 9
  • IMG_20160630_164103952.jpg
    IMG_20160630_164103952.jpg
    1.1 MB · Views: 20

zathros

*****SENIOR ADMINISTRATOR*****
Staff member
Administrator
Moderator
The hinges function excellently, I would recommend boxing them so the metal is hidden. You will be able to figure this out easily, it will not take much time, but will take your model even further over the top!! :)
 

lyter1958

Esteemed Member
thanks Zathros, i did use a few pieces left over from the x-wing build to hide the staple mostly, a little still shows, but not much
 

lyter1958

Esteemed Member
i hope everyone will use it. it does add that POP that you always say to try to put into models,zathros. and it does help to not loose the hatch :)
 

lyter1958

Esteemed Member
hi all, well i got a chance to do a little more work on the TIE . this one is really taking a long time to work on it. a LOT of small parts to cut,fold, and glue on.
but hey, thats what makes these baby's look so great. i know, enough of the chit-chat, get to the pic's
IMG_20160704_105901957.jpg 5 pieces per wing...thick and heavy
IMG_20160710_130002999.jpg now the fun stuff
IMG_20160710_133246596.jpg did my packing tape trick to make 'em shine
 

Attachments

  • IMG_20160710_125955034.jpg
    IMG_20160710_125955034.jpg
    1.1 MB · Views: 8
  • IMG_20160710_143324045_HDR.jpg
    IMG_20160710_143324045_HDR.jpg
    1.3 MB · Views: 10
Top