UHU02'S DISCOVERY

lyter1958

Esteemed Member
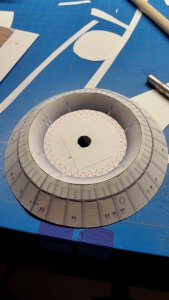
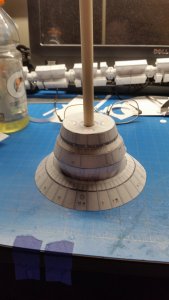
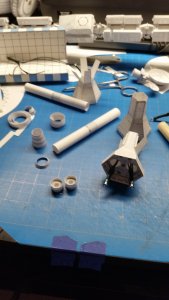
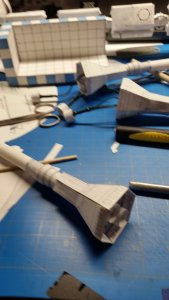
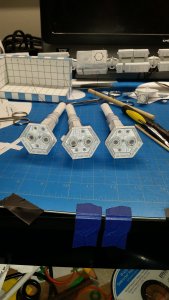
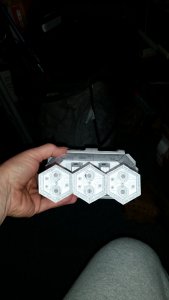
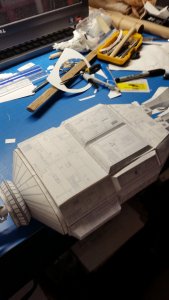
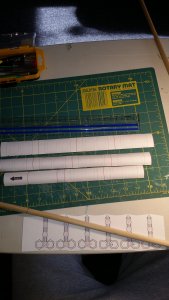
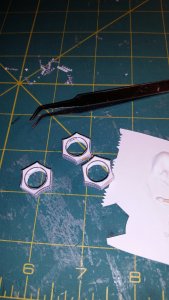
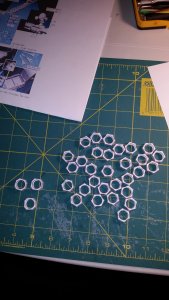
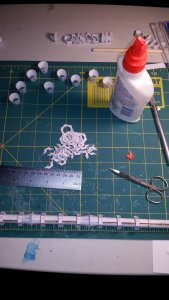
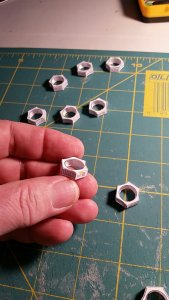
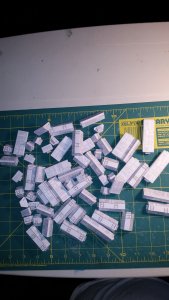
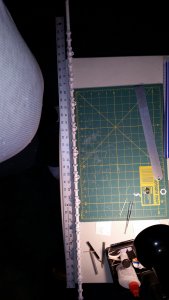
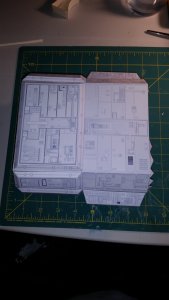
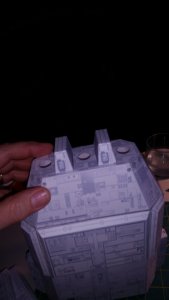
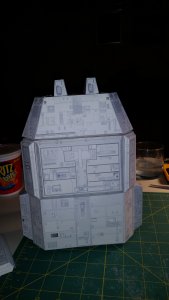
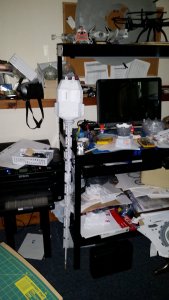
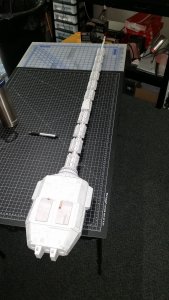
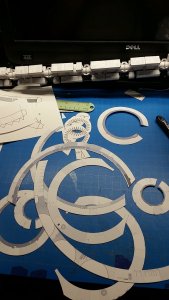
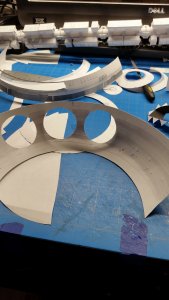
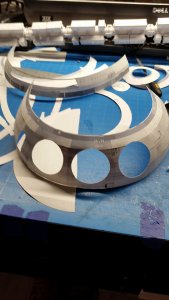
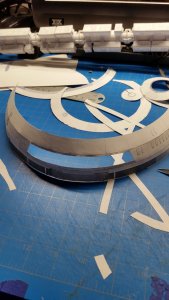
Ok, here we go again with my build of the Master's model. To start off as always, i print on 11x17 paper. Alot easier for me to roll and see.( getting younger each year). The spine is a 7/16 wooden dowel at 4' long..( i know, "4 foot...is this guy nuts??) . cutting and rolling out the pieces for the spine wasn't too bad
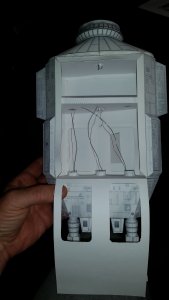
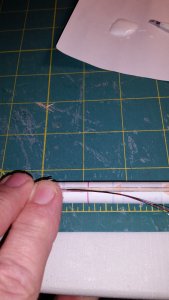
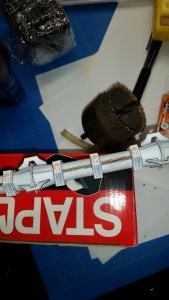
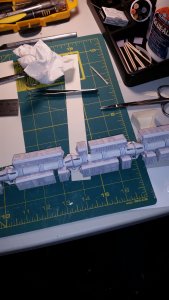
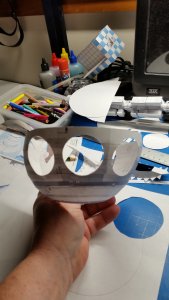
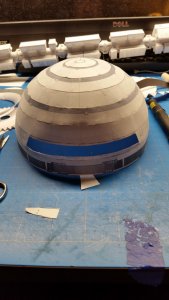
after gluing them to the dowel it left a small gap. so i cut a trough to run wires the entire length.
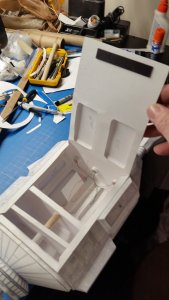
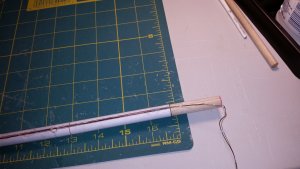
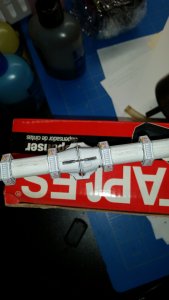
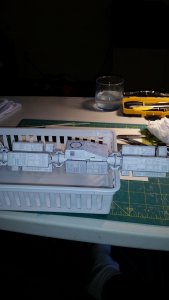
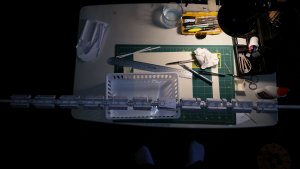
glued into place
 

Attachments

  • 20180127_113017.jpg
    20180127_113017.jpg
    1.9 MB · Views: 2
  • 20180127_125725.JPG
    20180127_125725.JPG
    1.4 MB · Views: 2
  • 20180127_141229.JPG
    20180127_141229.JPG
    1.3 MB · Views: 2
  • 20180127_142043.jpg
    20180127_142043.jpg
    1.3 MB · Views: 2
Last edited:

lyter1958

Esteemed Member
now onto the other small bits.. the spacers and other things . got to make a lot of them.then the cones and dividers and fins.
 

Attachments

  • 20180130_145524.JPG
    20180130_145524.JPG
    1.5 MB · Views: 2
  • 20180204_151515.JPG
    20180204_151515.JPG
    1.3 MB · Views: 2
  • 20180210_152538.JPG
    20180210_152538.JPG
    1.1 MB · Views: 2
  • orca-image-1517765343671.jpg_1517765344027.JPG
    orca-image-1517765343671.jpg_1517765344027.JPG
    190.4 KB · Views: 2

lyter1958

Esteemed Member
now the cargo boxes. a lot of cargo boxes. all different sizes.

after i got them all built, i started installing the 6 sided rings and the cones and spacers and fins. after first finding where top was gonna be, glued each in place.
the 6 sided "rings" had mounting simbles and numbers for attaching the cargo boxes.
after i go them all glued on.... crapp, i for got to hide the wires.. took some regular paper,cut,"paint with some watered down glue" and hide the wires
 

Attachments

  • 20180415_135234.JPG
    20180415_135234.JPG
    1.5 MB · Views: 1
  • 20180211_121156.JPG
    20180211_121156.JPG
    1.1 MB · Views: 1
  • 20180417_110719.JPG
    20180417_110719.JPG
    1.2 MB · Views: 1
  • 20180417_110747.JPG
    20180417_110747.JPG
    985.9 KB · Views: 1
Last edited:

lyter1958

Esteemed Member
i'm sure you all know where i'm going with the wires by now. on to the boxes. each one has a mark and number on the bottom to match up to the 6 sided piece. long slow possess of getting them in place and as straight as i could.
one is different for that is where the antenna is mounted
 

Attachments

  • 20180421_121146.JPG
    20180421_121146.JPG
    1.4 MB · Views: 1
  • 20180421_125207.JPG
    20180421_125207.JPG
    956.4 KB · Views: 1
  • 20180421_125228.JPG
    20180421_125228.JPG
    839.8 KB · Views: 1
Last edited:

lyter1958

Esteemed Member
the engine section is nice and open inside to hold a battery pack for the lights.
i haven't thought on how i'm gonna close the top yet, so i just let it "flop" around for now.
rear section attached that will hold the engines.

and a test fit to the spine.. oh it' gonna be BIG...
 

Attachments

  • 20180421_165328.JPG
    20180421_165328.JPG
    1.1 MB · Views: 2
  • 20180421_165458.JPG
    20180421_165458.JPG
    649.8 KB · Views: 2
  • 20180421_165519.JPG
    20180421_165519.JPG
    1.1 MB · Views: 1
  • 20180516_161908 (1).JPG
    20180516_161908 (1).JPG
    1.2 MB · Views: 2
  • 20180514_102410.JPG
    20180514_102410.JPG
    1.8 MB · Views: 2
Last edited:

lyter1958

Esteemed Member
started to work on the crew section. cut off all the glue tabs and used small strips of thin paper to attach each section. this was the real fun part on making sure its round
i got both upper and lower crew sections done. i had some "grand " ideas of doing a inside of the bay, with 1 door open and a pod half way out. not too sure if i can pull it off yet... but thinking about it..
 

Attachments

  • 20180812_224528.jpg
    20180812_224528.jpg
    1.4 MB · Views: 1
  • MSGR_PHOTO_FOR_UPLOAD_1534106889380.jpg_1534106891143.jpeg
    MSGR_PHOTO_FOR_UPLOAD_1534106889380.jpg_1534106891143.jpeg
    226.3 KB · Views: 1
  • 20180816_213719.jpg
    20180816_213719.jpg
    947.9 KB · Views: 1
  • 20180816_213705.jpg
    20180816_213705.jpg
    915.9 KB · Views: 1
  • 20180817_235835.jpg
    20180817_235835.jpg
    993.8 KB · Views: 1
  • 20180816_221418.jpg
    20180816_221418.jpg
    1 MB · Views: 1
  • 20180826_213238.jpg
    20180826_213238.jpg
    999 KB · Views: 1

zathros

*****SENIOR ADMINISTRATOR*****
Staff member
Administrator
Moderator
You will be part of a very small group of people who have actually made this. You will have some thing to cherish for many years!! :)
 

spaceagent-9

Right Hand Man and Confidant
Moderator
It's a magnificent model, and you are engaging a tremendous effort. Looking good! Needs a special place to show it off at.
 

zathros

*****SENIOR ADMINISTRATOR*****
Staff member
Administrator
Moderator
If you glass off a shelf in a small bookshelf, and blue out the glass the glass, put some background light in there, you could make an awesome diorama. :)
 

lyter1958

Esteemed Member
the engines were a "joy" (sic) to do. figuring out on how far the tubes went in and getting the lights in there...
 

Attachments

  • 20180901_212727.jpg
    20180901_212727.jpg
    1.3 MB · Views: 1
  • 20180909_220706.jpg
    20180909_220706.jpg
    1.3 MB · Views: 1

lyter1958

Esteemed Member
all 3 done
and attached in the main engine bay
 

Attachments

  • 20180909_222359.jpg
    20180909_222359.jpg
    1.8 MB · Views: 1
  • 20180909_223208.jpg
    20180909_223208.jpg
    1.2 MB · Views: 1
  • 20180909_223215.jpg
    20180909_223215.jpg
    1.1 MB · Views: 1
Last edited:

lyter1958

Esteemed Member
some of the wiring

i didnt want to glue the top down so that i could access the switch and batteries so i glued a pieace of strip magnet to help keep it closed

and there
 

Attachments

  • 20180909_223224.jpg
    20180909_223224.jpg
    1.3 MB · Views: 1
  • 20181104_150847.jpg
    20181104_150847.jpg
    1.3 MB · Views: 1
  • 20181104_150906.jpg
    20181104_150906.jpg
    1.2 MB · Views: 1
Last edited:
Top