Too stupid to lay flextrack !!!!!

XavierJ123

Member
Dec 17, 2004
240
0
16
86
Lexington, Kentucky
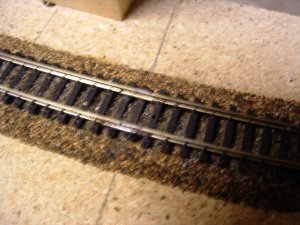
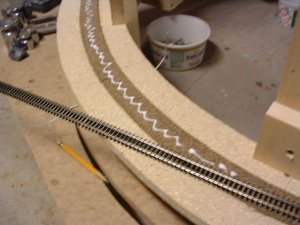
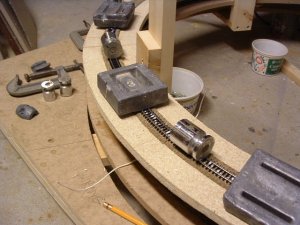
This may seem like a dumb question but would you consider laying flextrack a two man job? My only experience with track recently is Bachmann EZ track which is of course sectional track and just snaps together. On the other hand, when I attempt to curve a 36 inch long piece of flextrack track it will not stay in place long enough for me to attach it permanently. All the "how to" books that I have studied seem to skip over this subject. So I would appreciate any Tips and Hints. Thanks :confused:
 
I tack and curve it in place, following the centerline of the cork or track line. About three inches from the end, I stop and clip the last two ties off of the strip, then trim the rails even.. I then place rail joiners and the next length of flex on and solder them together. I continue my curve 'til I come out of it, then go back and place tie strip pieces that have had their tieplate and spike detail trimmed off in the gaps left at each joint. Eventually, I learned that my tongue and left foot were handy standins for a third and fourth arm ;)
 
What I do

I have just layed some (my R/R is ready thread).

I laid the first section into the curve.
and pinnind down up to about 8 " from the end. Then I could cut the excess rail off and road bed, then pin it down.
Next dip two connecters the ends in to flux and slid them in place. The next flexy track shape in to a curve , it will hold it self some what, then offer it to the pinned section and mark and cut the excess ends to match.
the trick is to connect the two only DO NOT PIN IT IN PLACE rather let the curve have no strain.
Solder in place making sure the ends set even, then you can bring it into its position and pin it.

I finnish it off by taking a piece of the cut off road bed and shave the ribs flat slide it under the gap where the rail connects and pin it down .
Hope you can understand my ramblings.
Best off luck.
 
I am just in the middle of building a helix and do it the way Bob says. I glue the flextrack to the cork roadbed .I keep it in place with weights, some of which are old railroad spikes I have collected . Once the glue cures I add ballast and fix it in place with diluted white glue and that holds the track firmly in place.
 
I too used flextrack. I have cork glued on blue foam, I ran a small bead of glue down the center of each cork half, started and followed the centerline of the cork, using push pins every second nail hole and a dollar store bottle of gravel as weight every now and then.


Note:
I wanted to attach a photo, but apparently I already posted it in the following thread: :D
http://www.the-gauge.com/showthread.php?t=15251
 
I should add that I don't nail my track but rather glue it in place by smearimg some Tacky Glue in a 1/2" wide swatch down the center. Once dry, I ballast then pull the tacks.
 
Sometimes a photo helps. I am building a helix so here is a photos showing how I spread glue on the cork roadbed with the next section of flexttrack ready to be put in place. I have already joined it with soldered connectors.
 

Attachments

  • flex.jpg
    flex.jpg
    57.2 KB · Views: 96
also don't be afraid to use a straight edge as simple as a 36" piece of 1 X 1 as a guide for the straight runs and cutting a template from plywood or masonite for the turns . You could make a template for each radius you are planning on using.

j
 
i have also found that an extra person would help with track laying but it can be done with just one.

i lay flex track alittle diffrent (i think) this what i do for corners i get two pices of flex track i then cut the ties off both ends of the two flex track but i make shure they can be used as filler for the gaps later. then put joiners on were the two connect and solder them wale thay are strate. now place joiners on the end and connect to track allready layed and bend thru the curive this way you get one long pice of flex track to make a curve insted of haveing to lay it a pice at a time. i find it makes it easyer to lay a curve insted of haveing to connect the two in the middle of the curve and maybe put a kink in the joint . but this way is alot better with two people as you are working with a 6 foot pice of flex insted of a 3 foot but i do lay some my self it's a little harder but it can be done .
 
Jamesp said:
also don't be afraid to use a straight edge as simple as a 36" piece of 1 X 1 as a guide for the straight runs and cutting a template from plywood or masonite for the turns . You could make a template for each radius you are planning on using.

j

Actually James, it is more realistic if you let the straights wander slightly.
If you ever look down a prototype line, it is seldom dead straight.
 
Matthyro said:
This photo shows the track in place held there by weights. I use some old scuba weights and a couple of scale weights I have.

That is a serious helix, Robin :thumb: ---but, if we used that particle board in Florida, it would swell up like a blowfish in this 95% humidity :eek: :p . We could probably get away with it if we painted it with a couple of coats of a good oil based paint. What's the humidity up where you're at?
 
Gosh, I don't know what happened to my previous reply. I must have done something wrong. At any rate, thanks for all the great advice on how to install flextrack. I have a little more confidence now. In fact, I soldered a couple of pieces together using flux as suggested and that works great. I guess there is no way to "slide" the ties back on----the ones that I removed before soldering. I thought maybe they would "snap" back on but that didn't happen either. What do ya'll do?
 
Xavier, I do not remove any ties. I make a fine saw cut under the rail which removes the plastic spikes from the plastic base that are meant to hold the track in gauge. I just cut back far enough to accomodate half a connector. With that done on both flex track sections I put the connectors on one and slide the track from the other section into the connectors. Look at this photo and you can see, the ties are where they shoild be.
 

Attachments

  • flex2.jpg
    flex2.jpg
    66.1 KB · Views: 93
XavierJ123 said:
Gosh, I don't know what happened to my previous reply. I must have done something wrong. At any rate, thanks for all the great advice on how to install flextrack. I have a little more confidence now. In fact, I soldered a couple of pieces together using flux as suggested and that works great. I guess there is no way to "slide" the ties back on----the ones that I removed before soldering. I thought maybe they would "snap" back on but that didn't happen either. What do ya'll do?

Cut off the spike detail from the ties you removed, and just slide them under the track at the joint. Once the track is ballasted, the little bit of detail you lost won't even be noticeable.
 
Live & learn! Matthyro, I read your comment after I laid my track. I removed the ties first and will have to replace them some way, shape or form. I will follow your suggestion on the next batch that I lay down---right after I solve my derailing problem. That track is sure a neat job. Some people are just talented.