

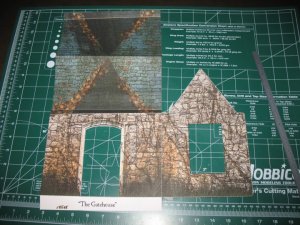
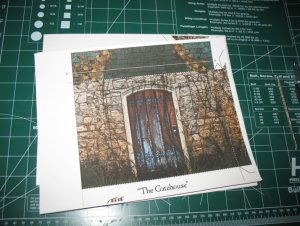
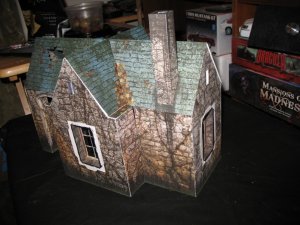
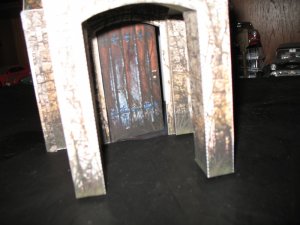
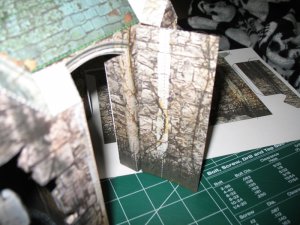
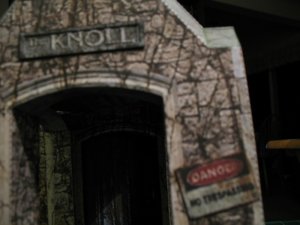
Ray Keim has released the second model from his excellent Knoll story last week (http://www.the-knoll.raykeim.com/index.html). I have spent several days studying the model and what I'm going to do with it. Well, because it's me I'm building it at as near to 1:18 as I can figure. After a daunting trip to Kinkos I was quoted $270 to have them print it up at that scale. So I am printing on my God awful HP D110 and piecing the tiles together. I am cheating with foam core support. I'm also trying to figure out some special effects. Enjoy!
The Knoll gatehouse
- Thread starter ASC Mclaren
- Start date
You are using an out of date browser. It may not display this or other websites correctly.
You should upgrade or use an alternative browser.
You should upgrade or use an alternative browser.
$270.00? It sounds like someone there was trying to rip you off.
I would have go else where to get another quote.
I am looking forward to another one of your Halloween builds.
I will be following this thread.
I would have go else where to get another quote.
I am looking forward to another one of your Halloween builds.
I will be following this thread.
- Apr 5, 2013
- 13,876
- 10,216
- 228
For a lot less you could buy a large format Epson 13" by 19" printer. It will actually print much longer than 19". That would allow you to print it larger, chop up the model where necessary with Photoshop, or some other program, and make it as big as you want. ")
$200 dollars from here: http://www.epson.com/cgi-bin/Store/jsp/Product.do?BV_UseBVCookie=yes&sku=C11CB59201
want!
$200 dollars from here: http://www.epson.com/cgi-bin/Store/jsp/Product.do?BV_UseBVCookie=yes&sku=C11CB59201
want!
Zathro, an Epson large format printer is on my Christmas list, wait, it is my entire Christmas list. :mrgreen:
You have to explore the site to find the two models that have been released. The links are hidden on the pages.

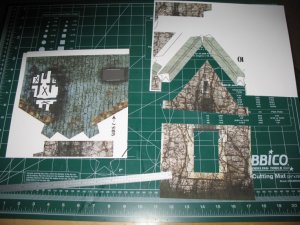
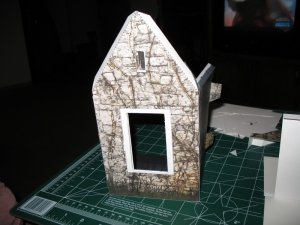
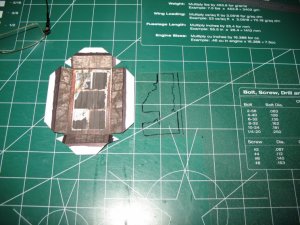
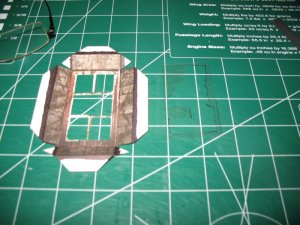
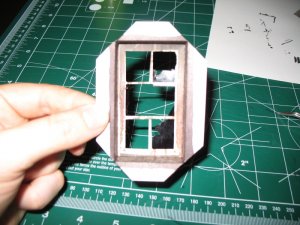
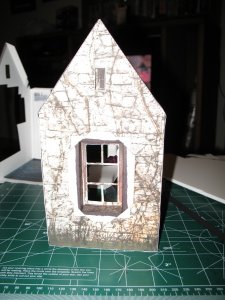
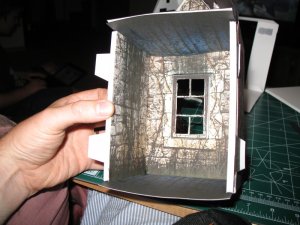
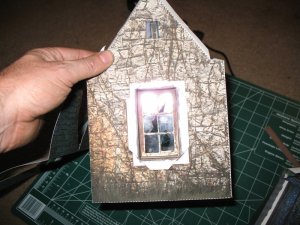
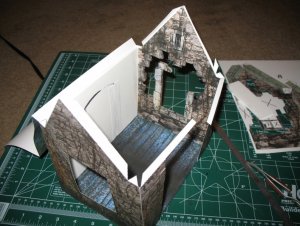
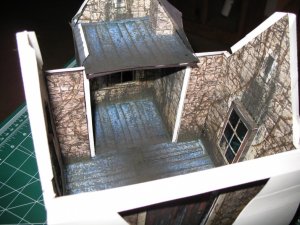
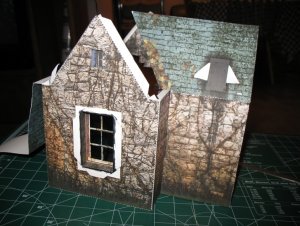
More progress:
Attachments
-
 IMG_2783.jpg189.5 KB · Views: 20
 -
 IMG_2782.jpg192.4 KB · Views: 14
 -
 IMG_2780.jpg191.5 KB · Views: 22
 -
 IMG_2779.jpg189.3 KB · Views: 9
 -
 IMG_2781.jpg192.8 KB · Views: 29
 -
 IMG_2784.jpg192.5 KB · Views: 15
 -
 IMG_2785.jpg191.8 KB · Views: 9
 -
 IMG_2786.jpg191.4 KB · Views: 17
 -
 IMG_2787.jpg168.9 KB · Views: 20
- Apr 5, 2013
- 13,876
- 10,216
- 228
That really is coming out nice. I wish I knew how to read, I'd get me some of these models!!
p.s. On a note of interest, I had not used my Epson Workforce 1100 for a few months which caused the ink to dry on the heads, the bane of all printers. Rather than waste ink in the useless printer cleaning, I just serviced the whole machine, filling each cartridge and flushing the heads with the cleaner. It took 45 minutes, I did not rush it. It prints beautifully again.
p.s. On a note of interest, I had not used my Epson Workforce 1100 for a few months which caused the ink to dry on the heads, the bane of all printers. Rather than waste ink in the useless printer cleaning, I just serviced the whole machine, filling each cartridge and flushing the heads with the cleaner. It took 45 minutes, I did not rush it. It prints beautifully again.
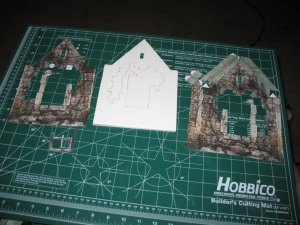
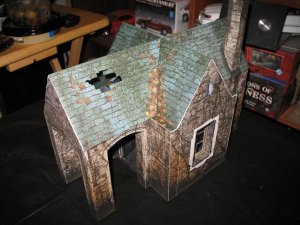
No reading required, just fish around the image until your cursor shows a link. I have had some issues with the resize, relating to the roof lines. At this scale, I would recommend removing the roof parts, build up the gate house, join the roof parts separately, then fixing them to the model. I've also run across an issue with the portcullis, if aligned at the roof the part is too short. I noticed this on another build posted on Ray's facebook page. I'll detail both of my fixes soon.
Zathros, you're making me very jealous of your printer!
Zathros, you're making me very jealous of your printer!
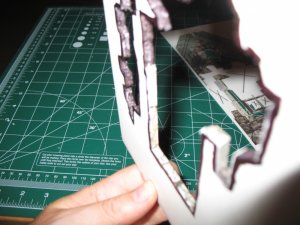
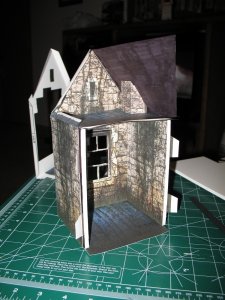
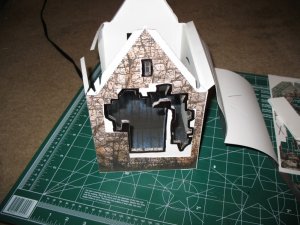
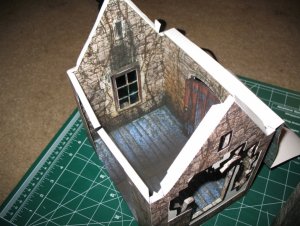
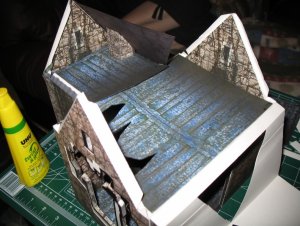
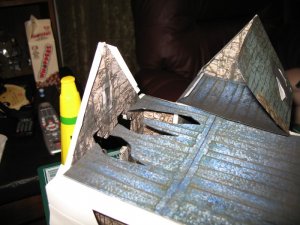
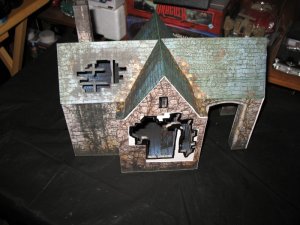
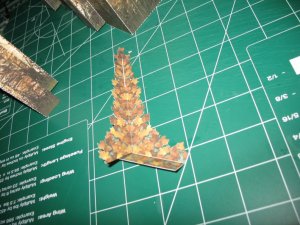
Almost finished! A few more pictures. In them you can see the gap that developed in the roof joint and my fix. You can also see the gap in the facade and my fix. Both achieved using reprinted pages and parts with little modification.
Attachments
-
 IMG_2789.jpg86.5 KB · Views: 26
 -
 IMG_2792.jpg188.3 KB · Views: 9
 -
 IMG_2791.jpg193.5 KB · Views: 12
 -
 IMG_2790.jpg193.4 KB · Views: 12
 -
 IMG_2788.jpg170.6 KB · Views: 10
 -
 IMG_2793.jpg123.3 KB · Views: 10
 -
 IMG_2804.jpg151 KB · Views: 10
 -
 IMG_2805.jpg165.5 KB · Views: 8
 -
 IMG_2799.jpg131.2 KB · Views: 13
 -
 IMG_2801.jpg190.3 KB · Views: 22
Hey, that's really cool! Houses and architecture aren't my thing, but this one is really good. Good job!
The extra depth added by using that foam core is great. Especially around the burned out areas. Ray makes some fantastic models and I can't wait to see what he comes up with next in this series.
I might add some some details later....
Well, with the last photo you posted, no need for details... It looks like it comes out of a movie set already.....:thumb:
Nice work!