The Innards of a Beast - The Razor Crest from "The Mandalorian"
- Thread starter Revell-Fan
- Start date
You are using an out of date browser. It may not display this or other websites correctly.
You should upgrade or use an alternative browser.
You should upgrade or use an alternative browser.
I'm sure your model will be cooler! I'm queuing up to become a test builder!
I doubt that I will reach that level of detail. Compared to this build my model will just be a hole in the ground. 
Thank you very much for your offer! thumbsup
I appreciate it but since there are a few huge technical requirements involved to set this all up I'm going to take the first shot at it.

Thank you very much for your offer! thumbsup
I appreciate it but since there are a few huge technical requirements involved to set this all up I'm going to take the first shot at it.
Last edited:
This is a master piece card board build. I'm sure you will get close to it RF.
This will be the most spectacular model of all times! 
ETA: 5 days.
ETA: 5 days.
Howdee fans! 
Now I'd like to show you the capabilities of the new SketchUp plugin.
It was created by a guy named "Avril01" and was supposed to create clouds for Minecraft terrains. This is how it looks in default mode:
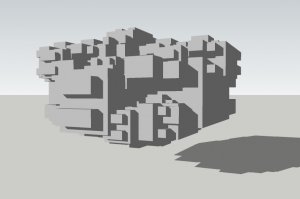
Basically you enter some numbers and the program generates a cloud.
I made use of the basic shapes and changed only two lines to extract the creator function and to adapt it to my needs:
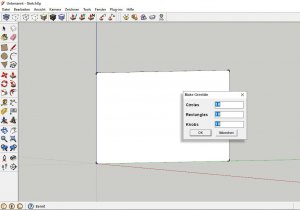
Now as you can see there are three options circles, rectangles and knobs. You create a face and select it. Then you start the plugin and tell it how many elements you want to create. Then you hit OK.
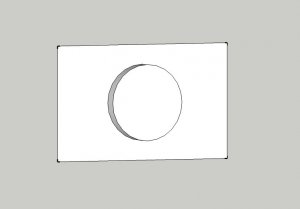
This happens with the face when you choose 1 circle and 0 of the others:
Another dialogue gives you the option to bevel it:
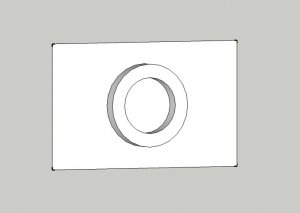
Several offsets are possible:

Of course you can select several faces and process them all at once:
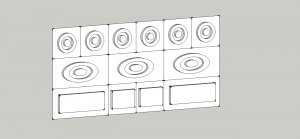
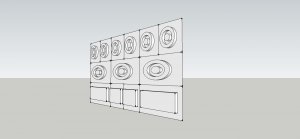
This was done in about half a minute. If I had made these shapes traditionally I would have needed at least five!
I am so impressed. This plugin will change model building in SketchUp forever because it can be tweaked even further. Thank you, Avril01! thumbsup
And a preview of the cockpit tub:
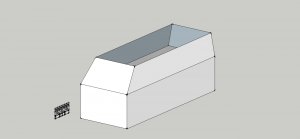
Now I'd like to show you the capabilities of the new SketchUp plugin.
It was created by a guy named "Avril01" and was supposed to create clouds for Minecraft terrains. This is how it looks in default mode:

Basically you enter some numbers and the program generates a cloud.
I made use of the basic shapes and changed only two lines to extract the creator function and to adapt it to my needs:

Now as you can see there are three options circles, rectangles and knobs. You create a face and select it. Then you start the plugin and tell it how many elements you want to create. Then you hit OK.
This happens with the face when you choose 1 circle and 0 of the others:

Another dialogue gives you the option to bevel it:

Several offsets are possible:

Of course you can select several faces and process them all at once:


This was done in about half a minute. If I had made these shapes traditionally I would have needed at least five!
I am so impressed. This plugin will change model building in SketchUp forever because it can be tweaked even further. Thank you, Avril01! thumbsup
And a preview of the cockpit tub:

Last edited:
It works with all previous and all future SU versions. Avril01 really makes neat stuff. 


That is VERY COOL!!!
Thank you for sharing this with all of us!!!
I really need to learn Sketchup.
Thank you for sharing this with all of us!!!
I really need to learn Sketchup.
Sooo, a small and dirty update of the project. I was able to plaster the cockpit walls with greeblies. That went so fast that I decided to tackle the other copartments on-the-fly. And what shall I say - they got greebled out as well. So now I have the whole inside covered with detail. I ran the model through Pepakura. Everything unfolded flawlessly but unfortunately I ended up with 200 pages of parts. That was way too much to handle, considering my deadline ends in 2 days from now.
To reduce the amount I rescaled everything to 1/144 which only required a very reasonable two pages for all components. Assembly should be faster as well, albeit some of the parts have become pretty small now. On a positive note: Abril01's script rendered the parts so nicely that I did not have to further edit them in Pepakura.
Here is a WIP of the evolution of the Mando figure:
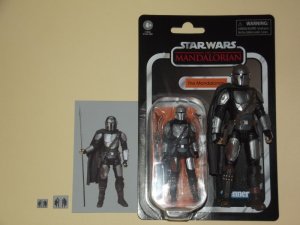
From right to left: Black Series, TVC (being kept carded of course), paper Mando in 1/18 (it really matches the size of the TVC figure, the TVC fig is just sitting higher in its tray which gives the illusion that it is bigger), then Mando prints in 1/144 and 1/183. The latter was too hard to handle:
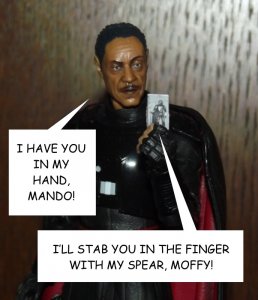
:Grin:
To reduce the amount I rescaled everything to 1/144 which only required a very reasonable two pages for all components. Assembly should be faster as well, albeit some of the parts have become pretty small now. On a positive note: Abril01's script rendered the parts so nicely that I did not have to further edit them in Pepakura.
Here is a WIP of the evolution of the Mando figure:

From right to left: Black Series, TVC (being kept carded of course), paper Mando in 1/18 (it really matches the size of the TVC figure, the TVC fig is just sitting higher in its tray which gives the illusion that it is bigger), then Mando prints in 1/144 and 1/183. The latter was too hard to handle:

:Grin:
So sweet!Sooo, a small and dirty update of the project. I was able to plaster the cockpit walls with greeblies. That went so fast that I decided to tackle the other copartments on-the-fly. And what shall I say - they got greebled out as well. So now I have the whole inside covered with detail. I ran the model through Pepakura. Everything unfolded flawlessly but unfortunately I ended up with 200 pages of parts. That was way too much to handle, considering my deadline ends in 2 days from now.
To reduce the amount I rescaled everything to 1/144 which only required a very reasonable two pages for all components. Assembly should be faster as well, albeit some of the parts have become pretty small now. On a positive note: Abril01's script rendered the parts so nicely that I did not have to further edit them in Pepakura.
Here is a WIP of the evolution of the Mando figure:
View attachment 193412
From right to left: Black Series, TVC (being kept carded of course), paper Mando in 1/18 (it really matches the size of the TVC figure, the TVC fig is just sitting higher in its tray which gives the illusion that it is bigger), then Mando prints in 1/144 and 1/183. The latter was too hard to handle:
View attachment 193414
:Grin:
I don't know. What I do know is that the first print of the rescaled parts turned out GREAT! But not so great is the fact that the parts are so small. Ah well. No time to waste for a bigger print. 
I'm now spending a large amount of cutting. This is what I have done right now:

And slowly everything falls into place:
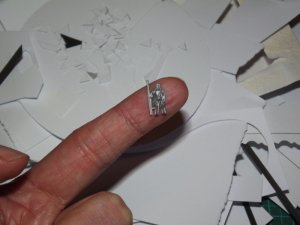
Yep, even at two pages this kit is very elaborate and requires a lot of patience and skill.
And my sincere apologies to Avril01 for misspelling his name; Abril01 it is. At least in the Spanish region.
ONE DAY remaining to see the most exciting paper model of all times!!! Stay tuned!!!
I'm now spending a large amount of cutting. This is what I have done right now:

And slowly everything falls into place:

Yep, even at two pages this kit is very elaborate and requires a lot of patience and skill.
And my sincere apologies to Avril01 for misspelling his name; Abril01 it is. At least in the Spanish region.
ONE DAY remaining to see the most exciting paper model of all times!!! Stay tuned!!!
Nice work on your figure! Knowing Rhaven, he'd probably take your figure and make a fully 3D one. I'm trying to convince him to do a micro Thunder Fighter! I told him to do it as a wedding ring for his fiancee!I don't know. What I do know is that the first print of the rescaled parts turned out GREAT! But not so great is the fact that the parts are so small. Ah well. No time to waste for a bigger print.
I'm now spending a large amount of cutting. This is what I have done right now:
View attachment 193419
And slowly everything falls into place:
View attachment 193420
Yep, even at two pages this kit is very elaborate and requires a lot of patience and skill.
And my sincere apologies to Avril01 for misspelling his name; Abril01 it is. At least in the Spanish region.
ONE DAY remaining to see the most exciting paper model of all times!!! Stay tuned!!!
Yo folks, the project is nearing the drop zone!
I have created two plates which will go around the base of the model:


Nothing spectacular but I think the whole scene would gain more impactful with a proper base.
All the cutting slowly pays off. Today I spent 43 hours to cut out 12 times of what you can see here in the picture:
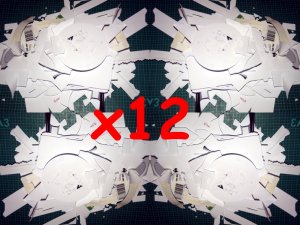
Yep, you read it correctly: 12 TIMES!!!
As a result of this, I incorporated a new part: A bullet hole. The Crest definitely needs a bullet hole.
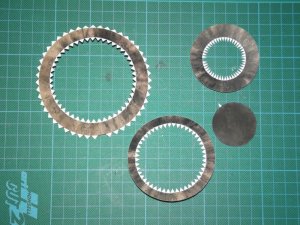
All pieces cut out.
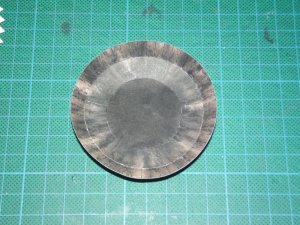
Assembled.
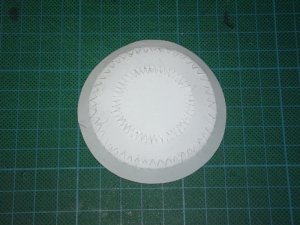
A nice view from the back. This goes right below the passenger seat:
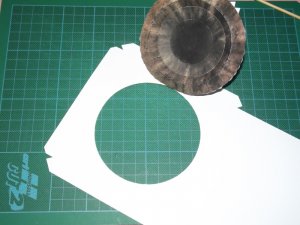
Start the clocks, ladies and gentlemen, because soon you will be shown the best model of the year! Ah, what do I say, the best model of the decade!!! And a decade of decades to come!!!

I have created two plates which will go around the base of the model:

Nothing spectacular but I think the whole scene would gain more impactful with a proper base.
All the cutting slowly pays off. Today I spent 43 hours to cut out 12 times of what you can see here in the picture:

Yep, you read it correctly: 12 TIMES!!!

As a result of this, I incorporated a new part: A bullet hole. The Crest definitely needs a bullet hole.

All pieces cut out.

Assembled.

A nice view from the back. This goes right below the passenger seat:

Start the clocks, ladies and gentlemen, because soon you will be shown the best model of the year! Ah, what do I say, the best model of the decade!!! And a decade of decades to come!!!
Last edited:
I thought you were young!I'm old, I can wait. :Grin:

