Hi All,
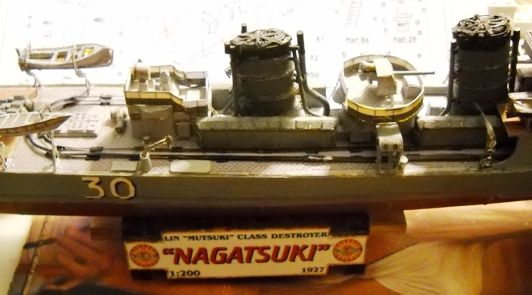
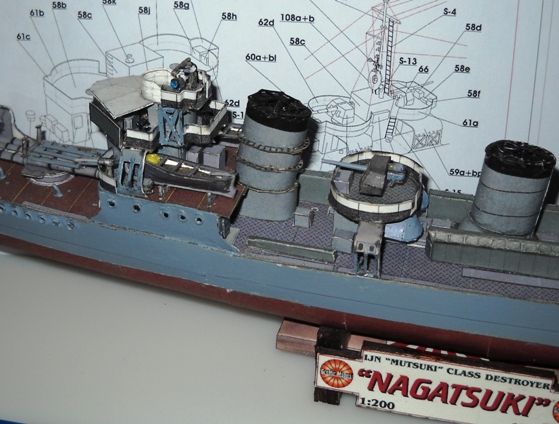
I do like my ship models, fortunately in card modeling, ship models take off from where the styrene world of ship models pretty much leaves off. I have done the 1/700 scale trip to the point of exhaustion and while braile scale is great if you want to work on a lot of models in a small space, the level of detail is a "little" limited. It usually requires investing in brass photoetch, lasered wood parts, and resin aftermarket bits that can easily double or triple the cost of a model kit. And while they do make them look better, you still have an under four inch long Destroyer model along with the amount of detail that it can carry on it's decks.
Card Model Ships go in at 1/400 and 1/200 and up from there for most classes of ships. At 1/200 you can really get into detailing parts. From learning a bit of magic building card model buildings where simple layering of parts can make them "pop" to truly elegant models and carrying that over to ship models I have begun to figure some things out.

I like the Ship Models at GreMir Models, Michael uses a downloadable format so you can print out the pages of your chosen model on your home printer. This means you can make multiples of them to come up with 3D looking effects. Where a simple set of printed lines along a hull can go from representing an armor belt to actually printing a second or third copy to give added dimension and gluing it in place after edge coloring the parts. It also helps in situations where the colors from one page to the next of a printed model in magazine format may not quite match. Using Photoshop or other photo manipulation software can help fix these issues.
At any rate, using a few small parts from one of Michaels' kits, in this case the IJN Nagatsuki I am currently working on, I started working out how to add a little detail to some of these small parts. The ship includes four small boats, three "Oar" boats and a Sampan. The "Oar" boats are supposed to represent the small "Cutter" type Life boats that were present on IJN Ships of the time. These would be too short to represent the official 9 Meter type Naval Cutter so I can't give you an official title.
While the original boat in the kit requires roughly 5 parts to come up with one, I am going to use a few extra print outs to give me the parts that I want to use to make it a little more detailed. Two of these boats would go on either side of the pilot house on blocks and one more on a pair of davits just a little aft of midships.

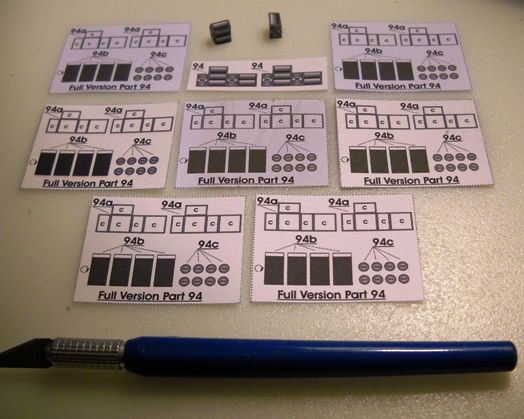
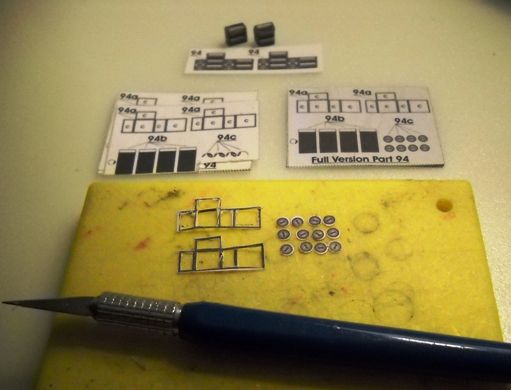
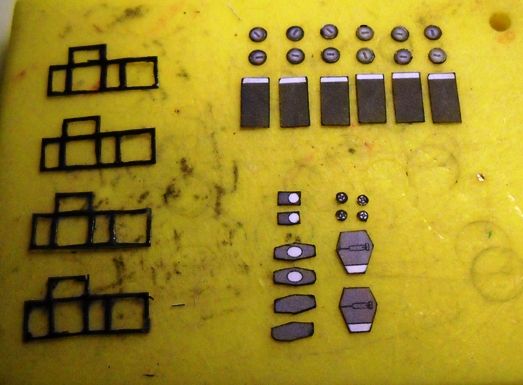
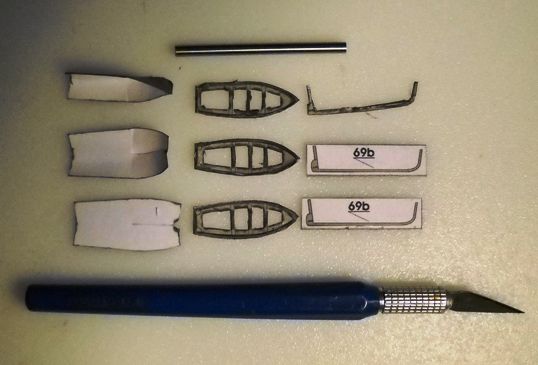
The parts that I will be using amounted to these clipped from the sheets. Having this many extra pieces will work out for me as I intend to build another vessel of the class later. The second one will be more detailed than the first.
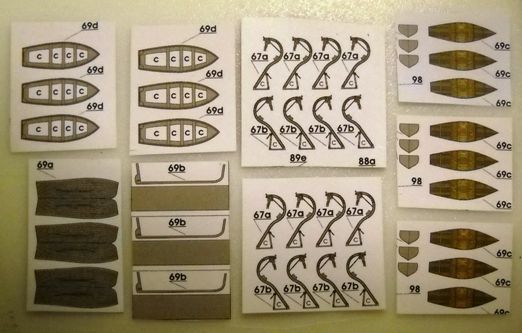
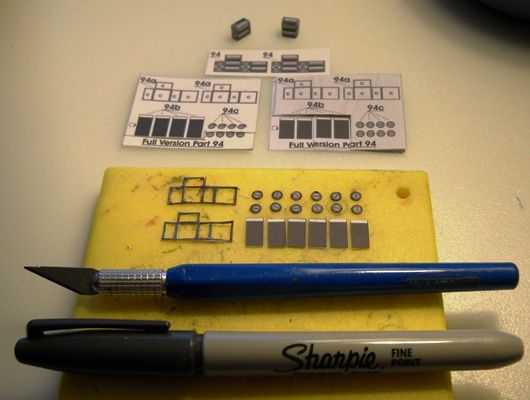
Clipping out the inside parts from the two deck sections of the print outs and then edge coloring them on the inner side starts the project. I also clipped out and edge colored the inner deck sections. There are two sets of these as one set will be sectioned up to get the cross pieces to glue on to the main pieces.
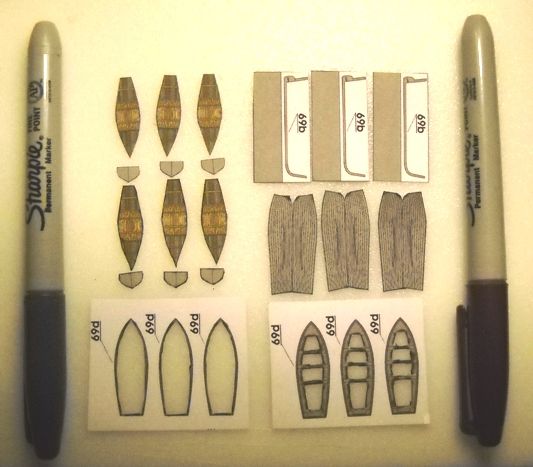
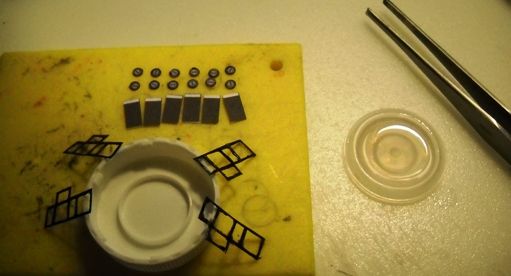
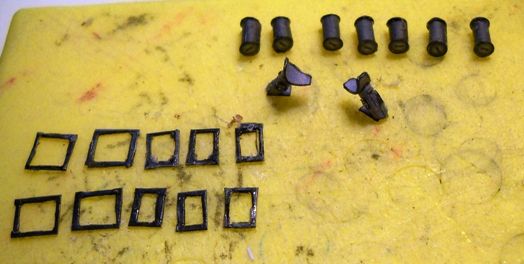
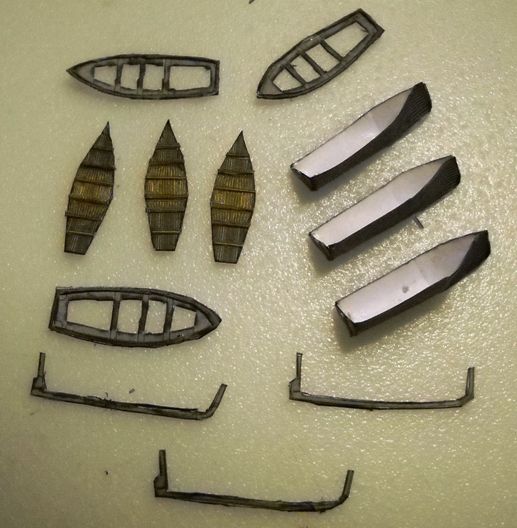
Folding and gluing over the keel parts, cutting out the upper most edge parts of the upper deck section and then gluing them in place on the main upper deck part gives you an idea how detailing them up like this works. The hull parts also get clipped out and a line is sliced in the center of the bow section to allow me to form it easier. The little steel rod is one of the punches from my Mini Punch set, I use it to roll the paper parts over an old mouse pad. This puts a little curl in the paper making gluing and forming these parts easier. Putting the curl in the bow and then laying it the other way for the stern curls the rear edges up to follow the shape of the stern parts. You can see the progression of the three parts for the hull.
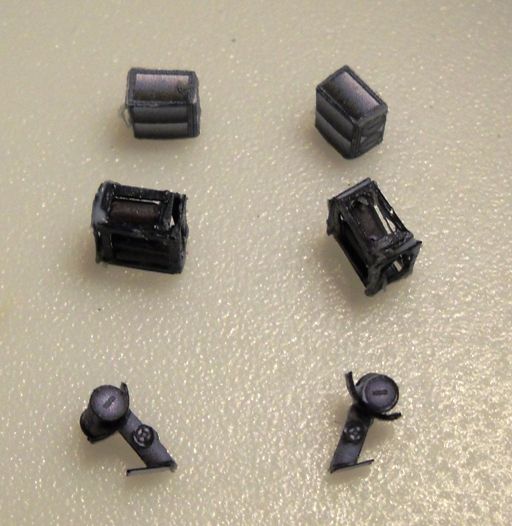
With the parts glued together after shaping I also added a small bit on the stern pieces where the rudder part of the keel piece would be going on. It makes the rudder stick out just a little more than it would other wise. Using some of the extra colored parts from the trimmed out bits also let me make a horizontal tiller handle to glue to the top of the rudder post.
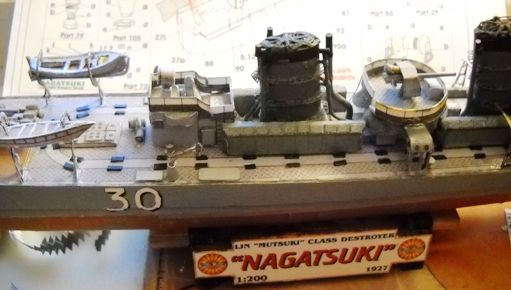
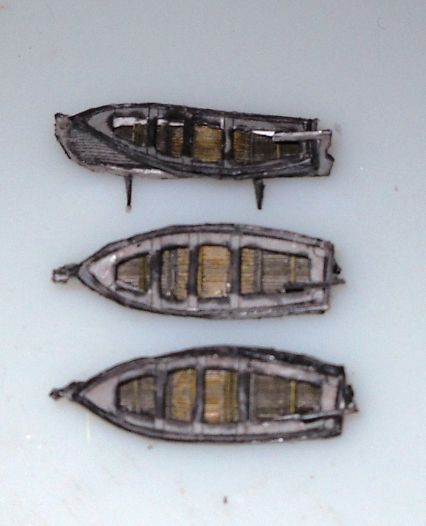
Putting the pieces all together makes up three small Cutters for the next Mutsuki Class Destroyer,
More to follow as I work over other small parts on the model to come up with a bit more detail on it.
Jay
treadhead1952
Las Vegas, NV
I do like my ship models, fortunately in card modeling, ship models take off from where the styrene world of ship models pretty much leaves off. I have done the 1/700 scale trip to the point of exhaustion and while braile scale is great if you want to work on a lot of models in a small space, the level of detail is a "little" limited. It usually requires investing in brass photoetch, lasered wood parts, and resin aftermarket bits that can easily double or triple the cost of a model kit. And while they do make them look better, you still have an under four inch long Destroyer model along with the amount of detail that it can carry on it's decks.
Card Model Ships go in at 1/400 and 1/200 and up from there for most classes of ships. At 1/200 you can really get into detailing parts. From learning a bit of magic building card model buildings where simple layering of parts can make them "pop" to truly elegant models and carrying that over to ship models I have begun to figure some things out.
I like the Ship Models at GreMir Models, Michael uses a downloadable format so you can print out the pages of your chosen model on your home printer. This means you can make multiples of them to come up with 3D looking effects. Where a simple set of printed lines along a hull can go from representing an armor belt to actually printing a second or third copy to give added dimension and gluing it in place after edge coloring the parts. It also helps in situations where the colors from one page to the next of a printed model in magazine format may not quite match. Using Photoshop or other photo manipulation software can help fix these issues.
At any rate, using a few small parts from one of Michaels' kits, in this case the IJN Nagatsuki I am currently working on, I started working out how to add a little detail to some of these small parts. The ship includes four small boats, three "Oar" boats and a Sampan. The "Oar" boats are supposed to represent the small "Cutter" type Life boats that were present on IJN Ships of the time. These would be too short to represent the official 9 Meter type Naval Cutter so I can't give you an official title.
While the original boat in the kit requires roughly 5 parts to come up with one, I am going to use a few extra print outs to give me the parts that I want to use to make it a little more detailed. Two of these boats would go on either side of the pilot house on blocks and one more on a pair of davits just a little aft of midships.
The parts that I will be using amounted to these clipped from the sheets. Having this many extra pieces will work out for me as I intend to build another vessel of the class later. The second one will be more detailed than the first.
Clipping out the inside parts from the two deck sections of the print outs and then edge coloring them on the inner side starts the project. I also clipped out and edge colored the inner deck sections. There are two sets of these as one set will be sectioned up to get the cross pieces to glue on to the main pieces.
Folding and gluing over the keel parts, cutting out the upper most edge parts of the upper deck section and then gluing them in place on the main upper deck part gives you an idea how detailing them up like this works. The hull parts also get clipped out and a line is sliced in the center of the bow section to allow me to form it easier. The little steel rod is one of the punches from my Mini Punch set, I use it to roll the paper parts over an old mouse pad. This puts a little curl in the paper making gluing and forming these parts easier. Putting the curl in the bow and then laying it the other way for the stern curls the rear edges up to follow the shape of the stern parts. You can see the progression of the three parts for the hull.
With the parts glued together after shaping I also added a small bit on the stern pieces where the rudder part of the keel piece would be going on. It makes the rudder stick out just a little more than it would other wise. Using some of the extra colored parts from the trimmed out bits also let me make a horizontal tiller handle to glue to the top of the rudder post.
Putting the pieces all together makes up three small Cutters for the next Mutsuki Class Destroyer,
More to follow as I work over other small parts on the model to come up with a bit more detail on it.
Jay
treadhead1952
Las Vegas, NV
")