Strike Noir: Build Thread

  • Thread starter Thread starter Soaring
  • Start date Start date
S

Soaring

Yup, just as the title reads, this BE the Strike Noir build thread.
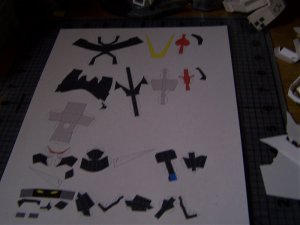
Some things I'd like to note about this model
-Tang did an excelent job on designing this
-The parts SEEM easy, I haven't really tried them out yet...
-Even though I said I tried it before, I did, but gave up....

-The templates are fantastic as well, however, some of the model runs of the page :S So bear with me :D
-----
For the Building Timeline...
Don't expect to have daily or weekly updates
Updates for this thread can come like...Once every day, then maybe the next update coming in one or two weeks
This is because I have other things to do :D

-------
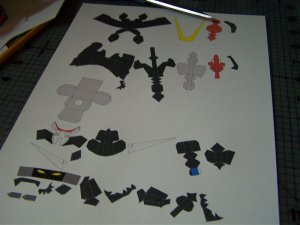
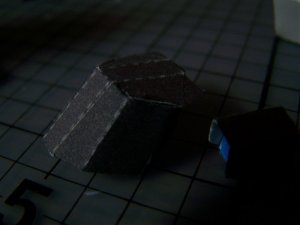
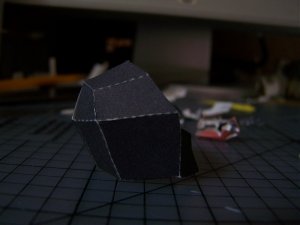
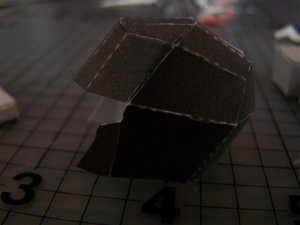
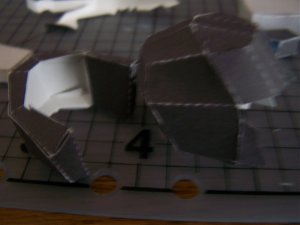
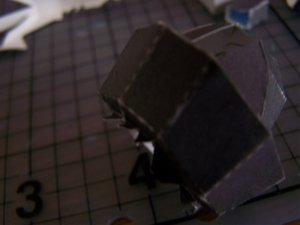
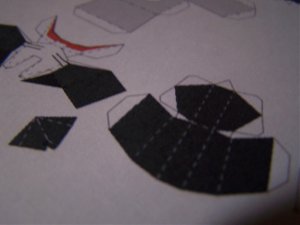
Alright, So, Let's get started! On...THE HEAD! Yes!
Alright, so in a few minutes I'll have some done...Hope you're all watching =)

Let's see how far I go...
 

Attachments

  • 100_1605.jpg
    100_1605.jpg
    114.9 KB · Views: 13
  • 100_1606.jpg
    100_1606.jpg
    102.2 KB · Views: 9
Whew, so far, no problems(Even with the X acto knife :D) I'd lke to note that the yellow antenna is supposed to be facing backwards...well, from the Pepakura model it shows that....So, it's 12:20 over here PM, so I have school tomorrow :/ Gotta wake up early :D
 

Attachments

  • 100_1609.jpg
    100_1609.jpg
    114.6 KB · Views: 6
Alright, so I bet some of you thought I'd cut short there...Well, you're wrong :D I have a test tomorrow, so I'm studying for it tonight, after school tomorrow, on Friday, I'll finish up Strike Noir's head, then start on the chest :)
 
-_-....Alright, there's one major thing I must note on the HEAD! I messed up. (No picture of this) On the head, I believe it is...the second largest piece. One of the fold lines must be attached INWARD, so you can add some details and what not. I didn't do that, and after the glue dried, it was too late to redo, so, I'm reprinting it and starting over ;)
 
ight, I reprinted it, post some pictures of the finished product in the morning ;)
 

Attachments

  • 100_1610.jpg
    100_1610.jpg
    125.3 KB · Views: 5
Alright, Ronin, this credit and model goes all to the thanks of Tang L.B, a fellow card modelist here at Zealot. I recieved it from him ^^

On to the Noir, this is how the neck piece should look.
 

Attachments

  • 100_1612.jpg
    100_1612.jpg
    92.6 KB · Views: 5
Then, this piece should go ontop of the neck, it's a supporter I think...
 

Attachments

  • 100_1613.jpg
    100_1613.jpg
    101.7 KB · Views: 4
This piece should go ontop of the head, near the antenna's
 

Attachments

  • 100_1614.jpg
    100_1614.jpg
    90.5 KB · Views: 4
Ad, this top piece of the head, the last piece I showed you should go ontop, with the antenna's going to the sides
 

Attachments

  • 100_1616.jpg
    100_1616.jpg
    89.6 KB · Views: 6
Then, this is the back piece, which should be one of the three main parts to the head :/
 

Attachments

  • 100_1617.jpg
    100_1617.jpg
    93.4 KB · Views: 6
rigt the second largest piece, should look like this! Make sure to position it right, or else the head will come out wrong :p
 

Attachments

  • 100_1618.jpg
    100_1618.jpg
    100.1 KB · Views: 6
Alright, so attached the 4th part from today's instructions to the head. So, it'll look like this!
 

Attachments

  • 100_1620.jpg
    100_1620.jpg
    101.5 KB · Views: 8
Alright, DO NOT GLUE ANY PIECE At least not yet, I'm preshaping everything :P So, just pretend as if it's glue. Now, remember the Largest piece? The black largest? Well, it should go behind the head piece. Sorry, I'm bad at verbal instructions, so that's why these pictures are here :/
 

Attachments

  • 100_1622.jpg
    100_1622.jpg
    98.5 KB · Views: 5
Aright, now, that larges piece, now glue on the fin, to the back, you know what...Just click on the picture, then it'll explain itself :/
 

Attachments

  • 100_1623.jpg
    100_1623.jpg
    93.4 KB · Views: 6