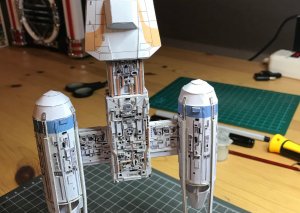
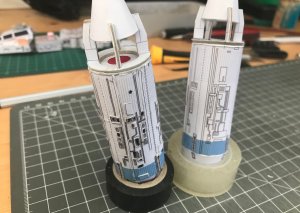
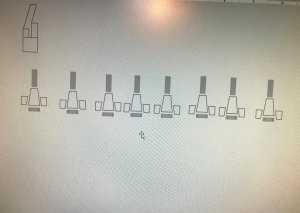
Oh forgot to mention: The part shown in the penultimate picture was created with the correct texture on both sides, so that the inside view is also correct.
Star Wars - Y-Wing building thread
- Thread starter starbuck
- Start date
You are using an out of date browser. It may not display this or other websites correctly.
You should upgrade or use an alternative browser.
You should upgrade or use an alternative browser.

You are doing a great job on this project! I like your solution for making a more "accurate" version of this model.
Are you planning to make an add-on kit for this model?
Are you planning to make an add-on kit for this model?
I would not name it add-on kit, but I would upload my parts to this model. Maybe it might be used as is or as a basis for better parts.You are doing a great job on this project! I like your solution for making a more "accurate" version of this model.
Are you planning to make an add-on kit for this model?
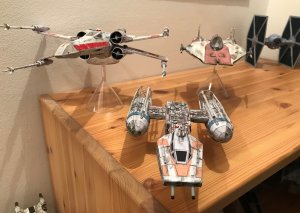
This is a pretty cool build. I'm relatively new at this paper thing so don't laugh at my question. Earlier on I saw you made three copies of the same part. I get copies 1 and 2, but am I correct is saying you added the thick card for more dimension? I believe I'm referencing the parts that reflect all the conduit on the ship.
Please feel free to ask everybothy here in this forum. Everybody will be glad to help.
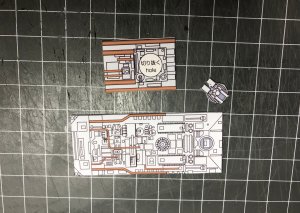
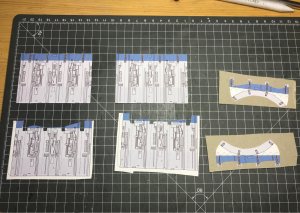
I used 3 copies - 1st is to form the part. From the second copy some details are cut out. And this panels are glued on the first one. The third copy is used to make details popping up. Sometimes on thicker card and - for the mashines here only the copy as is. I think it would be too much if I would also use thicker card for the mashines.
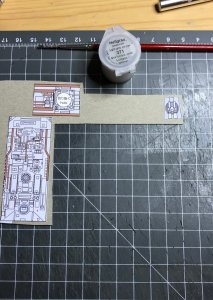
Furthermore I use gray and black markers to get some additional contrast. At the end I will paint the edges and do some weathering.
I used 3 copies - 1st is to form the part. From the second copy some details are cut out. And this panels are glued on the first one. The third copy is used to make details popping up. Sometimes on thicker card and - for the mashines here only the copy as is. I think it would be too much if I would also use thicker card for the mashines.
Furthermore I use gray and black markers to get some additional contrast. At the end I will paint the edges and do some weathering.
Last edited:
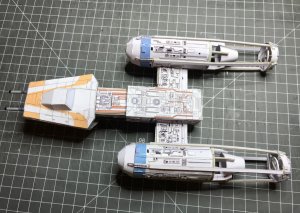
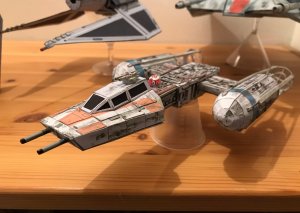
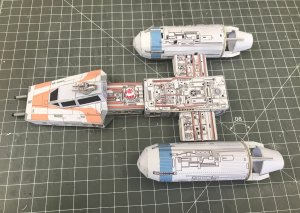
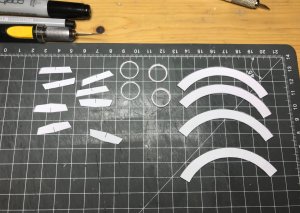
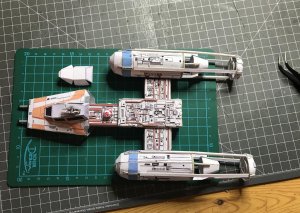
Mashines final - end part done.
End part: 2 copies - glue together to have the correct pattern (colour) on both sides, as both sides are visible. (also more stable) - and I cut the glueing tabs - they are not needed and would not look good, I suppose
Connection between end part and mashines. Not happy with the existing parts.
my plan: glue to thicker cardboard (more stable) - use the short parts to connect with the end part.
furthermore add some details to the end part - you can see on the last photo of the platic model.
Pictures and details to follow.
Attachments
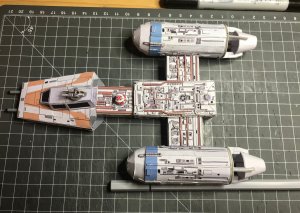
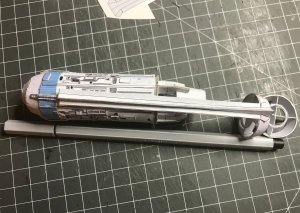
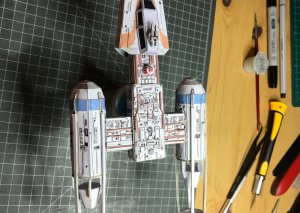
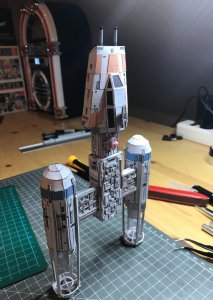
Additional greebling material for the end parts. And final assably. Looking good - not perfect but good.
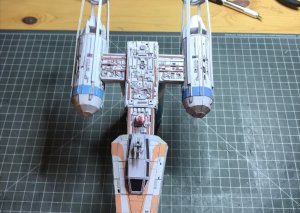
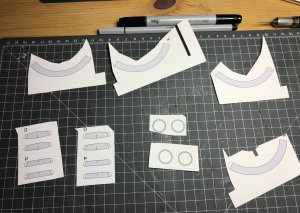
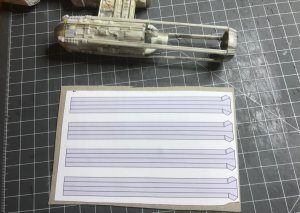
And then I turned to the bottom side - Whaaaat? Looking boring - and by checking the plastic model I noticed that - of course - the bottom side is also greebled.
So printing additional parts to finalize the bottom side.
Pics to follow.
And then I turned to the bottom side - Whaaaat? Looking boring - and by checking the plastic model I noticed that - of course - the bottom side is also greebled.
So printing additional parts to finalize the bottom side.
Pics to follow.
Attachments


")
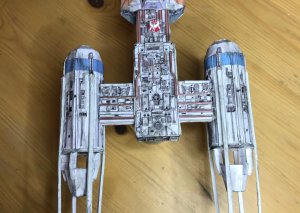
I used the same parts as for the upside and added details. To fill the hole for the droid on the upper side I used the cannon part - looks OK for me.