

As requested by the moderators I am starting a new thread for my continuing design and build of the Normandy SR2 from Mass Effect 2. After melvin008 did an unfold of a model captured from the game, then hit a wall and stopped development on it I decided to have at it. After doing the SR1 model a while back I always intended to do the SR2, and clearly the time had come. I'm too lazy to repost material from the previous thread, so here are links to them instead:
The Decision...
Work begins...
Work continues...
Work continues continuing...
And continues some more...
A teaser about a future project...
The usual excuses...
News of a new SR1... and also here
The SR2 starts to really take shape...
The test building (finally) begins...
The usual problems are discovered...
Leading to the usual re-design of parts...
While we keep test building...
And that brings us to today. :mrgreen:
And what do I have for you today you're probably wondering. Well, here ya go.
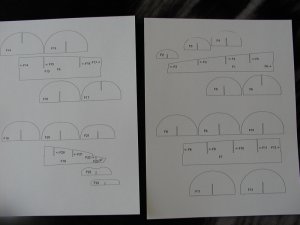
So far I have re-designed and re-unfolded all of the main hull, and finally in the past week I've squeezed in some build time. The first pic below shows the re-designed formers. Much more professional. More work to create, but worth it. If anyone knows an easy way of making this type of former please share it.
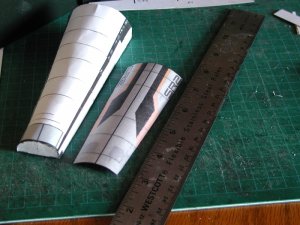
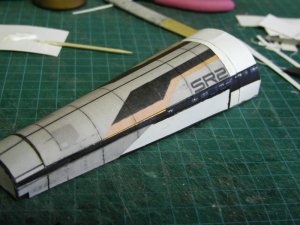
Next we see the first of the main skins ready to be applied. For this one I laminated the skin to an additional layer of cardstock and edge colored it before assembly.
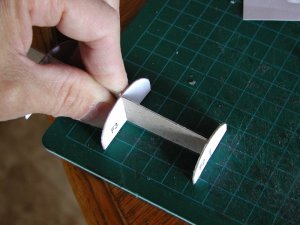
Meanwhile I had laminated the first set of the new formers to 1mm cardboard, so I started building the new skeleton while glue dried on the skin. The third picture shows the new formers taking shape. I used the lines on my cutting board to help keep the latitudinal formers at right angles to the longitudinal one. I had to use pieces of card stock to fill gaps in several places. My 1mm card might not be exactly 1mm, or I cut the openings a bit large.
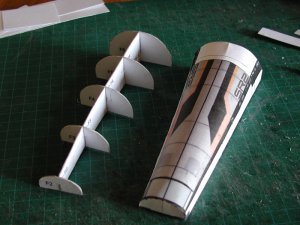
The fourth picture shows the new formers next to version one of this section with the skin applied. The new formers are clearly superior to the old ones. I expect most of the fit issues to be gone, and the end result to be far superior as well. You can also see in this picture how the skin hides many of the imperfections in the underlying foundation. I love that! The astute observer will also note that the skins are split at different places than the underlying structure. I did this to help hide those joint lines as much as possible. Let's hope it works!
In the next picture I'm getting ready to apply another layer of skin. This was also doubled up with another layer of card. Using two layers seems to be enough. The final two pictures are my attempts to capture how the layering shows up. Pardon the poor pictures. The next ones will be better.
By the way - my ink cartridges are getting low so the color on these skins is not the best. I will put in new cartridges before I print the next set so you'll see the colors much better. As mentioned I'm building two models at once, refining, re-designing, reprinting and re-building the re-designed, so in the end I'll really have two test builds.
That's all for now folks. I'll be building the second version of the same section next, then starting on the next section. I think all will go smoothly from here for the remainder of the hull, at least until I get to the tail section, which I expect will present a couple challenges.
Stay tuned,
Steve
The Decision...
Work begins...
Work continues...
Work continues continuing...
And continues some more...
A teaser about a future project...
The usual excuses...
News of a new SR1... and also here
The SR2 starts to really take shape...
The test building (finally) begins...
The usual problems are discovered...
Leading to the usual re-design of parts...
While we keep test building...
And that brings us to today. :mrgreen:
And what do I have for you today you're probably wondering. Well, here ya go.
So far I have re-designed and re-unfolded all of the main hull, and finally in the past week I've squeezed in some build time. The first pic below shows the re-designed formers. Much more professional. More work to create, but worth it. If anyone knows an easy way of making this type of former please share it.
Next we see the first of the main skins ready to be applied. For this one I laminated the skin to an additional layer of cardstock and edge colored it before assembly.
Meanwhile I had laminated the first set of the new formers to 1mm cardboard, so I started building the new skeleton while glue dried on the skin. The third picture shows the new formers taking shape. I used the lines on my cutting board to help keep the latitudinal formers at right angles to the longitudinal one. I had to use pieces of card stock to fill gaps in several places. My 1mm card might not be exactly 1mm, or I cut the openings a bit large.
The fourth picture shows the new formers next to version one of this section with the skin applied. The new formers are clearly superior to the old ones. I expect most of the fit issues to be gone, and the end result to be far superior as well. You can also see in this picture how the skin hides many of the imperfections in the underlying foundation. I love that! The astute observer will also note that the skins are split at different places than the underlying structure. I did this to help hide those joint lines as much as possible. Let's hope it works!
In the next picture I'm getting ready to apply another layer of skin. This was also doubled up with another layer of card. Using two layers seems to be enough. The final two pictures are my attempts to capture how the layering shows up. Pardon the poor pictures. The next ones will be better.
By the way - my ink cartridges are getting low so the color on these skins is not the best. I will put in new cartridges before I print the next set so you'll see the colors much better. As mentioned I'm building two models at once, refining, re-designing, reprinting and re-building the re-designed, so in the end I'll really have two test builds.
That's all for now folks. I'll be building the second version of the same section next, then starting on the next section. I think all will go smoothly from here for the remainder of the hull, at least until I get to the tail section, which I expect will present a couple challenges.
Stay tuned,
Steve

 ) I have finished all the 3D work on the lower hull, tweaked a whole bunch of parts where I noticed fit issues (mainly from not allowing for paper thickness), and did a little other tweaking here and there.
") .
.