Hi Billk,
Freehand9 is quite expensive, on the lines of Paintshop pro7 for price.
It has hundred's of special features, here is just one of them --
----------------------------------------
The perspective grid is a non-printing array of lines that converge on one or more vanishing points to create the appearance of three dimensions. Use the Perspective tool to snap objects to the perspective grid. Create and modify vanishing points and grid size to control the three-dimensional appearance of the attached objects. Use the Define Grids dialog box to edit and store custom perspective grids and use them to modify other objects.
Use the Perspective tool to attach objects to the perspective grid. Attach an object to the perspective grid to give it a three-dimensional appearance, which is retained even after the object is released from the perspective grid. Attaching an object to the perspective grid is a two-step process using the Perspective tool and the cursor keys.
To attach an object to the perspective grid:
1 Choose View > Perspective Grid > Show to show the perspective grid.
2 Click the object with the Perspective tool.
3 Drag the object to the desired area of the perspective grid.
4 Tap the appropriate cursor key.
5 Release the mouse button.
Tap this cursor key To
Left Attach the object to the left grid.
Right Attach the object to the right grid.
Up Attach the object to the floor grid, aligned with the right vanishing point.
Down Attach the object to the floor grid, aligned with the left vanishing point.
Note If the perspective grid has only one vanishing point, tap either the left or right cursor key to attach an object to the vertical grid and tap either the up or down cursor key to attach an object to the horizontal grid.
To alter an object’s perspective appearance, drag the object to a new location on the perspective grid using the Perspective tool. Objects retain their perspective appearance when moved from the grid.
To Do this
Flip a side grid object horizontally on the grid 1. Select the object with the Perspective tool.2. Press the spacebar.
Flip a floor grid object vertically on the grid 1. Select the object with the Perspective tool.2. Press the spacebar.
Move an object while constraining it to the perspective grid lines Hold Shift while dragging the object. Press Esc to retain the object’s perspective appearance when moving it off of the grid.
Reduce an object one pixel in both the x and y directions 1. Select the object with the Perspective tool.2. Press the 1 key.
Enlarge an object one pixel in both the x and y directions 1. Select the object with the Perspective tool.2. Press the 2 key.
Reduce an object one pixel in the x direction 1. Select the object with the Perspective tool.2. Press the 3 key.
Enlarge an object one pixel in the x direction 1. Select the object with the Perspective tool.2. Press the 4 key.
Reduce an object one pixel in the y direction 1. Select the object with the Perspective tool.2. Press the 5 key.
Enlarge an object one pixel in the y direction 1. Select the object with the Perspective tool.2. Press the 6 key.
Objects on the grid update automatically when repositioned using the Perspective tool. Moving objects using the Pointer tool or the cursor keys detaches them from the grid.
Note When View > Snap to Grid is checked, objects moved using the Pointer tool will snap to the Perspective grid but will not automatically obtain a perspective appearance.
Creating and modifying perspective grids
The attributes of the perspective grid determine the look of your three-dimensional objects. By defining the number of vanishing points and their positions, as well as the grid cell size, you can alter the viewer’s perspective.
To activate the perspective grid:
· Choose View > Perspective Grid > Show.
· Click the Perspective tool in the Toolbox.
To create a new grid:
1 Open the Define Grids dialog box by choosing View > Perspective Grid > Define Grids.
2 Click the New button.
The newly created perspective grid appears in the grid list. To change the default grid name, double-click the name and enter a new name. Press Return to accept the new name.
3 Set the number of vanishing points, grid cell size, and grid color.
4 Click OK.
You cannot name a new perspective grid using the same name as an existing grid. To replace a grid in the grid list, first delete the unwanted grid and then create a new one.
Altering grid attributes
Change the number of vanishing points and the grid color using the Define Grids dialog box. Alter the grid angles and orientation by clicking and dragging an active grid area with the Perspective tool. The cursor indicates when the pointer is over an active area. For information on the Perspective cursors, see Using FreeHand.
To Do this
Hide/show a grid associated with a particular vanishing point Double-click the vanishing point.
Hide/show the grid floor Double-click the horizon line.
Add a new grid to the grid list by modifying an existing grid Hold down Option (Macintosh) or Alt (Windows) while moving the grid with the Perspective tool. The new perspective grid appears in the Define Grids dialog with a default name.
Move grid and attached objects 1. Select the objects to be moved.2. Drag the perspective grid with the Perspective tool while holding the Shift key.
Move grid and clone all attached objects 1. Select the objects to be cloned.2. Hold down Shift-Option (Macintosh) Shift-Alt (Windows) and drag the grid.
Removing objects from the grid
When removing objects from the perspective grid, you can choose to retain or discard the perspective transformation from the object.
To remove perspective attributes from a grid object:
1 Select the object with either the Pointer tool or the Perspective tool.
2 Choose View > Perspective Grid > Remove Perspective.
To remove a selected object from the grid and retain perspective attributes, choose View > Perspective Grid > Release With Perspective.
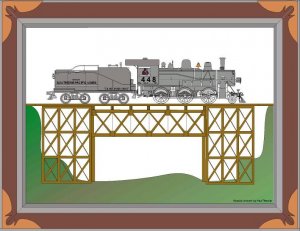
and here's a colour version of the loco.
Shamus


")