Scale Galvanized Community Watertank

fishBait

Member
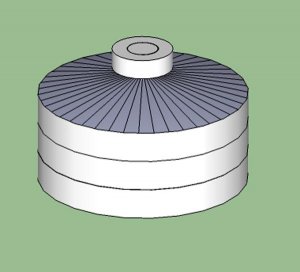
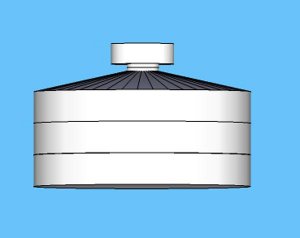
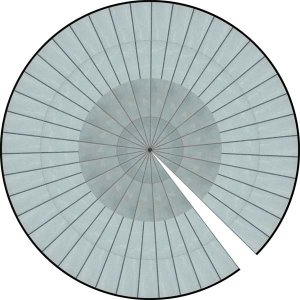
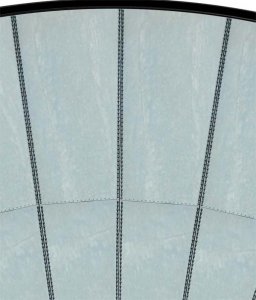
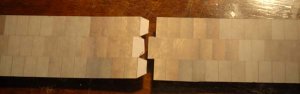
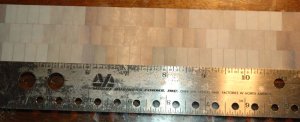
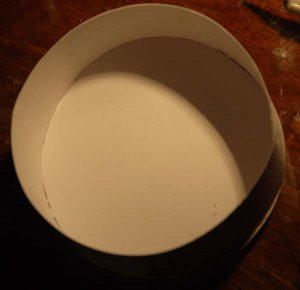
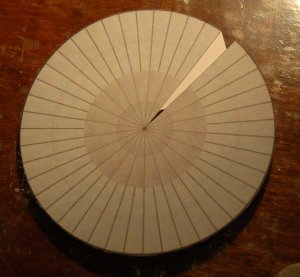
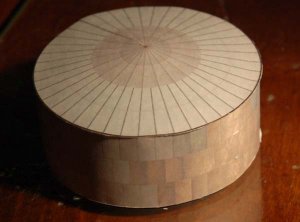
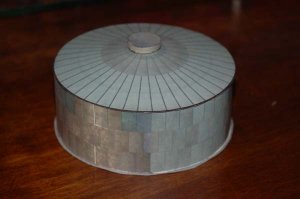
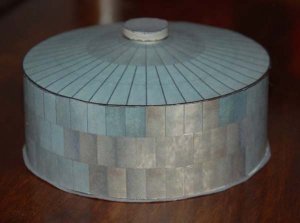
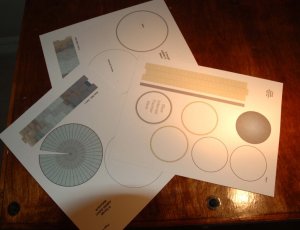
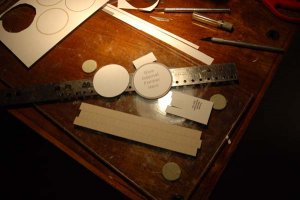
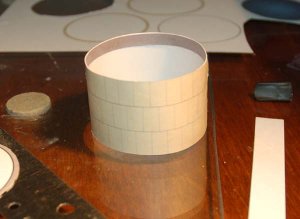
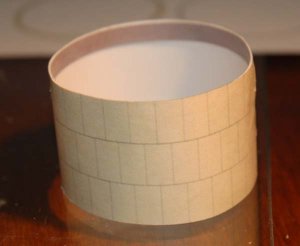
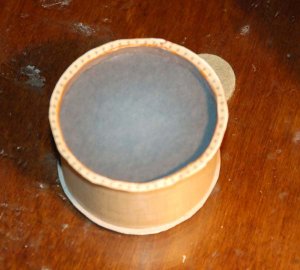
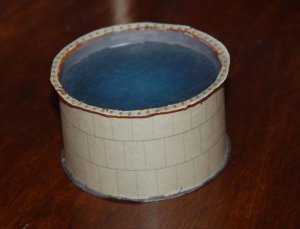
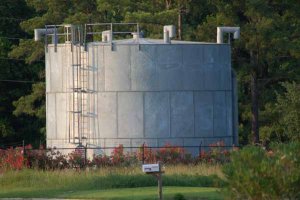
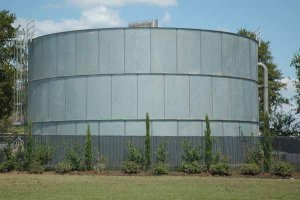
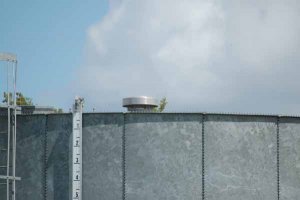
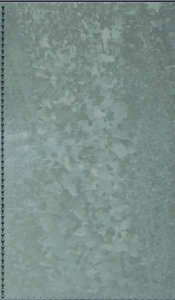
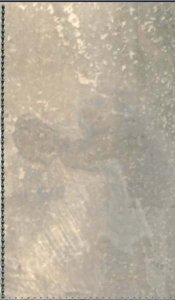
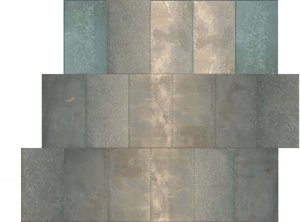
As advertised earlier, a galvanized water tank will be the next project and the first scale railroad project. After due consideration and study of the intended prototype, I decided to include three actual prototypes in the design phase (See images below!). The three prototypes are very similiar varying mainly in the top vent structure. At this point, I plan to include both vent structures as options.

One other major change in my design plans. I have decided to make and distribute the following scales:
O (1/:48), S (1/64), OO (1/76.2), HO (1/87), TT (1/120), N (1/160), and possibly Z (1/300) as well as the popular none railroad diorama scales of 1/35, 1/48, 1/72 and 1/44.

I realize that G scale is missing. That could change if there are enough posts to change my mind and a consistant scale can be agreed on. By the same token, if I have missed your favorite scale, the same rules apply. Let me know.

More later,

fishBait
 

Attachments

  • p01-proto1.jpg
    p01-proto1.jpg
    45.9 KB · Views: 33
  • p02-proto2.jpg
    p02-proto2.jpg
    43.6 KB · Views: 32
  • p03-proto3.jpg
    p03-proto3.jpg
    29.7 KB · Views: 30

fishBait

Member
I decided to go with three prototypes after I formulated my design strategy. How do you make a scale galvanized watertank made up of galvanized steel panels and make it look real? Huuummmm! Well, how about making up all of the steel panels individually from photos of the actual panels. Sounds good to me.

However, access problems prevented me from getting enough panels to make the tank. There are two more such tanks in neighboring additions, so go take photos of those panels. The fact of two different vent systems was just iceing on the cake. In addition, the tanks could be photographed under different lighting conditions.

So we start making our tank the old fashion way; One Panel At A Time! You can get an idea how this scheme is going to produce unique panes.

fishBait
 

Attachments

  • p04-toplevelpanel.jpg
    p04-toplevelpanel.jpg
    34.2 KB · Views: 32
  • p05-toplevelpanel.jpg
    p05-toplevelpanel.jpg
    34.9 KB · Views: 32
  • p06-Mid&botlevelpanel.jpg
    p06-Mid&botlevelpanel.jpg
    32.4 KB · Views: 40
  • p07-Mid&botlevelpanel.jpg
    p07-Mid&botlevelpanel.jpg
    24.9 KB · Views: 33

fishBait

Member
To see how this method is going to work out, I built a small segment of the watertank wall. Notice the top two outer panels. They look out of place because they are so dark. That is because they go on the other side of the tank (the shaded side, remember the lighting changes mentioned in the second post).

I will keep you updated as the design progresses.

More Later,

fishBait
 

Attachments

  • p08-sidewallsection.jpg
    p08-sidewallsection.jpg
    126.5 KB · Views: 39
Z

Zathros

It looks really great. I think you have the basis of a great diorama addition. :)
 

fishBait

Member
The watertank is progressing nicely. Couple of visits to the MUD (Municipal Utility District) for a conversation with the local manager. Cleared up some details and nailed down some dimensions. The tank under design is a 400,000 gallon bolted iron tank, one of the most popular in this area. If, and only if, I get enough requests, I will extend the project to include one of the smaller tanks.

An extended time of health issues, systems turmoil, and other various items curtailed modeling time. The USS Cairo languished in Beta testing for other reasons and new projects were just not possible.

The USS Cairo is being cleaned up and will be released in a matter of days and the watertank is well underway. From here on out, I will be keeping 2 or more designs in the hopper and active at all times.

Next design start announcement will be sometime before next weekend.

More later,

fishBait
 

Attachments

  • firstlook.jpg
    firstlook.jpg
    45.1 KB · Views: 30
  • second.jpg
    second.jpg
    27 KB · Views: 37

fishBait

Member
Stop and think a minute. You see less than one half of the tank from any given spot. Even then, the bottom panels are cut off due to fencing and other efforts to hide the plant. If you go in, then you are so close that you see only a few panels at a time, and they are distorted. I drove to five different tank areas and still did not get enough panels for the big tank (428000 gallons!).

So you will see some repeats in the tank, but not very many. Also, the repeats were disguised using different techniques and really do not show up. On the top, I did not climb a tank to try and be realistic there. I cheerfully used only a few modified panels. Check out the detail, yes those are all bolts.

When you build the tank, make sure you place it facing east or west, I built the side wall with the sun glare on one side and going to shade on the back face.

Main parts are designed, start a test build next session.

fishBait
 

Attachments

  • wall.jpg
    wall.jpg
    24.2 KB · Views: 33
  • pieplate.jpg
    pieplate.jpg
    47.4 KB · Views: 34
  • topdetail.jpg
    topdetail.jpg
    74.4 KB · Views: 36

fishBait

Member
Also saw a neat looking unique open top tank. It is a 150000 gallon tank with 26 panels around it. Three panels high. Very neat and well maintained! it is for irrigation water for the neighborhood and the golf course; hence the open top.

I really liked the look, so gonna include it in the watertank set. And yes, the color is real. I only removed the name to protect the innocent.

fishBait
 

Attachments

  • wall26.jpg
    wall26.jpg
    22.7 KB · Views: 34

fishBait

Member
Now for a little papermodeling. Prototype parts pages for HO, N and Z scale are completed. The test build will feature N Scale.

Photo 1 => Prototype part pages for the 428000 gallon tank and the 150000 gallon open top tank.

Photo 2 => Side wall parts removed from parts page.

Photo 3 => Side wall strips joined and checked for alignment.

Photo 4 => Side wall completed and internal former inserted. Base glued to sidewall and internal former.

Stay tuned, more coming.

fishBait
 

Attachments

  • bg-01.jpg
    bg-01.jpg
    115.8 KB · Views: 37
  • bg-03.jpg
    bg-03.jpg
    76.7 KB · Views: 32
  • bg-04.jpg
    bg-04.jpg
    101.6 KB · Views: 32
  • bg-05.jpg
    bg-05.jpg
    83.6 KB · Views: 36

fishBait

Member
We left off with photo 4 on the last build post. Picking up from there .....

Photo 5 => Insert the remaining internal former from the top and glue. Assemble the top of the tank by sliding the top area of the joint over the tab and glue.

Photo 6 => Glue the top to the top of the side wall.

We now have basic shape of a large 428000 gallon watertank. Next, we will add the top vents.

More later,

fishBait
 

Attachments

  • bg-08.jpg
    bg-08.jpg
    97.9 KB · Views: 34
  • bg-09.jpg
    bg-09.jpg
    87.1 KB · Views: 32

fishBait

Member
Proceeding to the top vents!

Photo 7 Remove the vent pipe parts and assemble forming the pipe from the vent side and gluing the internal formers in. Remember that the pipe will be installed on top of the tank and will have to set on the peak. Either recess the lower internal former, or cut a hole in the center of the former. Now assemble the vent cap (see graphics for the parts). Form a circle of the vent top side and glue the end. Insert the internal former at the very top of the vent cap. Now glue the top of the vent cap to the internal former and sidewall.

Photo 8 Glue the vent pipe to the tank roof, cener over the peak. Once dry, glue the vent cap to the vent pipe. Set back and admire your tank.

Photo 9 Another look at the completed tank.

More later,
fishBait
 

Attachments

  • bg-09a.jpg
    bg-09a.jpg
    99.3 KB · Views: 31
  • bg-10.jpg
    bg-10.jpg
    83.2 KB · Views: 32
  • bg-11.jpg
    bg-11.jpg
    85.7 KB · Views: 38

fishBait

Member
After completeing the HO, N, and Z scale tanks, I would like to put two questions out to you guys!

Question 1) I intended to add detail (piping) to the tanks, but now think that would be a wasted effort. Of the 5 big tanks and 1 smaller tank, all had different piping setups. It appears that the piping would depend on the placing and use of the completed tank. To me, I now believe that I should supply the basic tank and you pipe your own tank to fit your use. What do you think?

Question 2) It is now clear that the HO tank is about the biggest possible with this design. Any bigger tank will require extensive internal structure for support. For instance, The 1/46 scale tank would be 13.74 inches in diameter and the sidewall would be 43.16 inches long and 5.24 inches high requiring at least six pages. Every major part would require multipe pages. All of this card without internal structure sags and pulls apart. I propose to limit the release to HO, N, Z, 1/72 and 1/44. What do you think?

Thanks in advance,

fishBait
 

fishBait

Member
Starting build of the 150000Gallon Open Top Tank.


Photo 1 - Parts pages for the Open Top Tank.


Photo 2 - First parts removed from the parts page.


Photo 3 - Form the side wall, curl the sidewall smoothly and glue at the join.


Photo 4 - Glue the water level line strip inside the top of the sidewall. Make sure the strip is even with the top and trim the ends carefully.


More Later,

fishBait
 

Attachments

  • ot-01.jpg
    ot-01.jpg
    115.8 KB · Views: 31
  • ot-02.jpg
    ot-02.jpg
    95.2 KB · Views: 32
  • ot-03.jpg
    ot-03.jpg
    88 KB · Views: 41
  • ot-04.jpg
    ot-04.jpg
    80.7 KB · Views: 32

fishBait

Member
Continuing the build!

Photo 5 Insert the simulated water internal former from the bottom and seat firmly up against the water level line strip.

Photo 6 I had originally intended to make a bottom plug with a sandwitch of internal former and base. Not a good idea, but with this picture, envision inserting a bottom internal former and gluing, then gluing the internal former and sidewall to the base.

Photo 7 Base attached as described above.

Photo 8 Remove the center from the top rings. Laminate and remove the outer card stock.

fishBait
 

Attachments

  • ot-05.jpg
    ot-05.jpg
    87.8 KB · Views: 31
  • ot-07.jpg
    ot-07.jpg
    93.8 KB · Views: 33
  • ot-08.jpg
    ot-08.jpg
    77.3 KB · Views: 38
  • ot-10.jpg
    ot-10.jpg
    91 KB · Views: 30

fishBait

Member
Continuing the build!

Photo 9 Glue the top rim to the sidewall. Watch alignment of the interior of the rim vs sidewall.

Photo 10 Completed 150000 Gallon Open Top Tank. Notice the water simulation with the shaded insert. Again, I decided to leave the piping up to the individual builders. Every tank I visited had a different piping system.

Photo 11 Another shot of the completed tank showing details and a better feel of the water simulation.

Enjoy,

fishBait
 

Attachments

  • ot-11.jpg
    ot-11.jpg
    100.2 KB · Views: 33
  • ot-12.jpg
    ot-12.jpg
    91.2 KB · Views: 34
  • ot-14.jpg
    ot-14.jpg
    84.6 KB · Views: 30

fishBait

Member
Due to input via PM, the watertanks will be released as an alpha release in HO, 1/72,1/144. N and Z scale. That will be followed with an addendum of 1/48, 1/32, and 1/35 scale.

I will announce when the alpha is up for download.

fishBait
 
Z

Zathros

These look great! The texture on the metal tank is incredibly convincing, unrolled and rolled! :)
 

fishBait

Member
These look great! The texture on the metal tank is incredibly convincing, unrolled and rolled! :)

Always glad to hear from you Zathros. Again, thanks for the kind words. both tanks should be ready for release within a week, I'll advise here.

fishBait
 
Z

Zathros

My words reflect your generosity and skill of which both you have impressed many, especially myself. You are in that elite group of people like Mauther, of PaperMau, Julescrafter of Paper-Replika, James Gemperline of Paragon Paper models, UHU02, and a lot more who give their works away, beautiful works. Thank You! :)
 
Top