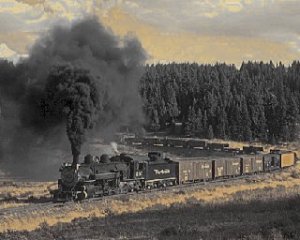
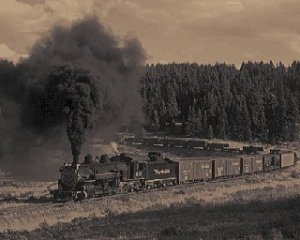
In answer to a request from McFortner for Photoshop help, this first little mini-tutorial will show you how to make "sepia" prints from either colour or black and white images.
1. First, convert your image to greyscale: on the upper menu select:
image - mode - greyscale.
It will ask you if you want to discard the colour information - click ok
2. Save as - give this image a new name if you don't want to overwrite your original colour image
3. Back to the menu
image - mode - duotone
4. A dialog box will pop up enabling you to select the two colours you will use. The default is black plus a colour. You will notice that you can change the colours by clicking on the coloured boxes or you can select "load" to bring in some duotone's that Photoshop has built-in. If you decide to load you will have to navigate into your Photoshop folder, in "goodies" there you'll find all the presets.
5. Now you are returned to the dialog box from step 4. You can also change the colour balance and contrast by clicking on the box that looks like a graph. This brings up the "Duotone Curve" editor. You can grab and drag the points to change at what point the colour "kicks in", how contrasty it is, etc. A straight line along the bottom will make the colour virtually invisible. A straight line across the top will make it solid. Do a little experimenting here and see the results.
6. If you don't like the results, or wish to change the colours, just go back to your menu - image/mode/duotone and the dialog box pops up again.
Hope this helps