Patlabor AV-98 Ingram 2

ASC Mclaren

Well-Known Member
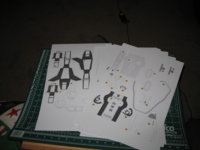
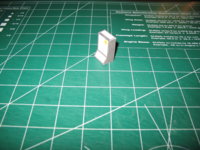
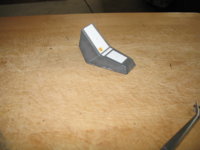
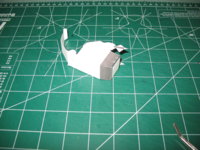
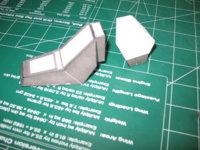
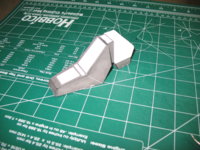
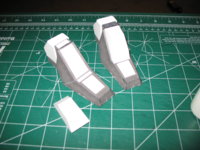
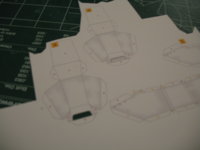
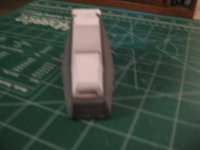
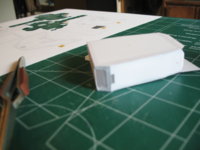
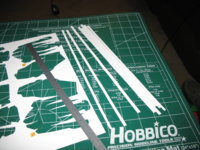
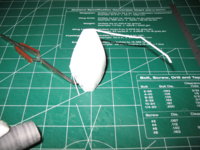
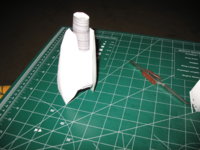
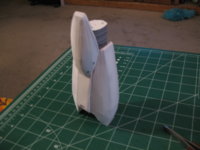
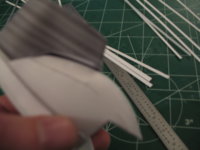
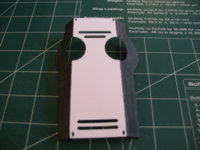
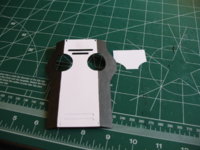
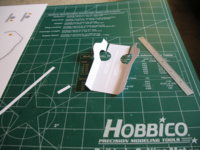
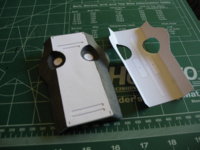
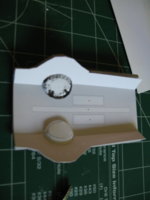
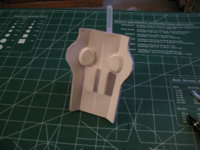
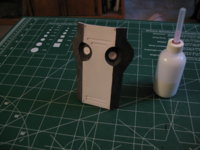
So, now that I have the wide format printer, I up-sized the Paper-replika Patlabor Ingram. I saw that the AV-98 models are designed to 1:24 scale, so I printer the model at 133%. I intend to add LED lights with flasher circuits. Any help with that would be appreciated, I am thinking 555 IC.
 

Attachments

  • IMG_2974.JPG
    IMG_2974.JPG
    1.1 MB · Views: 15
  • IMG_2975.JPG
    IMG_2975.JPG
    1.5 MB · Views: 18
  • IMG_2976.JPG
    IMG_2976.JPG
    1.2 MB · Views: 15
  • IMG_2977.JPG
    IMG_2977.JPG
    1.6 MB · Views: 14
  • IMG_2978.JPG
    IMG_2978.JPG
    1.4 MB · Views: 15
  • IMG_2979.JPG
    IMG_2979.JPG
    1.6 MB · Views: 16
  • IMG_2980.JPG
    IMG_2980.JPG
    1.4 MB · Views: 14
  • IMG_2982.JPG
    IMG_2982.JPG
    950 KB · Views: 17
  • IMG_2986.JPG
    IMG_2986.JPG
    1 MB · Views: 11
  • IMG_2989.JPG
    IMG_2989.JPG
    1,005.4 KB · Views: 13

ASC Mclaren

Well-Known Member
On the curved parts I have been cutting off the tabs, and creating my own, allowing a butt joint without edge gluing. I cut strips about .3 inch to use as tabs, and I cut to length.
 

Attachments

  • IMG_2999.JPG
    IMG_2999.JPG
    1.4 MB · Views: 16

ASC Mclaren

Well-Known Member
Sorry about that, I'm still getting used to the new platform. More pictures:
 

Attachments

  • IMG_2994.JPG
    IMG_2994.JPG
    1.1 MB · Views: 24
  • IMG_2995.JPG
    IMG_2995.JPG
    1.5 MB · Views: 22
  • IMG_2996.JPG
    IMG_2996.JPG
    1.4 MB · Views: 16
  • IMG_2998.JPG
    IMG_2998.JPG
    1.1 MB · Views: 20

ASC Mclaren

Well-Known Member
The only thing I had real problems with so far were parts 33 and 34. The gap was unacceptable. So knowing that these parts are bellows I cut strips at about .1", colored the strips various shades of grey and black, and wrapped 33. I did the wrap after attaching the 33 to 30/32 sub-assembly. I'll post pictures of the finished repair next post, after I fix the other side.
 

Attachments

  • IMG_3005.JPG
    IMG_3005.JPG
    1.1 MB · Views: 14

mysteroid

Active Member
Great idea! I'm a big fan of upsizing and big models in general. Looking forwards to seeing it lit up!

A quick question, what is your printer make and model and do you like it?
 

ASC Mclaren

Well-Known Member
I have a new Epson Artison 1430. So far I love it. Very easy setup (Even if you have been cursed with windows 8, like me), very nice prints. The pages are much less susceptible to water damage, as I found out while working while it was near 80 degrees out. It doesn't have any multi-functions, though. It only prints.
 

zathros

*****SENIOR ADMINISTRATOR*****
Staff member
Administrator
Moderator
I have an Epson Workforce 1100 printer that is excellent. I also know where to get the O.E.M. ink at a fraction of the price. It will print 13" wide, and however long, length, you set it, or at least till the ink runs out! :)
 

ASC Mclaren

Well-Known Member
I also finished the shield. Did I mention that I am building this as part of the Snohomish County Sheriff's Office SWAT (or maybe SRT), my local agency. So, I am building without the Japanese scripting and I will add the SCSO markings later. I am waiting for some 4017 IC to arrive, so I am building around the spaces that I intend to place the circuit boards.

As designed the underside of parts 125 and 126 are visible. I don't like that look, so I printed a second set, built those part inside out, white showing; then I placed these on the inside of part 116 (the back of the shield). Unsightlyness covered.
 

Attachments

  • IMG_3024.JPG
    IMG_3024.JPG
    771.8 KB · Views: 11
  • IMG_3025.JPG
    IMG_3025.JPG
    797.3 KB · Views: 16
  • IMG_3026.JPG
    IMG_3026.JPG
    892.2 KB · Views: 16
  • IMG_3028.JPG
    IMG_3028.JPG
    906.9 KB · Views: 16
  • IMG_3030.JPG
    IMG_3030.JPG
    833.3 KB · Views: 15
  • IMG_3032.JPG
    IMG_3032.JPG
    168.4 KB · Views: 14
  • IMG_3033.JPG
    IMG_3033.JPG
    944.6 KB · Views: 11
  • IMG_3034.JPG
    IMG_3034.JPG
    914.3 KB · Views: 14

Rhaven Blaack

!!!THE MAN BEHIND THE CURTAIN!!!
Staff member
Administrator
Moderator
That would be QUITE INTERESTING to see Snohomish County Sheriff's Office SWAT (or any other agency for that matter) using something like what you are making!!!
 

ASC Mclaren

Well-Known Member
Update: I lied last update, I hadn't finished the shield. So I built the grey anima-y buttons. Then I built up the left lower arm finished. Both hands done as well. I copied another build, and articulated the fingers.IMG_3039.JPG IMG_3040.JPG IMG_3035.JPG IMG_3036.JPG IMG_3037.JPG IMG_3047.JPG IMG_3055.JPG IMG_3059.JPG IMG_3058.JPG IMG_3064.JPG
 

ASC Mclaren

Well-Known Member
More of the hands:IMG_3060.JPG IMG_3061.JPG IMG_3065.JPG IMG_3066.JPG IMG_3060.JPG
There is another picture showing the finger articulation, alas I have a somewhat juvenile sense of humor so I didn't upload that shot (but one of my teenage sons laughed and laughed).
 

ASC Mclaren

Well-Known Member
IMG_3067.JPG IMG_3070.JPG IMG_3071.JPG IMG_3076.JPG I should be starting the electronics this week (hopefully). Anyway, I will be adding part of the cockpit, so I needed a seat. I decided to borrow a seat from a Lamborgini Mercialogo, designed in 1:18! I built the light interior version, and then used a Prismacolor marker to color the seat. The seat built up fantastic, as it fits 1:18 pilot perfectly. Then I added the 5 point harness, which was custom.View attachment 131106 View attachment 131107 View attachment 131109
 

ASC Mclaren

Well-Known Member
Well, I've been on hold for want of electronics proficiency. I have some gifted co-workers, who schooled me, so I have completed the two circuits that I need on breadboards, and will be transferring these to circuit boards which I will fit in the waist of my Ingram. The small board is a wig-wag. The wig-wag lights will be the hip and chest lights (I'm thinking of adding two blue chest lights). The large board is the shoulder light bar circuit, which flashes one side three time, then the other three times. WP_20140617_20_04_54_Smart.jpg WP_20140617_20_05_49_Smart.jpg
 

ASC Mclaren

Well-Known Member
A small update: I have started moving the electronics from the breadboards to circuit boards, but I have yet to solder any connections. I have gotten some of the 0402 SMD LEDs soldered onto SMD mounts. I have also started the chest/cockpit. I opened up the part so that I can install some of the cockpit. If you build an Ingram, I would recommend removing all of the tabs (Except the 90 degree tabs) on part number 93, and making your own butt tabs. I created light boxes for the LEDs too keep light from bleeding through the back or sides of the mounts. I used red and blue colored sheets as lenses. I was able to install both the red and one of the blue chest lights. Tomorrow I hope to get three more Leds soldered... Sorry about the picture quality, my camera doesn't like close up.IMG_3077.JPG IMG_3078.JPG IMG_3080.JPG IMG_3082.JPG IMG_3087.JPG IMG_3088.JPG IMG_3092.JPG IMG_3093.JPG IMG_3094.JPG
 

Rhaven Blaack

!!!THE MAN BEHIND THE CURTAIN!!!
Staff member
Administrator
Moderator
This is really coming together nicely!!!
You are doing a GREAT JOB on this (despite the poor picture quality ;)).
 
Top