n scale steam kitbashing - canadian locos

Wiredup

Member
Dec 8, 2007
114
0
16
kinda a repost from another thread... see http://www.zealot.com/forum/showthread.php?t=164314

Pretty much I got three projects:


This: (Con-cor J3a Hudson)
5db5_1_sbl.JPG


into this: (Canadian Pacific Royal Hudson)
royal_hudson_2860b.jpg


this: (Con-cor USRA 2-10-2)
0f3a_1.JPG


into this: (Canadian Pacific Selkirk)
3102075142_65e44ce14f.jpg

(Selkirk photo by me)


finally this: (Bachmann Heavy Mountain)
bachmann_82501.jpg


Into this: (Canadian National 6060 u1f)
cn6060.jpg
 

Wiredup

Member
Dec 8, 2007
114
0
16
I started on the 6060 conversion tonight using my guinea pig... a Light Mountain Bachmann with a Vandy Tender.

The Vandy Tender is much too long... but after taking it apart is gonna be a REAL PITA to shorten...so I'll leave it as is.

But here's pics of my progress. First attempt at kitbashing anything!

3103421957_c58b1413fd.jpg


3104254466_d5e84091a6.jpg


3104253942_17f9a115d7.jpg


3103423481_dde4274f26.jpg


3103423983_93a4dbcd33.jpg


I still need to do the smokebox front, and go over the painting again... do some touch ups on the cab, and do another mod to the front... what I describe as an intercooler...but I dunno what it's called because I have only very basic knowledge of the anatomy of these things.


P.S. any tips or suggestions would be awesome!
 

nkp174

Active Member
Oct 10, 2006
1,455
0
36
41
Cincinnati, O.
Welcome to our cubby hole of fun!

Intercooler...perhaps the feed water heater???

The shielding on the front was commonly used to cover the air pumps (powering the brakes)...but that clearly isn't the case here because I can see the air pump on the side.

I also suggest that you finish #1 first...so that you can take all the lessons you learn to #2 and produce a nicer locomotive because of it. My first scratch built 27' boxcar I scrapped. My second was a thing of beauty because of all I learned on #1.
 

Wiredup

Member
Dec 8, 2007
114
0
16
oh I'm definatley finishing this one before I move onto the others. in fact I already know how I'm going to do the side rails on the next one...aside from not trying to cut a straight line freehand! :)

The part I'm talking about on the CNR is the large block below the smoke box that has the signal lamps, and the number plate mounted on it.

now how hard would it be to modify the trucks, or do you know of a manufacture that makes the same front trucks that we see here. I know the Lifelike Berkshire has a single axle truck thats covered like that.
 

nkp174

Active Member
Oct 10, 2006
1,455
0
36
41
Cincinnati, O.
Basically, inside bearing lead trucks were pretty much the standard for a long, long time...and the USRA engines had them. USRA locomotives also had that type of trailing truck (I don't recall the name for it). Outside bearing lead trucks became common after 1930. It was a new design that allowed a single lead axle to track like a pair of lead axles at high speed (hence a greater than 78mph excursion with a 2-8-4 which occurred a while ago (unofficially of course, it was higher)).

I don't know who to check with for the parts in N scale. In HO, Precision Scale would offer a truck similar to that. The delta trailing truck should be available from someone.
 

doctorwayne

Active Member
Sep 6, 2005
3,516
0
36
Canada, eh?
To help with your conversion work, here's a pair of photos of the real 6060, taken in the mid-'70s when she was the regular power on the Wednesday midday run from Toronto to Niagara Falls.
CNR_6060_at_Niagara_Falls_Ont_-_Sept_4_1976_-_view_1.jpg


CNR_6060_at_Niagara_Falls_Ont_-_Sept_4_1976_-_view_21.jpg


The easiest way to build a Canadian-style all-weather cab is to lay out the sides on a sheet of .010" or .015" styrene, making sure that the height and length is equal to or greater than the cab which is on your model. Cut out all of the window openings. Use a file or sandpaper to remove all protruding detail (rivets, window sills, handrails, etc.) from the cab sides of the model. Next, lay the new side atop the smoothed side of the model and mark any part of the original side which shows through the windows of the new side. Use a knife, saw, or file to remove these areas as required, then cement the new sides in place. You will have to lop off the rear of the existing cab roof, and may even need to fashion a new roof - do this in the same manner as you did the sides, and file or sand all protruding detail off the existing roof.

This is a HO scale Santa Fe Northern, from Bachmann, with an all-weather cab built as described above. It's now in the possession of my good friend Deano.
other_locos_016.jpg


This is a Tyco/Mantua Mikado, done the same way:
2007-01-10_491.jpg


And a Bowser Pacific (the side skirting was also done with styrene):
2007-01-10_488.jpg


To add white sidewalls to the tires, hook pick-up wires to the loco so that you can power it whilst on your workbench, then use a brush, held stationary, while the drivers turn at slow speed.

Wayne
 

Wiredup

Member
Dec 8, 2007
114
0
16
Wayne, great idea for the while walls! I'll do that tonight.

Those are great pics too! Love the quality of work you've done, very inspiring.

The 6060 is a loco that has a special place in my heart. I've rode her more than any other loco during my railfanning experiences since I was 3.... seeing as how it came to Alberta in the early 1990's. I got quite a few shots of her, but more are always better!
 

Wiredup

Member
Dec 8, 2007
114
0
16
I started work on the nose of the CNR mountain tonight... using brass as I couldn't find the proper styrene tubes (ie... the sizes were not all in stock).

I used krazy glue to weld all the brass tubing together into a general cone shape, attatchted it to my drill and started going at the sandpaper... maybe I'm not patient enough, but this does not seem like an efficient way to shape the brass into the cone I'm wanting....

any better ideas?
 

doctorwayne

Active Member
Sep 6, 2005
3,516
0
36
Canada, eh?
What if you were to fashion one from heavy paper or thin sheet styrene, then use it as a mould, into which you could pour some 5 minute epoxy? If you wanted a working headlight, you could drill it out as required.

Wayne
 

Wiredup

Member
Dec 8, 2007
114
0
16
the epoxy isn't working out as planned... gave it three tries last night...ran outa epoxy and didn't get the shape I was hoping for.

I got the brass cone smoothed out using a drill/file combo, and then went over it with some sandpaper. But now it's cutting off the excess thats driving me completley nuts. I put it in a vice grip and started away with a hacksaw but I'm probably using the wrong blade.

What about using plaster?
 

doctorwayne

Active Member
Sep 6, 2005
3,516
0
36
Canada, eh?
I'd try autobody filler, the kind that requires a catalyst to harden. Not a good idea to apply it to the plastic loco in its "un-set" state, however.

Wayne
 

Wiredup

Member
Dec 8, 2007
114
0
16
ended up getting some air-dry clay from my local arts and crafts store... result:

3144913517_8fb514c36b.jpg


not too shabby if I say so myself.
 

Wiredup

Member
Dec 8, 2007
114
0
16
The one with the original headlamp poking through is actually the most accurate outo of the three. The one on the loco with the green sides is actually the worst.

thanks for the words! It really helps me get right back at it. I need to pickup some more thinner before I start painting again, but I should have a fleet of U1f's by the end of January I think! :mrgreen:
 

Wiredup

Member
Dec 8, 2007
114
0
16
Sit down and grab a cup, because this is the home stretch!!


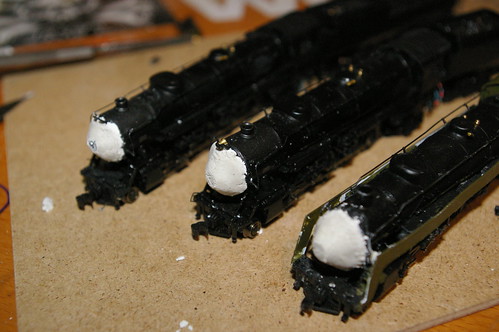
Where we left off last time was the clay noses applied to the locos. Well... they have been painted and here are some 'before the finals' shots.. The following is using one of the Heavy Mountains... in fact this one will be my MAIN U1f and decaled #6060.

3198815816_54caf89dcf.jpg

3198815824_c121bf4a8c.jpg


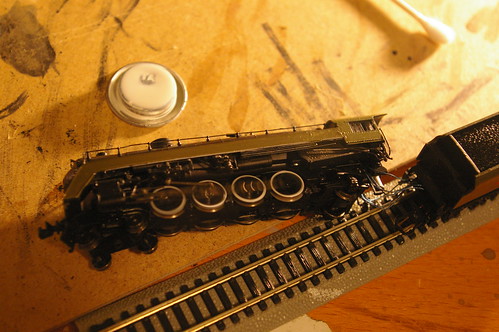
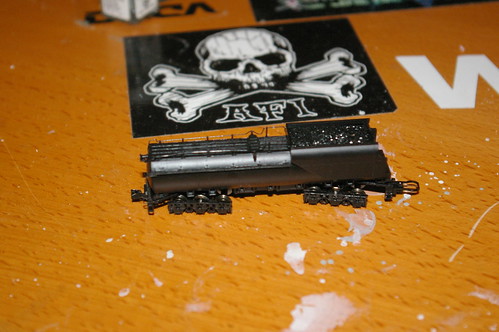
So the first step to finalizing the design was to finish off everything in front of the cab. This meant cutting some styrene for the sides and the lil box under the smoke box.

3198815810_6bdfc3129d.jpg


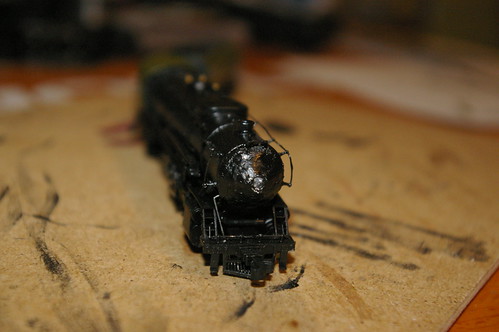
As you can see that worked out pretty well! :mrgreen:


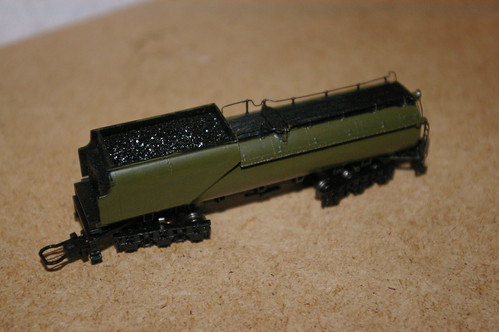
Then it was time for paint! I painted the styrene that was just applied and then realized I should have painted the pieces before gluing them in place... would have made it a lot easier!

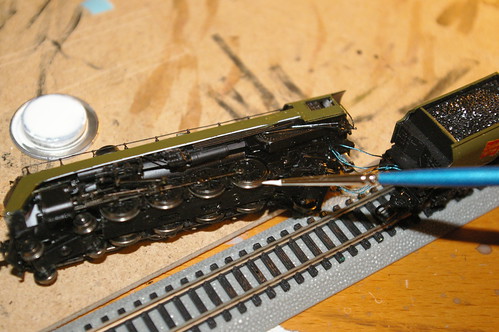
Anyways, after that I worked on the white-walls for the drivers... As you can see I took the previous suggestion of applying power to the loco and then using some throttle... take the brush to the wheels edges.

3198815804_0781b252b0.jpg


3198815798_2eb3456f24.jpg


How wonderful is that?!

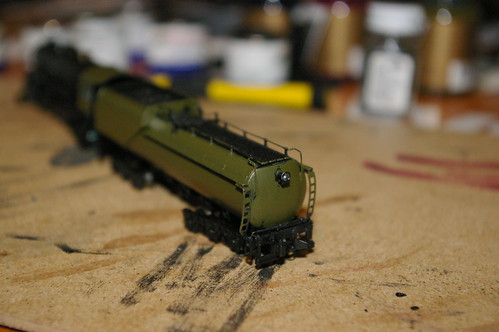
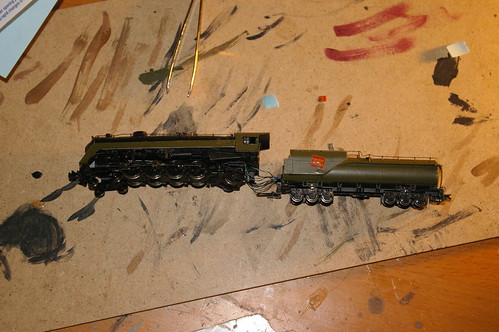
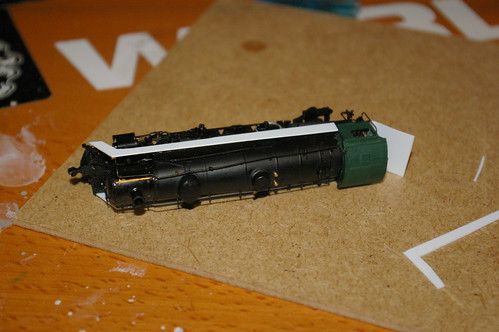
I was on such a roll I decided to start decalling... then the poo hit the fan! wall1

The microscale decals I have (and the only set I can find for CN streamlined steam) must either be really old... or the quality of the microscale decals is just not very good... I have FOUR of the tender logos before this... so enough for two locomotives. I used THREE up on just the one side... they keep falling apart! I'm very distrot and scared that I only have one possible attempt at the other side of the tender...

3198824492_6073f832f6.jpg


As you can see, not even that one turned out very well...


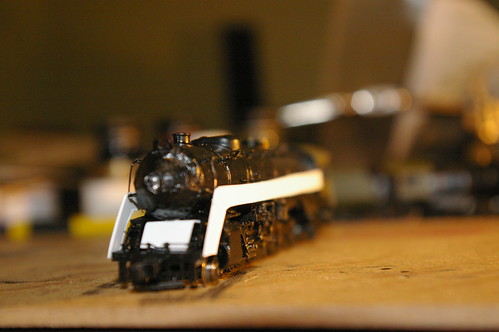
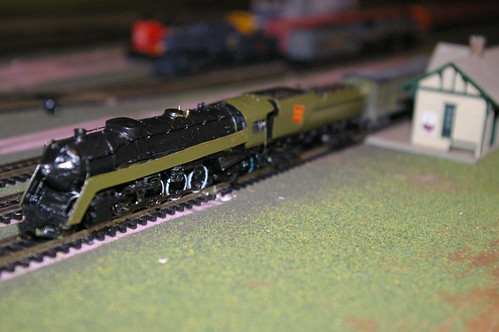
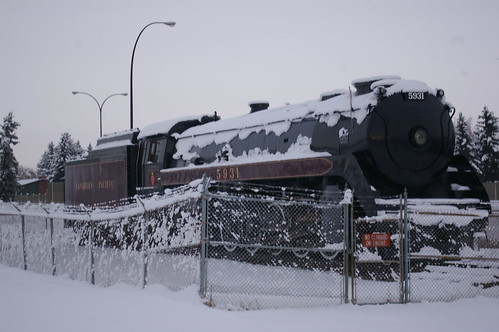
Anyways... I put the loco on the tracks to see what she looks like with some passenger cars behind her. Not too shabby!

3197976837_a13c434a38.jpg


Sorry about the bad focus... I can't find my macro lens anywhere!


Anyways, only a few more things to finish up... I need to find the Bell for this loco... its on my workbench somewhere, but it's so bloody tiny I don't know where it coulda gone. I just hope it didn't fall into the carpet where it will be lost forever. :eek: I've emailed Bachmann a few times if they will do replacement bells for this loco, but they have never gotten back to me... so I'm really worried.

After the bell I will have to do the cab conversion, and then the final decal applications... After that, I will have one very pretty piece of Canadian Steam on my layout! Oh happy day! :thumb: