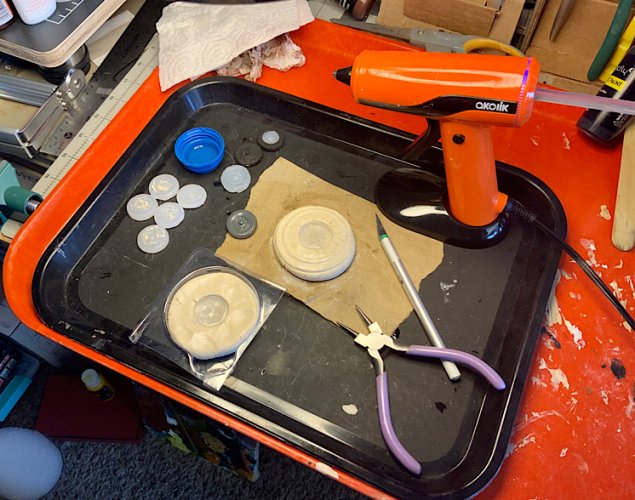
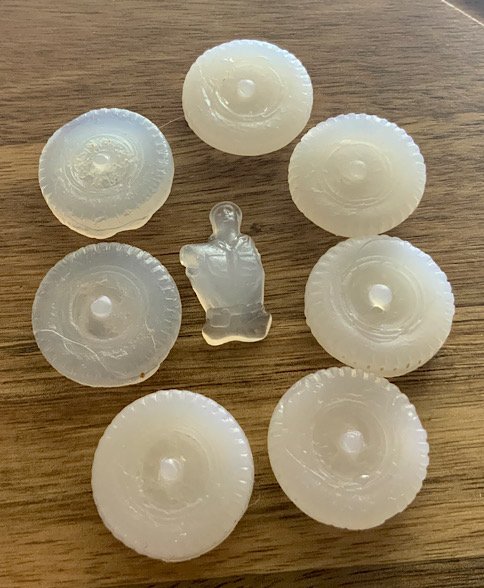
I have quite a few 1/35 paper models to build and a couple of scratch builds I want to do that need a ‘truck tire’.
I bought a German half track kit a while back and the front wheels are perfect for my needs. There are only 2 in the kit. Since I am cheap, I didn’t want to spend a bunch of money on extras, so I set about figuring out how to make my own.
Yes, I can make a silicone mold and cast them in resin. I will be doing that one of these days, but for simple, flat back parts and even some more complex things, I found a way to make a mold easily and cheaply.
I’ve started messing with ordinary air dry clay for the mold. I saw a guy make a part with the clay and hot glue on youtube and tried it. It works, although it is a bit fiddly. My first wheel came out OK, the third one was fubared (but still useable) by a glue gun burp and the second one is ugly, but still can be used.
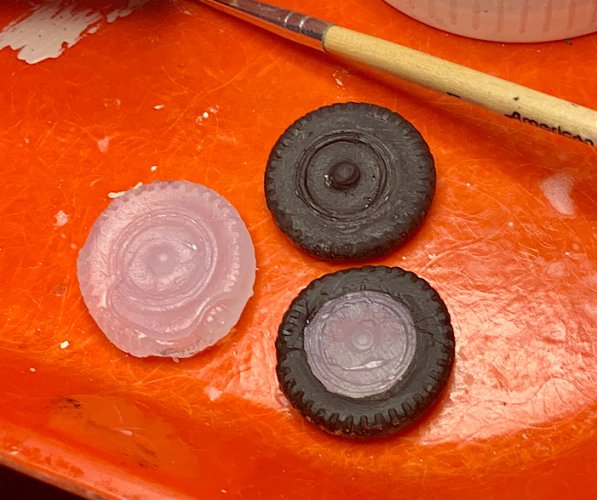
Those are about 1” in diameter, or 35 inches or so to scale. The all black is the first one, the black tire is #3 and the glue one is #2.
You simply mash out a blob of air dry clay and press the part into it to form the mold. The fiddly part is getting it back out without ruining the mold. That is where I am now… experimenting with releasing the part. Remember, the clay is soft, you don’t let it dry.
When finished, you just wad up the clay and put it back in the bag with the rest of it.
This experiment was triggered by a little missile launcher thing (a HAWK) that came with a batch of army men off ebay. I had overlooked it as ‘silly’ originally but yesterday found out that it is actually a quite good, to scale, model of a Hawk launcher. All I have is the 3 missiles on their holder that pivots and is vertically adjustable.
The real Hawk setup looks like this:
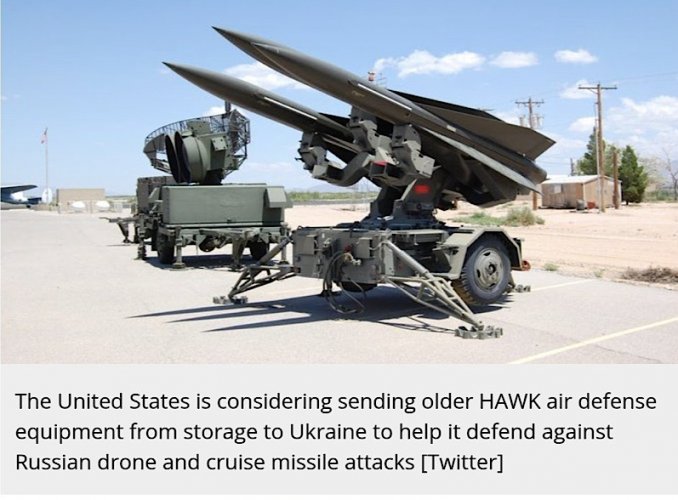
I have the 3 missiles, tan like these, and the mount. I will need to build the trailer.

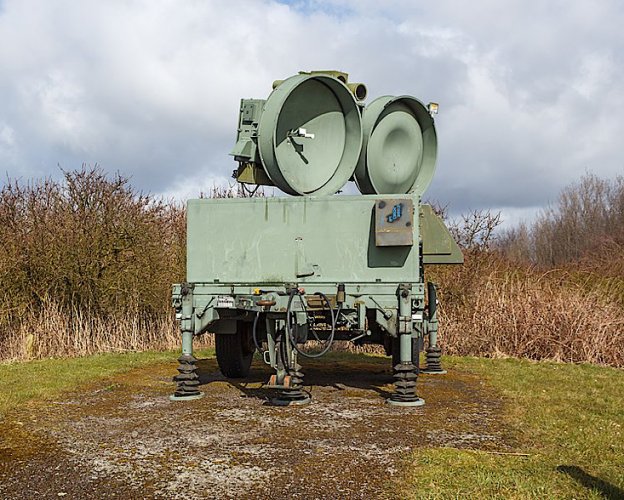
And the aiming/radar unit for this looks like this. It will have to be entirely scratch built. I think the bottoms of two soda cans will be perfect for forming the radar reflectors themselves.
My plan is to use the 1/25 trailer from the mobile kitchen unit in the resources section and re-scale it to 1/35. AND use hot glue wheels and tires.
I bought a German half track kit a while back and the front wheels are perfect for my needs. There are only 2 in the kit. Since I am cheap, I didn’t want to spend a bunch of money on extras, so I set about figuring out how to make my own.
Yes, I can make a silicone mold and cast them in resin. I will be doing that one of these days, but for simple, flat back parts and even some more complex things, I found a way to make a mold easily and cheaply.
I’ve started messing with ordinary air dry clay for the mold. I saw a guy make a part with the clay and hot glue on youtube and tried it. It works, although it is a bit fiddly. My first wheel came out OK, the third one was fubared (but still useable) by a glue gun burp and the second one is ugly, but still can be used.

Those are about 1” in diameter, or 35 inches or so to scale. The all black is the first one, the black tire is #3 and the glue one is #2.
You simply mash out a blob of air dry clay and press the part into it to form the mold. The fiddly part is getting it back out without ruining the mold. That is where I am now… experimenting with releasing the part. Remember, the clay is soft, you don’t let it dry.
When finished, you just wad up the clay and put it back in the bag with the rest of it.
This experiment was triggered by a little missile launcher thing (a HAWK) that came with a batch of army men off ebay. I had overlooked it as ‘silly’ originally but yesterday found out that it is actually a quite good, to scale, model of a Hawk launcher. All I have is the 3 missiles on their holder that pivots and is vertically adjustable.
The real Hawk setup looks like this:

I have the 3 missiles, tan like these, and the mount. I will need to build the trailer.

And the aiming/radar unit for this looks like this. It will have to be entirely scratch built. I think the bottoms of two soda cans will be perfect for forming the radar reflectors themselves.

My plan is to use the 1/25 trailer from the mobile kitchen unit in the resources section and re-scale it to 1/35. AND use hot glue wheels and tires.
Last edited:


