grades the ups and downs of model rr

Going from table top grade to a higher level has been my biggest set back.....the grade is too steep or the approach is so long that it surpasses my space available.....anyone know any tricks as to how to lay out grade transitions. I use plywood table top and foam board as my base....

thanks for any info on the ups and downs of model railroading...
 
hills....

Bywaterrailroad.

Your first post to The Guage! Welcome:)

The only way is up, is up, and the only way down, is down. I have the same problem. inclines too steep, and not enough room to make then acceptable.

What is the main prob with the inclines? Locos can't get up them? Without/with load? Derailments and the start/end of the inclines? What percentage is the inline you are working with?

The only way to get an incline out of in a small space is a helix. (like a sprial).

You should alwasy put transitions into you inclines (for the first foot or so) at each end. (derailments on long passenger coaches, if you don't) Making the transitions go a long way into the incline will only produce a steeper portion in the middle.

The woes of inclines!:mad:

PS. At the Australian Model Railway Assocs shoow last week, I failed to see a noticeable incline on any of the layouts! :eek:
 
Ah, the age-old problem. Basically, you gotta face reality, you can't put ten pounds of "stuff" in a five pound bag! You have to either get a larger bag or less stuff, there's no magic tricks available here.

More to the point, what grade are you using, and what kind of RR are you trying to model? Generally, try to keep the grade under 2% to avoid the problem you're having. If you need to determine more specifically how steep a grade your equipment can handle, use a "test track" with an adjustable grade (nothing fancy, a 1X4 with a straight piece of flex track fastened on it, and a few books to raise/lower one end of the 1X4).

Thats how you figure out how much stuff you got. To make a big enough bag, you need to make the approaches longer. Can you add a (dare I mention it) a helix? Or add a few zig-zags here and there?

Finally, make sure there isn't an abrupt change from one grade to another or from grade to level. Looking at the grade from the side, you need to round off the corners. Just visualize a train starting to go on to or off of a grade, and what happens at the center of the cars and at the couplers, and you can see why. (Unfortunately, this makes the length required even longer.)

Bill K
p.s. BTW, welcome to the Gauge!
 
grades

thanks guys for all the insight to my grade problem....i have gained lots of check list items to take back to the layout......i will let ya'll now if it....."makes the grade"..........i think i will be doing a few adjustment.......i think they are over 3%.....but there are two of them and they will be hidden from view.....i knew that i could not make long runs up and down so i hid them....derailments and the power to get from level to level is more of what i have to worry about......i have already rebuilt the second level twice.....but i am going to take another look at one of the grades and put it to the suggestions ya'll have made.....thanks.....
 
Grades

Bywaterrailroad,

3% :eek: You're lucky! Mine are 6% and greater! and traverse through a 15" radius at the same time! Wont' haul more than 3 passenger cars up it without wheelspin, then screams down the other side. I just use 2 loco's when using that part of the layout. I'm only on a 2.4 m * 1.2 m layout and i wanted a flyover to get from the outside mainline to the inside mainline giving, effectively, a double loop mainline should I choose to run that way. Have you built the inclines yet? 3% while not ideal, should be manageable.
 
grades are in place

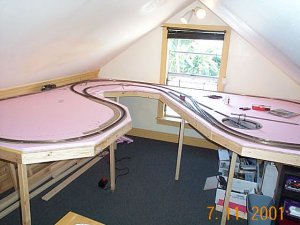
the grades are in place now, i am happy with one side but the other is much more steep......thats the one that will be hidden howerver......i don't think that i will be pulling much up that slope.....attacehed is a pic of the layout when it was under construction....also ad ideas on how to paint the rails after they are in place....i want the ones visiable to be painted rusty brown......i will paint only the sides that can be seen.....
 

Attachments

  • layout16.jpg
    layout16.jpg
    54.4 KB · Views: 471
I started a post under "Technical" about an idea to change levels.

re: Painting the rails - it can get tedious after the track is down, but IMHO it's woth it. Any dark brown paint will do, preferably waterproof and suitable for metal. Just painting the visible rails will make it easier, and just the visible sides of the rails even more so. Don't worry too much about not getting any paint on the top of the rails, you'll have to clean them all when you're done anyway, so a simple "wipe" while you're painting is enough.

BillK
 
Rusty rails

Bywaterrailroad,

I weathered my track using artist acrylic paint. Two colours. Iron Oxide (actually made from rust) and burnt umber (made from burnt trees). I painted the ties/sleepers the burnt umber, and then used a mix of iron oxide and burnt umber to paint the rails. It didn't take long. The iron oxide is to intense to use by itself for rusty rails, so i toned it down a bit with the burnt umber. Then I put the ballast down (so not to get any paint on it). You can be pretty rough when painting the track, just wipe/clean it off the top of the rails later. But be very careful when doing the turnouts, so not to disrupt the electrical conductivity of the switch rails.
 

Attachments

  • dsc00011.jpg
    dsc00011.jpg
    59.8 KB · Views: 467
thanks for the info on painting the rails woodie, your track work looks great....and what a fine job on the landscape.....you did a real nice job there man.....i have read in a how-to book that you can spray paint the track brown then come back when that is dry and using a fine bursh paint the side of the rails rusty color......but i was wondering about paint on the rail....but all the post so far have said that i can remove the paint from the top of the rail as i paint before it drys.......
 
paints

No need to use a spray paint. Usually expensive anyway, and waste a lot. Just wack it on with a brush. You don't have to be too careful, as the ballast covers up the sloshed bits. Don't worry bout the paint on the rails. It comes off very easily, with a light sand of the top of the rails, just as you would do when doing a track clean. Should only be a few dollars for artist paint to cover your layout track with plenty to spare.
 
grades up and down of rr...continued

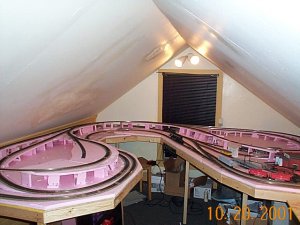
earlier i posted a photo of the Bywater Railroad layout prior to this past months second level grades....attached is a pic of the new upper level and the grades to get up there......they will be hidden benind landscape terrain.....:rolleyes:
 

Attachments

  • layout37.jpg
    layout37.jpg
    83.3 KB · Views: 444
Hello Bywaterrailroad

That grade on the left looks a little on the steep side, seeing as you have not yet started your scenery, can you start it before the curve about 18" back I would think. Otherwise, the track looks good.

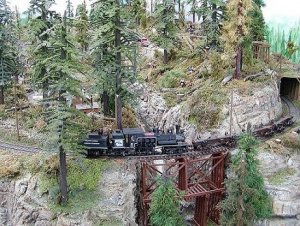
here is one of my grades, 3% on a curve.
shamus
 

Attachments

  • noly41a.jpg
    noly41a.jpg
    88.2 KB · Views: 438
left grade

hi shamus,
yes that is the problem grade...it is very steep so today i started to do the landscaping to hide it.....i have made it like a canyon so it is not see and what is seen it has a limited view...the plaster hard shell is still damp as I type but as soon as it is firmed up i will post a pic of what it looks like after the results of topography....i was concerned with its steep grade but so far it looks good after the landscape.....:confused:
 
Unexplored Option.

Hello Bywater.

So, we all agree that you can't put 10 kilos of model railroad in a 2 kilo bag.

Your space is tight, and as far as I'm concerned, grades shorten the lifespan of mechanisms. That's why I have avoided them for years. Speaking of shortening a life span, wait until cars come uncoupled on the grade. You will shave ten years off of your own life, chasing a string of runaway cars before they reach the first curve!

That said, instead of "Raising the Bridge, Why Not Lower The River?"

2 solutions for your railroad. You want a bridge going over some kind of gourge to break up the monotony of flat benchwork? Lower a section of the benchwork a dramatic foot or two, plug in the bridge, and you don't have to worry about burning out your motors.

Another option is, run one of two lines on a raised tier, using a tunnel to hide a sizeable piece of the run.

If you combine the two, you can have an impressive looking piece of the Rockies in the corner of your attic!

Regs,

George:)
 
I think what you have looks fine but if you are limited to space I would,t raise your sec level any higher then 3.5 or 4 inches that should be sufficent enough but it looks great
 
I used Polly Scale water-based paint, applied with a brush, to paint my rails. I paint 10' or 15' of track, then wipe the tops of the rails with a rag over my fingertip. The brush that I use is a 1/4" moderately stiff one, which allows you to quickly work the paint in around the spike heads moulded into the ties. As Woodie says, exercise a little care around the turnouts. You should be able to paint all of the rail on the layout that you show in an evening or two, with no paint stink or overspray.

The track is Atlas Code 83 flextrack.

2005trains027.jpg


Wayne
 
Where did y'all find this thread??:D :D

Anyway, I'm realizing that Bywaterrailroad has been incommunicado since
Katrina; If you're out there listenin', stop in and say hello!! Ya might not have
any good news (I know how that goes) but we'd like to hear from you just
the same :wave: Did you manage to save anything from your home
(let alone the layout)?? Just wondering how you're doing:)
 
Painting the track

I always paint it after it is in place if you don't when you bend flex track you can see light spots where the rail slides. Also NEVER NEVER sand your track. get a rag put a few drops of light oil on it and rub the top of the rail before painting. This will prevent the paint from sticking there. Now it will still stick if not wiped of but it sure makes it easier to come off.
If some paint drys on the rail use a bright boy to remove it or if stubborn a little nail polish remover. I also use that to clean really dirty track.
Les