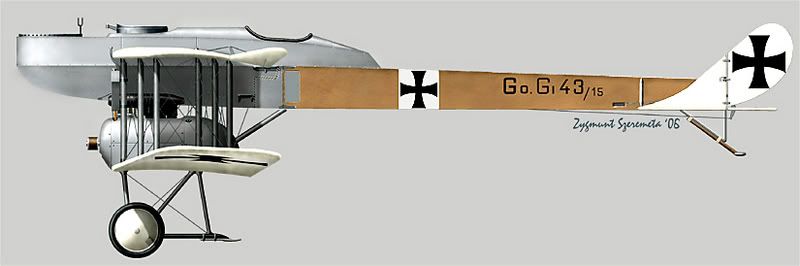
Gotha G.I 42/15 "FEODORA" - Some Progress
Hi Russell, Hi all,
It turns out that there were not many bare-metal surfaces on this plane - so, there will be very few areas where I need to use scuffed-up aluminium duct tape. The metal plates were painted in a very light gray paint nuance - so instead, I think I will mask and spray some fixative gloss over these areas before the final assembly, to indicate semi-glossy painted surfaces.
I finally got some time off to take a few photos of my ongoing build;
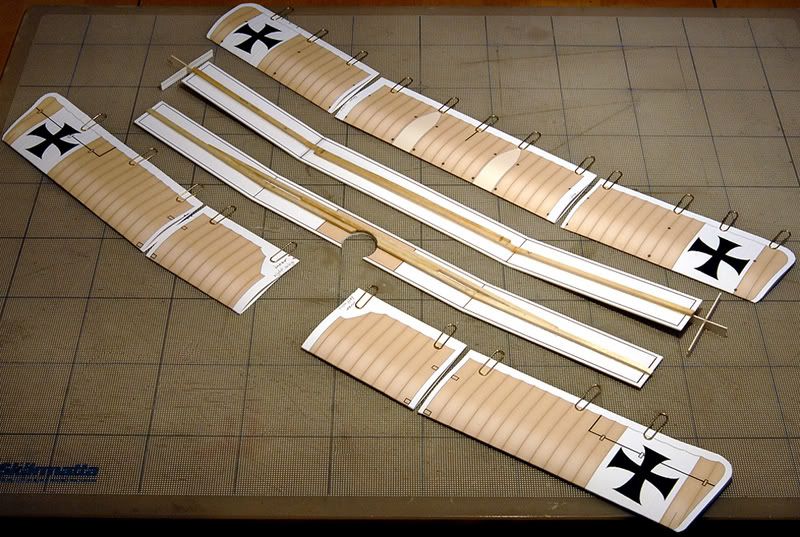
To begin with, I´d like to show the method I used to strengthen the long and narrow wings. We have an open fireplace in the house and to light it, we have a box of very long matches. I have used these wooden sticks several times to stiffen up the wings of my card model planes.
For the lower wing, I had to add about 10 degree dihedral, and on top of that, the outer wing tips are also swept back. First, I scored the spars that are made out of card and bent the slightly over the edge of the cutting mat. Then I checked the dihedral with the 1:48 plan of the Windsock datafile on this aircraft and made two slanted supports of thick card stock to place under the wing tips. After that, I carefully cut almost through the sticks at an angle and bent them just a little, to the point where they would begin to break. I used CA glue several times over (under the heat of the halogen table lamp) to get joints that would be very hard. When the joints had hardened sufficiently, I cut them in the appropriate lengths and glued them to the card stock spar, using non-water-based paper glue. I put small clamps and weights evenly spread out over the top and left it to dry thoroughly overnight, again checking the dihedral and making sure the base was absolutely flat (a book shelf plank). The upper wing only had the swept-back tips (no dihedral) but I used a wooden stick that had a very, very slight upward curve, to somewhat counter the weight of the whole wing assembly. I also cut extra, long support wooden 'rods', that I CA-glued next to the first sticks, to support them further. This is how they turned out - first a photo of the material used -:
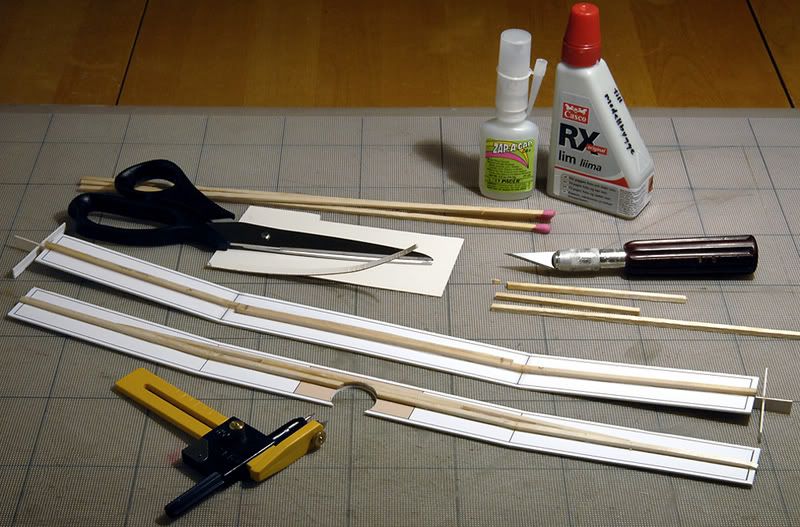
- and here are the spars and wing parts, with airfoil shape - secured with paper clips for a dry fit - upper wing nearest to the camera. The upper wing spar will slide through holes in the upper fuselage, when finished, and also fit around the middle gunner´s cockpit, so it has to be rather narrow and at the same time as strong as possible. A circle cutter came in handy for the round gunner´s cockpit hole:
I have folded all the wing pieces and tried to give them the proper wing airfoil on the top and bottom halves. The underside of the wings should have a slight under camber to look right - I think I will solve this by adding slightly bent strips of medium thick card to the underside back of the card spars.
Before folding the wing parts over, though, I have embossed all the lines from the underside, using a blunt metal tool on several layers of soft tissue, to achieve a slight raised rib effect. I worked on a photographic light table to be able to see the lines. These wings will not be semi-transparent (because of the thick spar construction), so I think the embossing effect will add some authenticity to the look of fabric-covered wings. This effect is not so noticeable in this flat lighting, although it 'feels' right - I plan to go over them once again, and I´ll post a photo later with side lighting to show the effect.
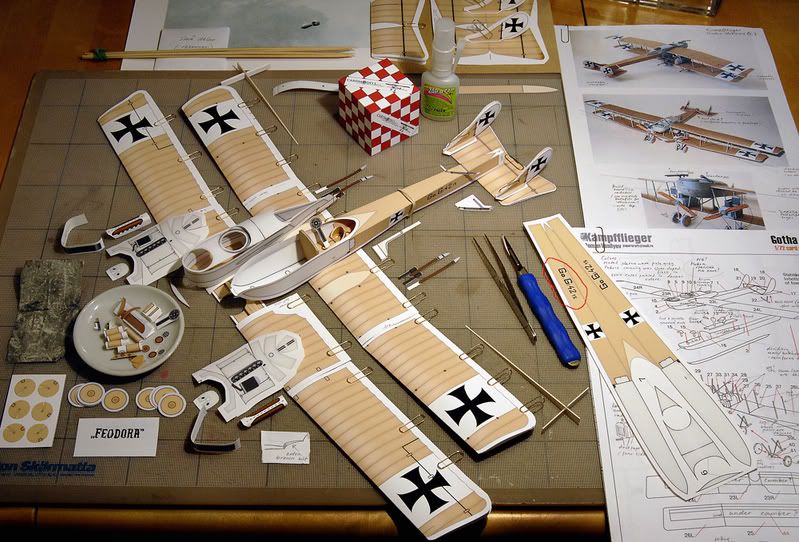
As you can see from this wide shot, there are quite a lot of very small parts in this highly detailed 1:72 scale model - a model very much to my liking:
(New serial number 42/15, by the way - encircled in red)
For example, each of the propellers consists of six parts. Some of them are also very thin, even at this enlarged scale (slightly larger than 1:48, probably around 1:44) - the tail skid, for example, took some very careful cutting with a freash scalpel blade (nd using magnifying glasses). I then soaked it in CA glue, to make it strong enough to support the weight of the rear end of the plane. I plan to reinforce the fuselage internally with a box spar, so it will stay straight when assembled.
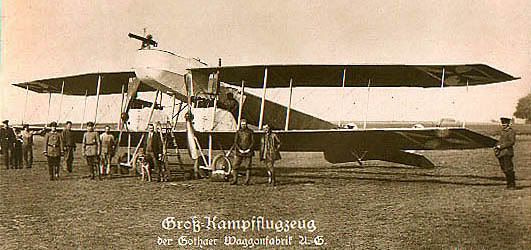
According to photos in the Windsock datafile, the forward gunner´s cockpit should be equipped with a Parabellum type MG and for the middle one, A Spandau.
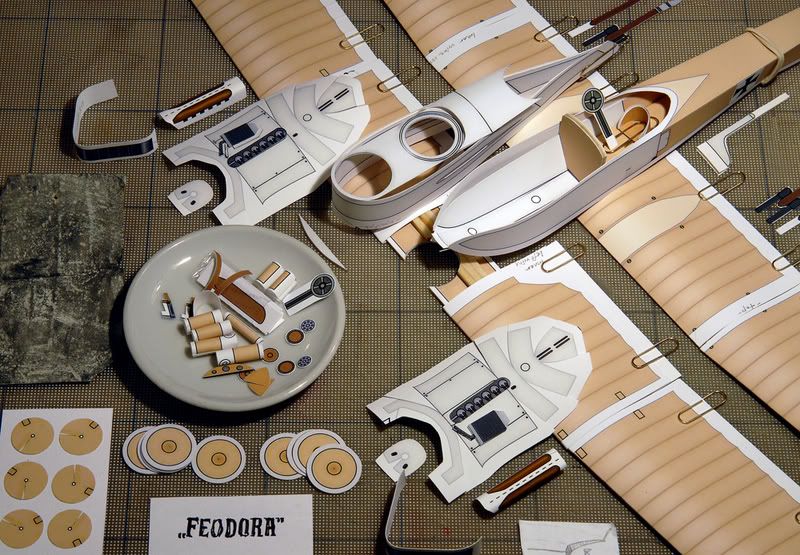
Here is a close-up of the forward part of the plane, with the smaller parts spread out:
The engine nacelles are quite complicated builds in their own right. the six cylinders are built as a block, with the option, of course, to scratch-build individual round cylinders and exhaust pipes. I have changed the general coloring of this model a little bit, from a dark brown towards a lighter doped-linen-fabric color. I have also lightened the gray color of the painted metal surfaces. According to the period photos in the Winsock datafile, this color should be lighter than the fabric color.
I have cut out the sides and fabric covers of the four main wheels, with some extra spares. When I find suitable light gray O-rings, I will cut the diameter down to suit their size. The landing gear skids will have to be reinforced with a thin, 'springy' card and CA.
For wing struts (none in sight here), I plan to use round, light gray-painted tooth picks. The inner four struts are supposed to be thicker and sturdier than the rest, though. I don´t know yet how to achieve this - either I scrape or sand the remainder of them down or add some thin paper to the inner four on each side. They should preferrably also be oval in shape, with pointed ends. We´ll see about that later on. And, there is of course the rigging - I have found some thin thread of a good gray 'wire' color but I might use some other material. This is a fun build . . .
That´s all for now - more pics later,
Bengt :thumb: