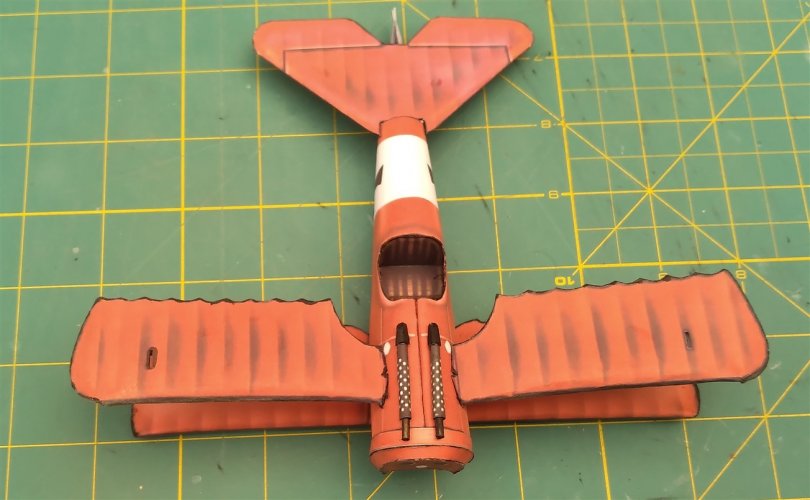
Strangely, the original pdf of this Fokker Dr1 scales out to roughly 1/17 scale.
I have therefore resized it to 1/32 scale using the real plane’s dimensions for reference. If you want to build it in 1/48 scale, zoom the pdf to 66% and if you want 1/72 scale, zoom to 44%.
The build sequence is more or less identical to the Se5a. (https://www.zealot.com/threads/se5a-1-32-scale-resized-version-of-the-zio-prudenzio-model.182094/#post-1055368 ), with the following exceptions.
The lower wing is attached to the fuselage in the same sequence as the lower wing of the Se5a.
The tabs on the middle wing are glued to the fuselage sides using medium superglue. Don’t worry about the vertical angle of the wings, just make sure that the leading edges are parallel to the lower wing.


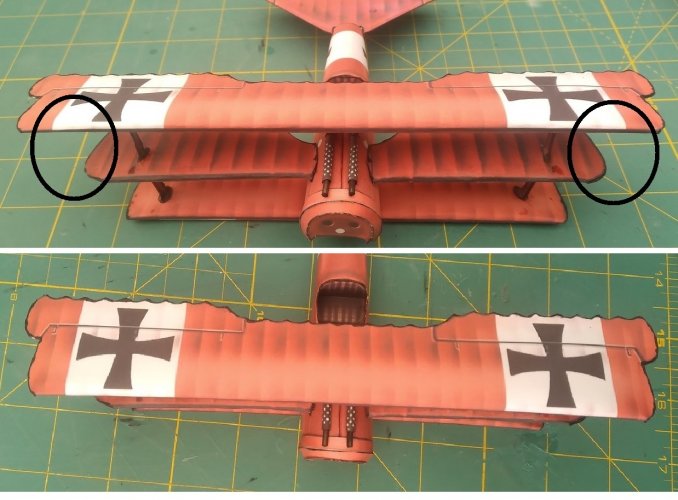
Fit the wing struts parts m1 & m2. The middle wings will automatically re-align themselves when these struts are fitted.

Fit the top wing, ensuring that it is centered with respect to the middle wing and follows the forward inclination of the other two wings.

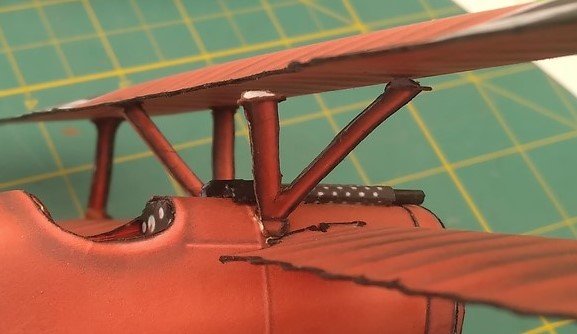
Glue the base of each inner strut to the fuselage and when completely dry, glue the tops of the struts to the underside of the top wing.

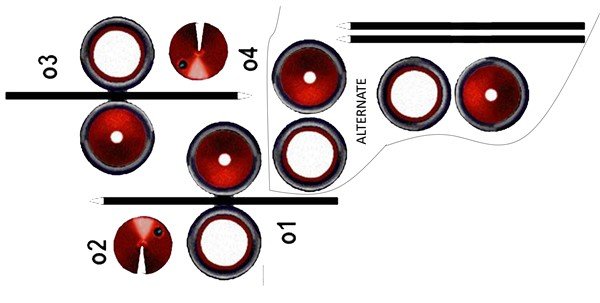
The rest of the build is straight forward apart from the wheels. I found it easier to separate each wheel assembly into 3 parts, rather than the 1 part on the original. I have therefore provided the 2 options on the sheet.

The model was now sprayed with clear acrylic lacquer.
The pdf can be found in the resource section.

I have therefore resized it to 1/32 scale using the real plane’s dimensions for reference. If you want to build it in 1/48 scale, zoom the pdf to 66% and if you want 1/72 scale, zoom to 44%.
The build sequence is more or less identical to the Se5a. (https://www.zealot.com/threads/se5a-1-32-scale-resized-version-of-the-zio-prudenzio-model.182094/#post-1055368 ), with the following exceptions.
The lower wing is attached to the fuselage in the same sequence as the lower wing of the Se5a.
The tabs on the middle wing are glued to the fuselage sides using medium superglue. Don’t worry about the vertical angle of the wings, just make sure that the leading edges are parallel to the lower wing.


Fit the wing struts parts m1 & m2. The middle wings will automatically re-align themselves when these struts are fitted.

Fit the top wing, ensuring that it is centered with respect to the middle wing and follows the forward inclination of the other two wings.

Glue the base of each inner strut to the fuselage and when completely dry, glue the tops of the struts to the underside of the top wing.

The rest of the build is straight forward apart from the wheels. I found it easier to separate each wheel assembly into 3 parts, rather than the 1 part on the original. I have therefore provided the 2 options on the sheet.

The model was now sprayed with clear acrylic lacquer.
The pdf can be found in the resource section.

Last edited:


