Faro Basso

Enterpriser10

Since the beginning. . .
My dears,

Here I'm tryng to do like all of you, experts in paper. Although I'm a trekker, now I'm starting to assembly a Faro Basso as a gift to my wife for our 10th wedding anniversary next september. She doesn't know nothing about it (please, don't tell her! . . .). She loves this special scooter since our visit in Rome last year, and she remember the film Roman Holiday. To my happiness, this paper model was designed by one of the masters, Uhu02, that kindly give me a chance to download his files. Thank you a lot, Uhu02!!!!!

So, let's to work!

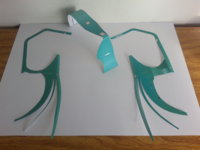
Here I have the three first parts . . .

FB-1[1].jpg
 

Enterpriser10

Since the beginning. . .
So, now I faced my first question!

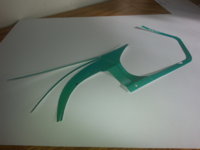
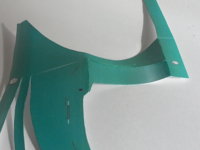
If I understood the Uhu02's way, I can cut out the flaps from this green part (red higlighted) because it'll use the flaps from the part that I'll glue under there (blue highlighted). But, before glue, I accept any suggestions . . .

FB-2[1].jpg FB-2.a[1].png
 

Tonino

Well-Known Member
Yes, you're right! The tabs in the upper part (1b) are to be used only if you don't want to use the piece below (1c). This way is better because the parts result to be flush, edge to edge.
You can cut away all the red highlighted tabs.

Bt the way: I'm happy to see someone build this one! I'm going to follow this build. Should be a nice adventure! ;)
 

Rhaven Blaack

!!!THE MAN BEHIND THE CURTAIN!!!
Staff member
Administrator
Moderator
You have perked my curiosity. I will be following this build!
GOOD LUCK!!!
 

Revell-Fan

Co-Administrator
Staff member
Administrator
Moderator
Ohh, this is cuute!!! The Faro Basso is a very fine kit and a refreshing deviation from the SciFi themes UHU02 is so well known for. I'm looking forward to seeing more build pics! :)
 

zathros

*****SENIOR ADMINISTRATOR*****
Staff member
Administrator
Moderator
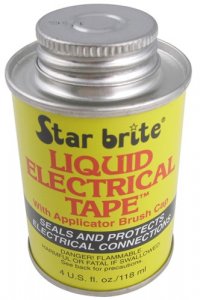
I look forward to a detailed build thread of this. I would recommend buying some liquid electrical tape, for the wheels. It really makes them look rubber, and if you do it right, you can make nice treads by gluing on thin paper, threads to the wheels, then painting with the Liquid Electrical Tape. ;)

Liquid E Tape.jpg
 

Tonino

Well-Known Member
I've heard you talking about this product before. The bad thing of an international forum is that you see a lot of interesting products but you cannot buy them because they don't exist in your country.
I've never seen anything like this one before. What kind of substance is this? And where do you buy it?
 

zathros

*****SENIOR ADMINISTRATOR*****
Staff member
Administrator
Moderator
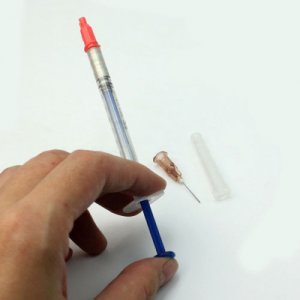
You go to most automotive shops, or places like Home Depot. It is used very commonly world wide. The other thing I see and use a lot, is conductive epoxy, available at Radio Shack, and online. This epoxy dries rock hard and conducts electricity with no resistance. On a paper model, instead of running wires, you could run lines on epoxy on paper have lights, motors, etc, connect, by gluing the wires at the terminal ends. Imagine closing and opening and the cardboard would be the circuit board. You could make lights come on without switches, just by opening or closing doors, or twisting a light ring, and make the circuit whole. Fun stuff to work with. It dried hard as a rock. I use this on my R/C Helicopters as the wires are so small, it too much to apply heat. The Epoxy conducts and secures the connection. I get it from Radio Shack. Any electronics shop has this, as it is a must in fixing electronics.


Epoxy Conductive.jpg
 

Enterpriser10

Since the beginning. . .
My dears,
I'm so sorry for my recent absent because I'm working out, in a other city. But my model is on the way! Next week I'll be at paper work again!

See you!

Enterpriser10
 

spaceagent-9

Right Hand Man and Confidant
Moderator
geez Zathros, that's fantastic stuff!!!
I was just going to mention how cool a method wetting tissue or thin paper to make fenders and stuff is, soon im starting paper mache' for dinosaurs and parts for star trek Klingons and domes and stuff .
'ZATHROS TOLD ME, THATS WHO EDDIE!!!''
 

Enterpriser10

Since the beginning. . .
Yes, you're right! The tabs in the upper part (1b) are to be used only if you don't want to use the piece below (1c). This way is better because the parts result to be flush, edge to edge.
You can cut away all the red highlighted tabs.

Bt the way: I'm happy to see someone build this one! I'm going to follow this build. Should be a nice adventure! ;)

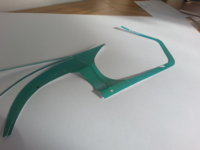
Thank you for your clue, Tonino!!! I did it, and the parts are ok, like the photos. The parts 1b and 1c need to be curved. And I discovered that lines indicated by blue arrows need to be folded.

Yes, I'm on my way!!!!!

Enterpriser10
 

Attachments

  • FB-3[1].jpg
    FB-3[1].jpg
    1.1 MB · Views: 13
  • FB-3.a[1].png
    FB-3.a[1].png
    830.7 KB · Views: 12
  • FB-3.b[1].png
    FB-3.b[1].png
    834.9 KB · Views: 12
  • FB-4[1].jpg
    FB-4[1].jpg
    1.1 MB · Views: 12
Last edited:

Enterpriser10

Since the beginning. . .
I look forward to a detailed build thread of this. I would recommend buying some liquid electrical tape, for the wheels. It really makes them look rubber, and if you do it right, you can make nice treads by gluing on thin paper, threads to the wheels, then painting with the Liquid Electrical Tape. ;)

View attachment 149270


Thank you for your clue, Zathros. I didn't know this product, but I'll search arround. If I found, I'll tell you. Thanks.

Enterpriser10
 

Enterpriser10

Since the beginning. . .
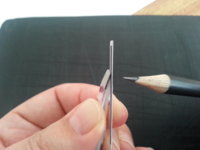
Now, my dears, I'm preparing the next parts painting the edges with green ballpoint pen, to give a more beautiful finish. I'm testing with ballpoint pen to see how it looks. To me it seems like it's getting good. What do you think? I applied the ballpoint pen in front and back of the border guided by a ruler, seeking to obtain a more complete finish. Have you any suggestions?

Thanks.

Enterpriser10


FB-6[1].jpg FB-7[1].jpg FB-8[2].jpg FB-9[1].jpg FB-10[1].jpg FB-11[1].jpg
 

zathros

*****SENIOR ADMINISTRATOR*****
Staff member
Administrator
Moderator
Superb job on the cutting of your parts. It is essential on a model of this quality!!
 
Top