I need a dump truck for my 1/24 scale railroad layout. The to be built shovel needs something to put material into.
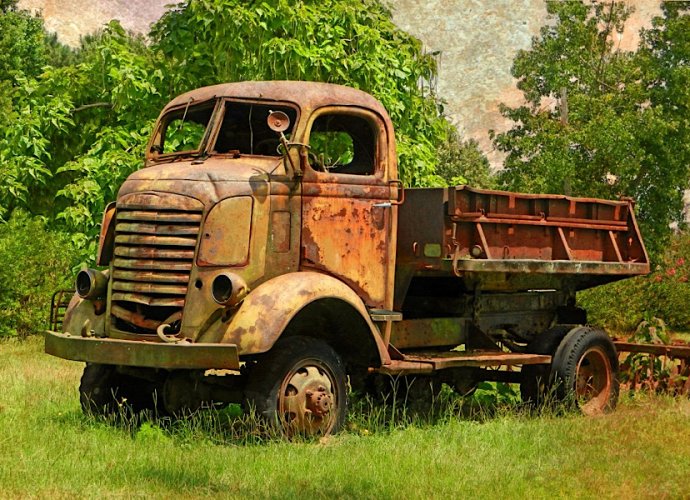
This is what I'm calling a 'hybrid' build, consisting of a cast resin cab and wheels & tires and the chassis from an Orlik Zis-5 kit. I want to model this old rust bucket.

Right now I think the main chassis will be from the Zis-5 and the bed will possibly be from the Zarkov Mack Truck model scaled up to 1/24... if it works out.
My railroad layout is staged in 1937, so I'm calling this truck a 1935. GMC made them from 1934 and they were all quite similar. The cab was sold as a '38, but I have an unlimited modeling license... grin...
My truck won't be quite as rusty and beat up as the prototype.
So far I have the cab and wheels, my kit direct from Orlik in Poland and some pictures to follow.
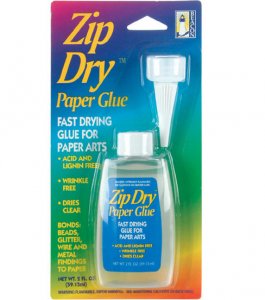
I have only built one paper model before, and it was a J3 Cub. That one went together mostly with white glue. It appears that super glue is the way to go with this kind of model.
I am working from a copy of the original book page, scanned and printed. I'm glad I did that, since it is VERY easy to mess this up, at least for me. I printed the page on 110 pound stock, using legal size paper. I found out that using legal paper may waste a bit of paper stock, but the A4 pages are happy on that size paper. The legal paper is also easier to find, and cheaper.
Here's what I have accomplished so far. First the cab and wheel. That wheel was a bit small so I ordered larger ones.

I'll be using these wheel and tire castings.


Here are the first frame rail pieces ready to glue together.

I managed to glue the outside and inside pieces of the frame rail, but there must be an easier way. How does one properly glue those plain paper edges together? I got more glue on my fingers than on the paper. I got one frame rail completed. It is quite strong and light weight.

I finished the second frame rail. Here the first one is being hoisted by the special crane attachment.

The work space... I use that bent tweezers for most stuff on these parts. I'm still learning. The hair clips are priceless. The pliers helps flatten and squeeze at times. The pointed sculpting tool gets the glue into the tiny spaces between layers.


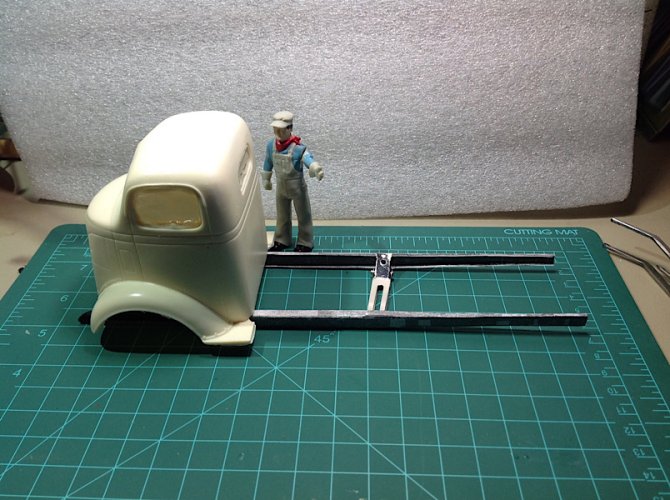
Here the frame rails are posed under the cab. This will work! Next to fabricate the cross members and assemble the frame.

I would appreciate any comments and tips on building this kind of complex model. I have glued my fingers to more than I want to already.
This is what I'm calling a 'hybrid' build, consisting of a cast resin cab and wheels & tires and the chassis from an Orlik Zis-5 kit. I want to model this old rust bucket.

Right now I think the main chassis will be from the Zis-5 and the bed will possibly be from the Zarkov Mack Truck model scaled up to 1/24... if it works out.
My railroad layout is staged in 1937, so I'm calling this truck a 1935. GMC made them from 1934 and they were all quite similar. The cab was sold as a '38, but I have an unlimited modeling license... grin...
My truck won't be quite as rusty and beat up as the prototype.
So far I have the cab and wheels, my kit direct from Orlik in Poland and some pictures to follow.
I have only built one paper model before, and it was a J3 Cub. That one went together mostly with white glue. It appears that super glue is the way to go with this kind of model.
I am working from a copy of the original book page, scanned and printed. I'm glad I did that, since it is VERY easy to mess this up, at least for me. I printed the page on 110 pound stock, using legal size paper. I found out that using legal paper may waste a bit of paper stock, but the A4 pages are happy on that size paper. The legal paper is also easier to find, and cheaper.
Here's what I have accomplished so far. First the cab and wheel. That wheel was a bit small so I ordered larger ones.

I'll be using these wheel and tire castings.


Here are the first frame rail pieces ready to glue together.

I managed to glue the outside and inside pieces of the frame rail, but there must be an easier way. How does one properly glue those plain paper edges together? I got more glue on my fingers than on the paper. I got one frame rail completed. It is quite strong and light weight.

I finished the second frame rail. Here the first one is being hoisted by the special crane attachment.

The work space... I use that bent tweezers for most stuff on these parts. I'm still learning. The hair clips are priceless. The pliers helps flatten and squeeze at times. The pointed sculpting tool gets the glue into the tiny spaces between layers.


Here the frame rails are posed under the cab. This will work! Next to fabricate the cross members and assemble the frame.

I would appreciate any comments and tips on building this kind of complex model. I have glued my fingers to more than I want to already.
Last edited:


