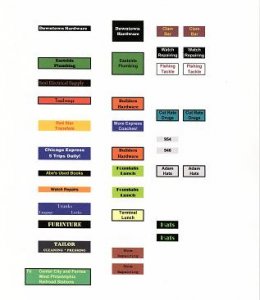
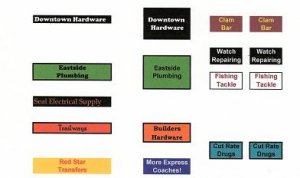
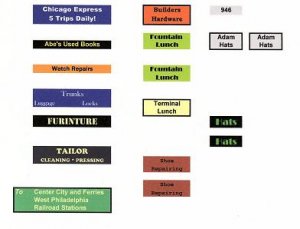
I took a break from working on the electrical last night to create some signs for my buildings. I looked in several trolley books and especially by By The El: Third Avenue and its El at Mid-Century for examples of signs from the 40s and 50s. By The El is very good because the photos are in color and show Third Ave, the el and many of the stores along the street.
I created the signs in Excel using different fonts and font sizes, fill colour and font colour controls. The long thin signs are intended for the signboard in the clerestory over the shop window. The smaller signs are intended for double sided signs, hanging over the sidewalk The larger square Downtown Hardware and Eastside Plumbing signs could be applied to the side of a building. There are a couple of signs intended for the windows of my Bachmann bus terminal.
I printed the signs on Domtar 110 lb. Laser-Inkjet Cardstock 8 1/2 x 11 sheet, that I picked up at the local Staples.
The plan from here when I get time (or the mood strikes me) is to:
1. cut out the sign graphic
2. cut a piece of .060 styrene to shape
3. use double sided adhesive mounting paper (I have MBS Stick'em)
4. apply backing paper to the sign
5. peel backing paper from the back side of the sign
6. drill # 80 holes in the top of the plastic for eye-bolt hangers
7. slide a piece of mounting wire (.028 brass wire) through the eye bolts and glue it in place with CA
8. the rod & eye bolts grimy black or dark gray