Building of GREMIR HMS Onslow

I just came up this idea and tried it. Looks it is working.

Here is what I did....

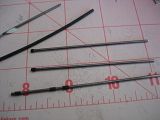
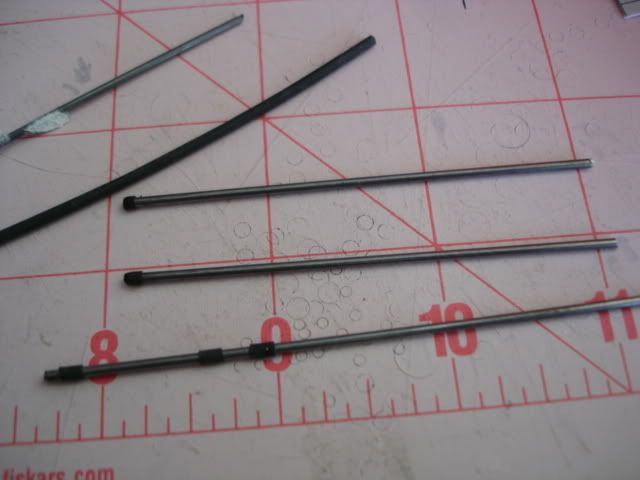
First I cut a piano wire at right lengths and put 'HEAT Shrink Tubes'....


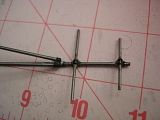
And then, glued using 'CA'. Since the glue surface is kind of 'ruber', the bonding was quite strong....


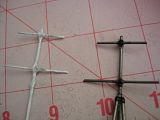
Compared to old one...


Finally, it is painted.... Well, yes.. It is not white... I had a diffulity to paint with brush. So, this time, I sprayed. At this moment, 'gray' was only one I have in spray... :) Spray gave smoother paint surface..

 
Thanks for the encouragement ! :)

I added some more details today. Here is what I have so far. As I add details, I feel like 'the ship is being alive'.....
 
I finally finished the bottom before I continue... This should have done in early stage, but I was afraid a possible 'damage' during building. However, I think it could be more clean if I did it early. Now, it was hard to attach them because of 'delicate' superstructures... :)
 
Hi barry,

Thanks for your comments.

barry said:
I think you left off the strips on the formers on the hull sides.

I put it just now... You can see in the above picture.

barry said:
I think you put glue all the way down the former edge. If you glue just the top and bottom the frames show less. Christoph always carefully sands the edges of the frames to match the curves as well.

I appreciate you pointing out this. I was also thinking the side former has 'seam' of frames. They become more noticeble as time goes because I was holding with my fingers most time when I work. I am thinking to cover another layer of side former (using 20lb thin paper) to make it look smoother. I think it is a valuable tip - only glue the top and bottom of the frame.. I will try it...

Thanks

JN
 
One tip I have noticed that the ship guys use, is to make a stand to hold their models early in the construction. Maybe this is done to hold the model instead of the hands being used so much.

john
 
Hi John,

I also thought it is the right way (In fact, I learned it while building this ship . :). I will keep it in mind and make a stand first next time when I build a new one.

Thanks
 
I started to add railings. Woowooo.... It was not an easy work pretty much different from what I thought. Only 1/3 of railings done.. Need some break... :)

Well, this is a picture just before I add railings....and the picture with railings will come next...
 
Those are some nice looking railings, jnyoun!
Nice looking ship too!8)

Tunny, I know there are some threads which show different rail building techniques scattered through the forums.
You may have to do a search for railings or railing tutorials, unless someone posts a link.
Sorry, I'm not a ship builder yet, I just know there are some here.:wink:

Russell
 
The railings are not home-made. I purchased a 'laser-cut' card railings. It is made of card paper. So, I needed to enforce it with 'CA'. The ladder is also the same materials.
 
So, now it is time to work on 'side frame' because I have attach an anchor...

A good news is that I just fixed it in 30 min like a charm !!!! Just glue the top and bottom edges.. What a great tip !!! Thanks a lot for the tip...

Here comes the ship with fixed side frame...