

Z
Building my own x-wing
- Thread starter dnalor
- Start date
You are using an out of date browser. It may not display this or other websites correctly.
You should upgrade or use an alternative browser.
You should upgrade or use an alternative browser.

Damn i forgot the holes for the wings..so that they can open..
Now i have cut them ...and made the holes a little bigger so that i also have an mounting point in the back...
Now the pieces i need for attaching the wings to the hull.
Now i have cut them ...and made the holes a little bigger so that i also have an mounting point in the back...
Now the pieces i need for attaching the wings to the hull.
Attachments
Z
Zathros
1/16...that's a nice size ")
Yes the build goes at a nice speed, but it is difficult..
Not from everything is a howto..
At this moment i'm trying to fold the wings..
But the folding line is round, not sharp enough.
I'm thinking about cutting the wing up, and glue it in place for sharper lines.
I hope to complete the fuselage this week..
I have new glue so Now i can start finally.
Yes the build goes at a nice speed, but it is difficult..
Not from everything is a howto..
At this moment i'm trying to fold the wings..
But the folding line is round, not sharp enough.
I'm thinking about cutting the wing up, and glue it in place for sharper lines.
I hope to complete the fuselage this week..
I have new glue so Now i can start
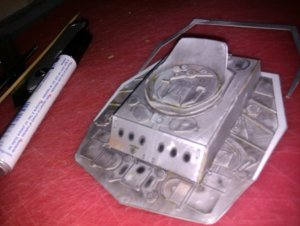
finally.hum...the sharp edge part isn't that easy for this size..
so i start first with the easy parts..hum there are none
Just ready with glueing 2 parts of the underside to the chassis..
front-chassis glued to the back chassis..
AND DAMN that's difficult.......really
I had cut of the folding lines so i figured out were to fold..
And i almost got it right....almost.
ah the 3 part is glued only on 1 side...that is why it sits like this. it has to dry first.
Attachments
Z
Zathros
do you want to do led lights?..
you should try arduino.. looks interesting.
I want to do led lights with this.
But first the most dificult parts and then look for lights.
you should try arduino.. looks interesting.
I want to do led lights with this.
But first the most dificult parts and then look for lights.
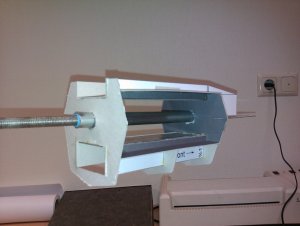
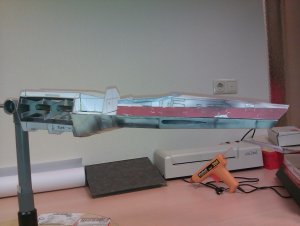
yesterday tackeld my wing problem.
my problem was that when i bend the wings in to shape..
The folding wasn't sharp..
I tried it also with a sharp piece of wood to get a nice fold, but that didn't work.
Now my solution is: to cut the carton a little and bend at the almost cutline.
For me it works like a charm.
Now, i have to look for a filler to make the wings more stiff.
but i'm proud of it
Attachments
how do you mean score?
first i glue the prints on some thicker cartboard..
then cut them out.
after i cut the foldinglines a little so that they bendt easier.
first i glue the prints on some thicker cartboard..
then cut them out.
after i cut the foldinglines a little so that they bendt easier.
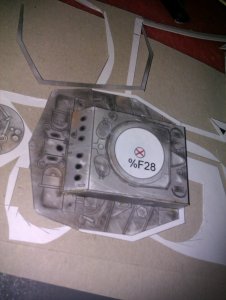
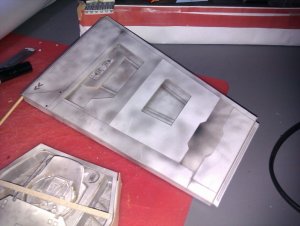
ok hull part 3 is installed.
started also with the upper part..
But that one is because of the length difficult.
First a glued the ribs on the chassis and wanted to glue the hull over it.
just like the underside.
But it didn't go very well.
so i cut them of again..and glued them in place on the inside of the hul.
now it sits better.
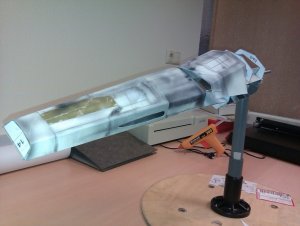
I tried the nose cone but is gaps A LOT with the hull..
So there is something where i have to look for an solution...maybe cut the with part of the cone and slide in on the hull......maybe
started also with the upper part..
But that one is because of the length difficult.
First a glued the ribs on the chassis and wanted to glue the hull over it.
just like the underside.
But it didn't go very well.
so i cut them of again..and glued them in place on the inside of the hul.
now it sits better.
I tried the nose cone but is gaps A LOT with the hull..
So there is something where i have to look for an solution...maybe cut the with part of the cone and slide in on the hull......maybe
Attachments
Z
Zathros
I think the gaps are caused by the edges being not folded on a rigid square line, also, it is only necessary to fold the bend for the amount needed. If you need a 90 degree angle, don't fold it all the way over. If a bend isn't straight, you will get a error that just increases the problems along the way. Sometimes, in certain models, like the Rodger Young, they can be disastrous. Looking at the picture, and seeing how the gap forms, it seems that it was not folded properly,
One solution could be to make the nose section one piece, in Photoshop, then there are no open seams and that would shift the assembly to a perpendicular line connecting the nose to the rest of the craft. This may entail cutting out other parts. If you are real careful, you could run a seam that actually runs along panel lines and by it's nature hides itself.
One solution could be to make the nose section one piece, in Photoshop, then there are no open seams and that would shift the assembly to a perpendicular line connecting the nose to the rest of the craft. This may entail cutting out other parts. If you are real careful, you could run a seam that actually runs along panel lines and by it's nature hides itself.
how do you mean score?
first i glue the prints on some thicker cartboard..
then cut them out.
after i cut the foldinglines a little so that they bendt easier.
I have a metal pick from a nut cracker set (other builders use dull exacto blades, or pens without ink, or .....) and where I need to fold the part, I run the pick over the fold line. If the fold is straight, I use a clear ruler as a straight edge. I always score the fold lines, usually prior to cutting the part from my sheet. Then, depending on the fold I will use a straight edge, hemostats, wide or narrow tweezers to then make the crisp fold. I test fit the parts, dress the edges (if needed) and glue.