building my own snowspeeder
- Thread starter dnalor
- Start date
You are using an out of date browser. It may not display this or other websites correctly.
You should upgrade or use an alternative browser.
You should upgrade or use an alternative browser.
 And some other non-paper stuff - X-wings and the like. Cans are good for base color, actually.
Aaahh..airbrush..
I bought a airbrush set and started to read the howto...
the next thing i did was sell the set")
It's very difficult...and time consuming.
Man, you must have bought the wrong brush. I've got an Iwata Revolution that I've used for six years and all you need to do is hook it up to a compressor, pour some paint in the cup, and start painting. Simple, simple, simple.
Iwata is probably one of the best types of brushes you can get, because it's like the Glock of the airbrush world: designed to be easy to maintain and use.
i think that the brush was fine..
it was a good brand, and type.
But i looked a how to......Also saw the prices of the paint WAUW
and got an offer for my airbrush set i couldn't refuse.....and that was the main reason.
So my conclusion was the spraycan...and who knows..maybe i find a good deal again
But i'm still building so i still have a few months before i start to paint.
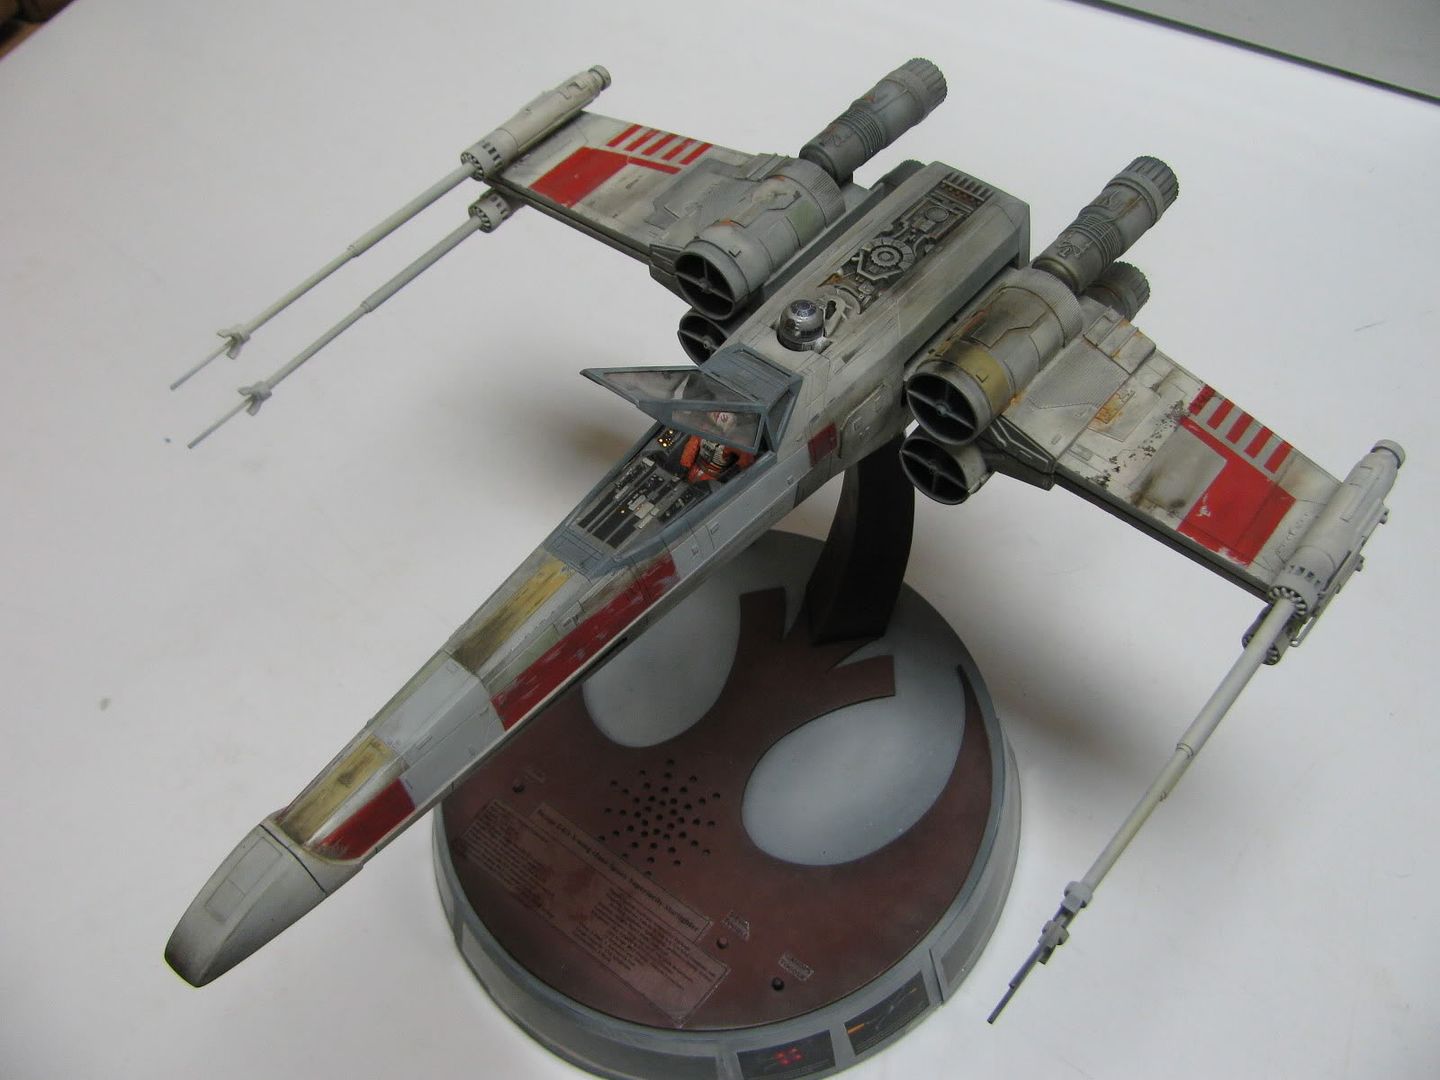
Well, you can still get great results with things like weathering powder and dry pastels. You basically brush them on with a paintbrush just like you would regular paint, and they stain very similarly to real soot and grime. Check this build out:
See the subtle streaking on the wings? All done with weathering powder. It's very controllable and not very expensive either.
If you can't find weathering powder, a set of browns and grays in pastel will do the trick. Just grind them up and use them like weathering powder. You just have to make sure you don't buy the oil pastels, as they crumble and smear rather than turn to powder.
This train car was almost completely "painted" using weathering powder:

It's really great stuff, and like I said, very easy to use and control.
See the subtle streaking on the wings? All done with weathering powder. It's very controllable and not very expensive either.
If you can't find weathering powder, a set of browns and grays in pastel will do the trick. Just grind them up and use them like weathering powder. You just have to make sure you don't buy the oil pastels, as they crumble and smear rather than turn to powder.
This train car was almost completely "painted" using weathering powder:
It's really great stuff, and like I said, very easy to use and control.
- Apr 5, 2013
- 13,876
- 10,215
- 228
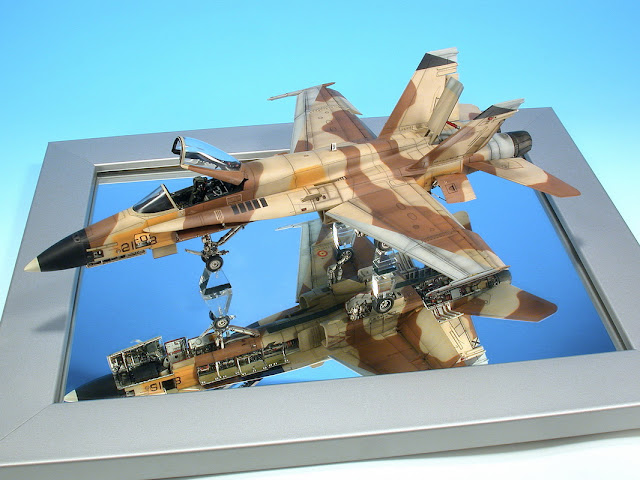
MillenniumFalsehood, you do have to admit your expertise comes into play here. I saw Steve How from "YES" pick up a $100 dollar electric guitar, and he made it it sing. That F-18 is sweet , by the way.
Expertise doesn't really enter into it with weathering powder. It's pretty much idiot-proof. Just slap it on and brush it, and it will stick to the paper. If you don't like it, just use a wet wipe or a wet paper towel to gently remove it and start over again.
Neither of those are mine, though; I should have linked to this:
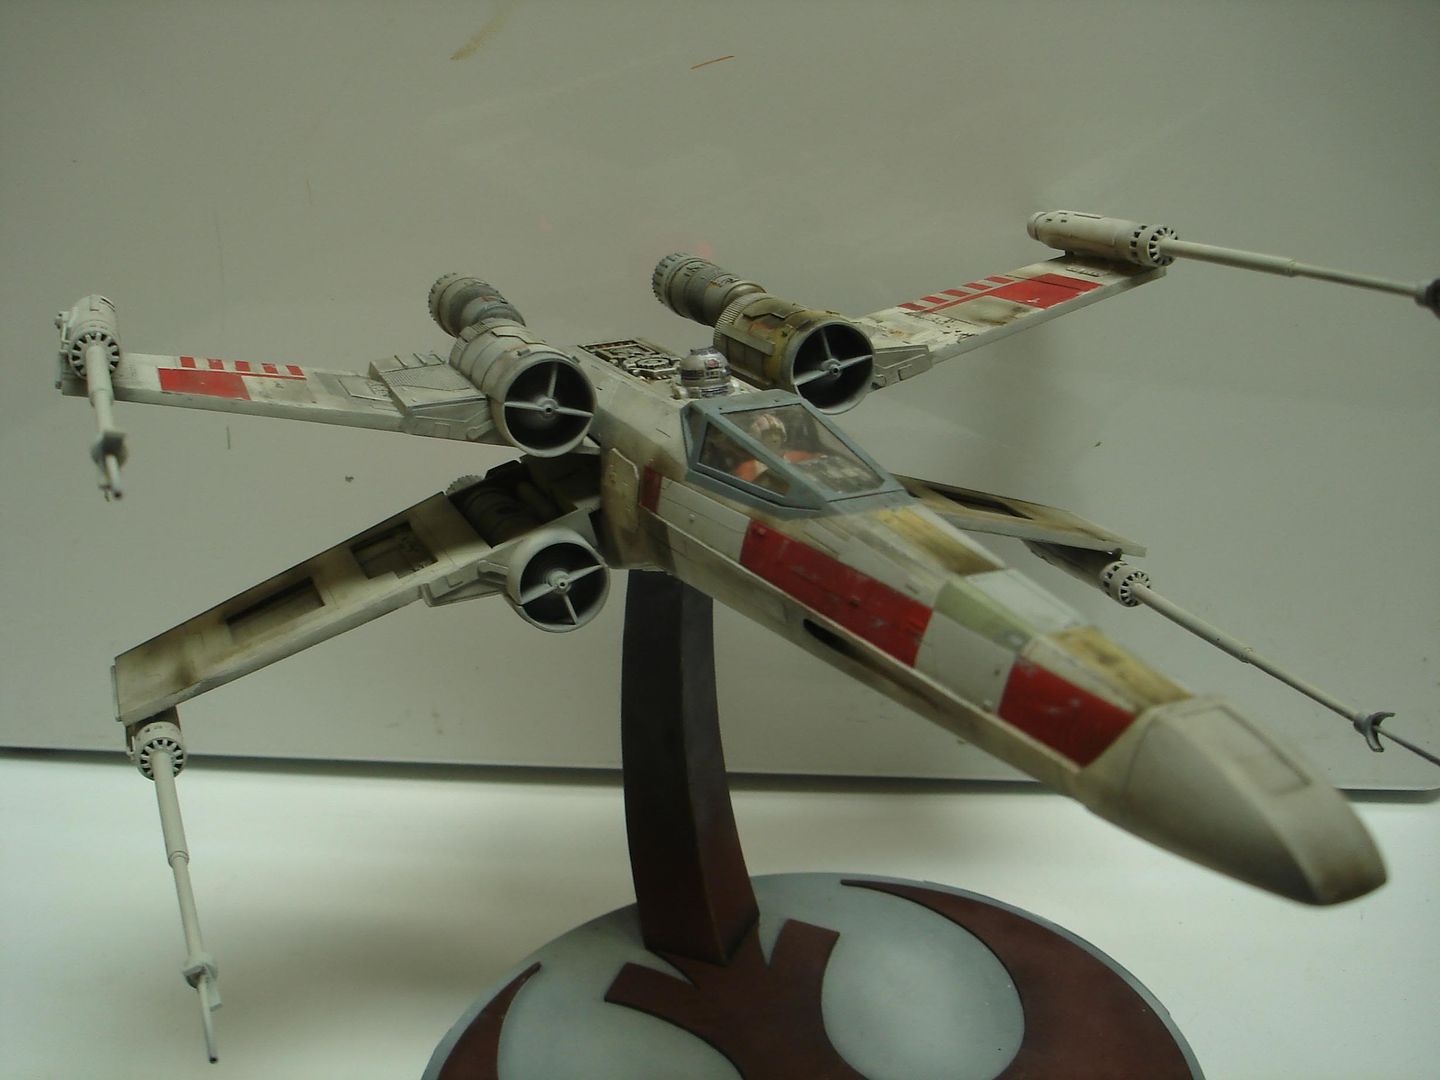
That actually is mine. I used weathering powder for the first time on that build, and it turned out fantastic. Most of those burn marks and discolorations were pretty much happy accidents. There were a few that a purposefully shaped to be that way (I think the big burn mark on the dorsal port engine cowling is one), but overall it's pretty much the powder doing the work for me. Some of them are actually oil paint, which is also idiot proof, but a lot of that is weathering powder.
Neither of those are mine, though; I should have linked to this:
That actually is mine.
I used weathering powder for the first time on that build, and it turned out fantastic. Most of those burn marks and discolorations were pretty much happy accidents. There were a few that a purposefully shaped to be that way (I think the big burn mark on the dorsal port engine cowling is one), but overall it's pretty much the powder doing the work for me. Some of them are actually oil paint, which is also idiot proof, but a lot of that is weathering powder.I had that kit once and it won a contest. yours looks even better then mine did, I use weathering chalks all the time, and oils as well but I must say they are not "foolproof"
this powder weathering-thingi am using it on the snowspeeder for practice.
so when i start on the Ywings..all will go perfect ...
- Apr 5, 2013
- 13,876
- 10,215
- 228
-- A phrase I don't like to use, only because I have proved it wrong on oh so many occasions!"Idiot-Proof"
AAANNNDD Back to the snowspeeder..
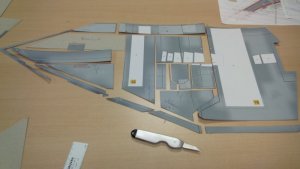
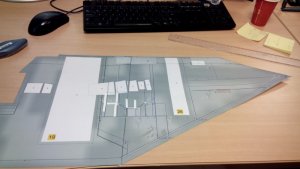
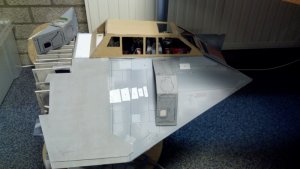
i printed the orginal hull sheets again and put the real prop picture at the screen.
Looked where the plating is put and drawn it on the orginal.
then glued it on a thin carton and cut it out.
after the cutting part i took of the orginal papercraft hull sheet and glued the pieces on to the new grey skin.
i made 3 different grey-tones .
And now the half part of the snowspeeder side 1 is glued on...
and took off again (because i forgot a piece of hull) and put back on again
and after that i saw that i forgot the screw holes F****K
and i couldn't take the hull parts of again because the glue is dry..
So......i try to drill them with a dremel....when i find one.
14932
Attachments
Still looking good Dnalor,
and Millennium, My biggest problem with weathering powders in getting them in the right places
and Millennium, My biggest problem with weathering powders in getting them in the right places
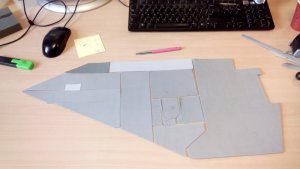
thanks..somehow ....this should be a easy build...but it gets more difficult with every step i make....i hoped that after the engines it would get easier.
the plating looks great but i had to correct some pieces so they would fit...how that is posible i don't know..
i also have to rebuild the strips on the edge of the wing..
But overall i'm very pleased with the result. now the other side and then the nose..
Attachments
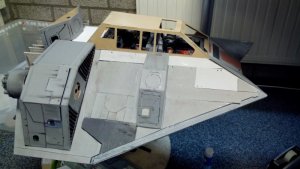
very nice, how you produce such large models:thumb:
A better question is, where would one put all these huge models? I don't think any of them are under 45 centimeters long.

- Apr 5, 2013
- 13,876
- 10,215
- 228
I think it's coming out great too. I wouldn't worry about dimensions, just worry about making the parts fit symmetrically and in balance, and as great as it is now, it will be even greater!