Had to pop over here to take a look, and it seems that I'll have to keep coming back to keep up with it... Nice looking build, keep up the great work.
building my own snowspeeder
- Thread starter dnalor
- Start date
You are using an out of date browser. It may not display this or other websites correctly.
You should upgrade or use an alternative browser.
You should upgrade or use an alternative browser.
Yes untill now it's a great build...
everything i try works....more or less...")
And it looks like the scale off it all fits the ship.
Now when i flip over the ship..i hope it stays on
it's a big pile off carton which isn't calculated with the construction of the orginal craft.
everything i try works....more or less...
And it looks like the scale off it all fits the ship.
Now when i flip over the ship..i hope it stays on
it's a big pile off carton which isn't calculated with the construction of the orginal craft.
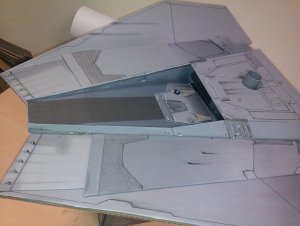
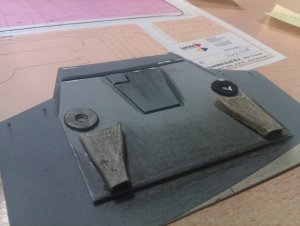
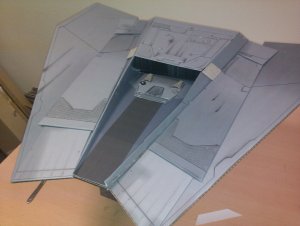
Ok it fits..
i made some side flaps to hold it up.
and started with the raised part on the ground..uh..the piece in the picture without the grey-color.
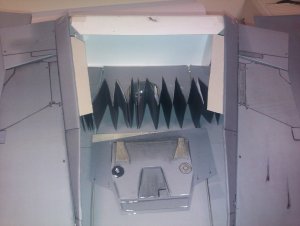
Also i have to make a skin from the nose to the engine air intake now you see the orginal parts and that's not so good.
aH....i thinking about constructing an engine something..
because of the large opening of the air intake. you can see way back in there..
i try to fill it up a little
5300
i made some side flaps to hold it up.
and started with the raised part on the ground..uh..the piece in the picture without the grey-color.
Also i have to make a skin from the nose to the engine air intake now you see the orginal parts and that's not so good.
aH....i thinking about constructing an engine something..
because of the large opening of the air intake. you can see way back in there..
i try to fill it up a little
5300
Attachments
aargghh from this day on..
i'm building a disney toy....
disney bought star wars
good part...there will be 3 more movies...
scary part..mickey is the great evil boss of the emporer..
i'm building a disney toy....
disney bought star wars
good part...there will be 3 more movies...
scary part..mickey is the great evil boss of the emporer..
aargghh from this day on..
I'm building a disney toy....
Disney bought star wars
good part...there will be 3 more movies...
Scary part..mickey is the great evil boss of the emporer..

There is not enough that can be said about this project.
This model is turning out to be far better then studio quality.
The amount to energy, effort, and work that you are putting into this, is PHENAMINAL!!!
This model is turning out to be far better then studio quality.
The amount to energy, effort, and work that you are putting into this, is PHENAMINAL!!!
Z
Zathros
The vanes looks fantastic. This is bowing peoples minds here, I can't imagine the reaction of those who will get to see them in the flesh!
Thanks,i do my best.
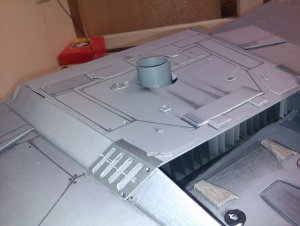
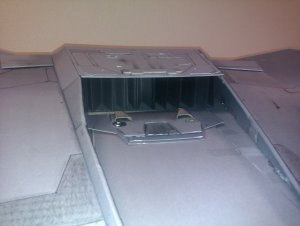
Today i installed the inside of the air intake..and made the panel-spaces the same.
and it looks great
Again 1 problem less..
Where's my next problem
Today i installed the inside of the air intake..and made the panel-spaces the same.
and it looks great
Again 1 problem less..
Where's my next problem
Finally...the Vanes
Also the midsection of the ship has his final color.
Now the details, and the hole for the mounting device.
5722
That looks great. I always thought the Paper-replika Snowspeeder looks a little bit boring from the bottom side. I am curious about the next details.
regards loenf
I remember you saying you were wanting to do more scratch building this time around and it really seems you are getting a nack for it. Your scratch built parts intgrated perfectly and really take this model up a notch. I cant wait to see this in it's final glory.
me too..
I hope one day i can do a nice Y-wing...he is on my secret todo list...
But your scratch building is a little uh..very much higher level then mine.
My building skills start to become a little good but the have to become much better before i try an Y-wing.
I hope one day i can do a nice Y-wing...he is on my secret todo list...
But your scratch building is a little uh..very much higher level then mine.
My building skills start to become a little good but the have to become much better before i try an Y-wing.
Thanks,
detailing is difficult.
that because i everything i make has to be a grey colour..
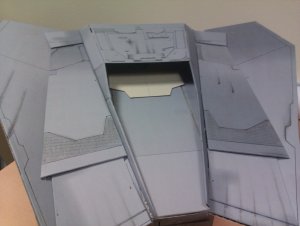
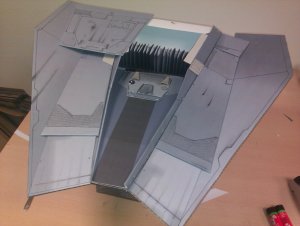
Today i attached the nose fins..and some uh things the air-intake.
Also made the hole for the wall-mount and glued the plate to the belly of the monster.
i need to hide the gap between the plate and the rest of ship.
6063
detailing is difficult.
that because i everything i make has to be a grey colour..
Today i attached the nose fins..and some uh things the air-intake.
Also made the hole for the wall-mount and glued the plate to the belly of the monster.
i need to hide the gap between the plate and the rest of ship.
6063