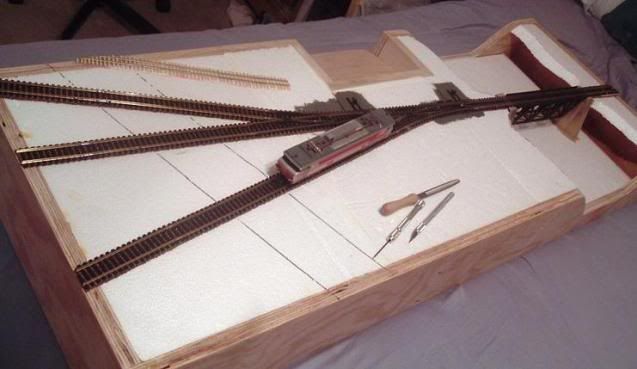
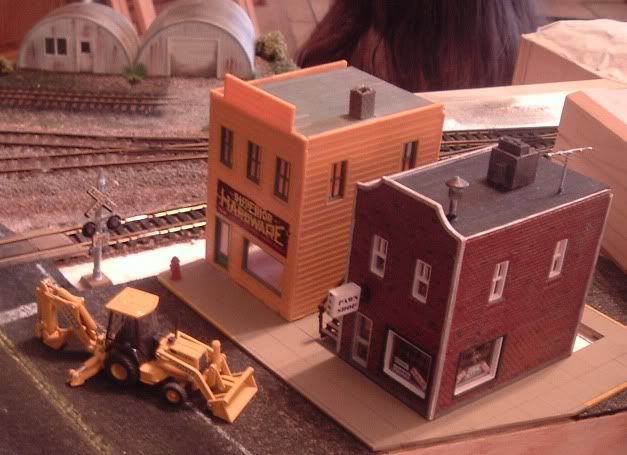
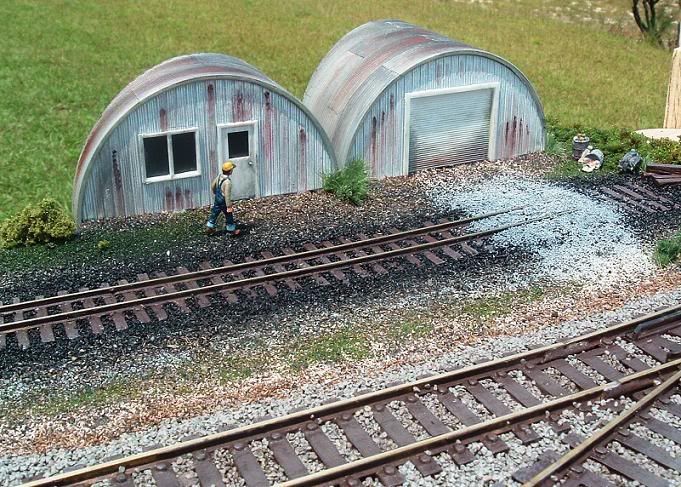
...but I thought you might be interested in some of my wiring projects.
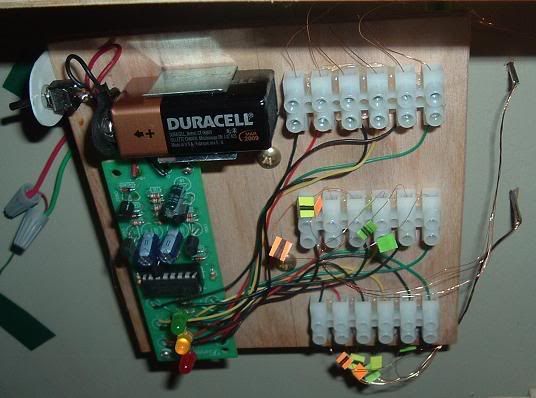
These are my N scale traffic lights I just finished. The price of "scale" traffic lights being absurd---the flasher unit is $35, the lights run $10 or more apiece---I felt there was something that could be cobbled together from this>>> FK148 Traffic Light Kit, with 12 LEDs
At $9, it certainly was worth a try. I deviated from the instructions by wiring the LED portions of the circuit with appropriate colored wire, then ran them to buss strips for each light. In my case, it was for a 3-way intersection so the remaining lights were wired into place, then the whole assembly was tested.
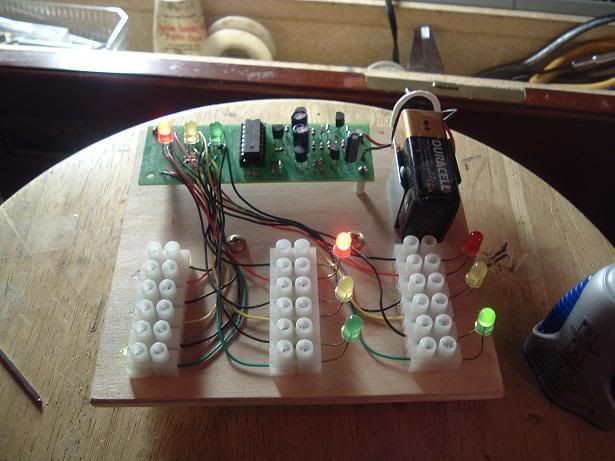
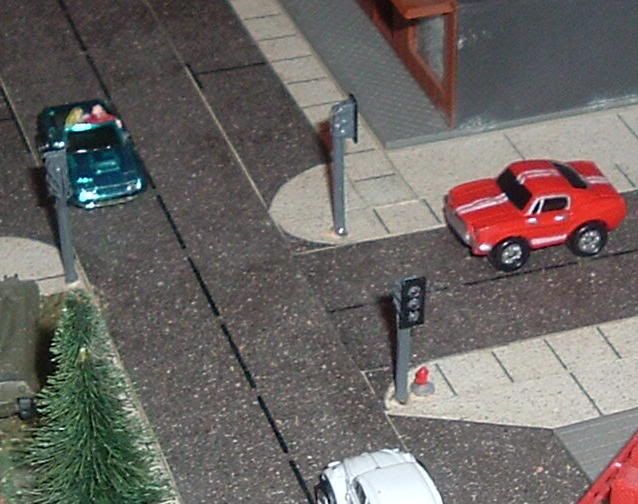
My masts were made from lengths of C70 rail. My wires are pulled from a salvaged transformer. The wire on a transformer is coated with varnish already, making it perfect for this kind of install. The wire in a coil has to be insulated to work its magic that makes a motor or transformer do what they do. Just a matter of peeling off what you need, being careful not to nick or kink the wire. Soldering it or making a terminal connection requires scraping the ends first. My LEDS are 1.6mm clear red,yellow,green ones glued to the mast.
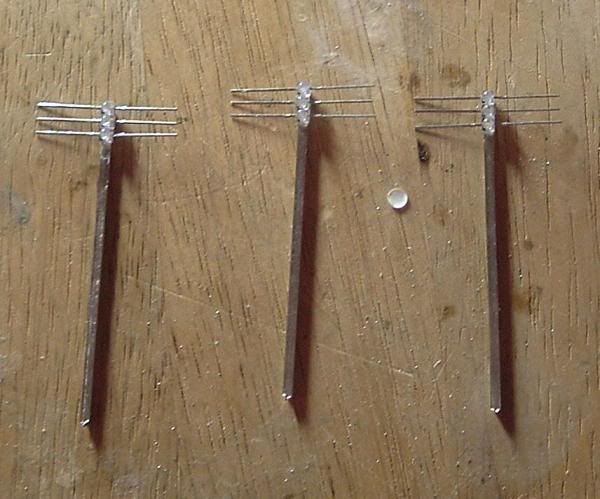
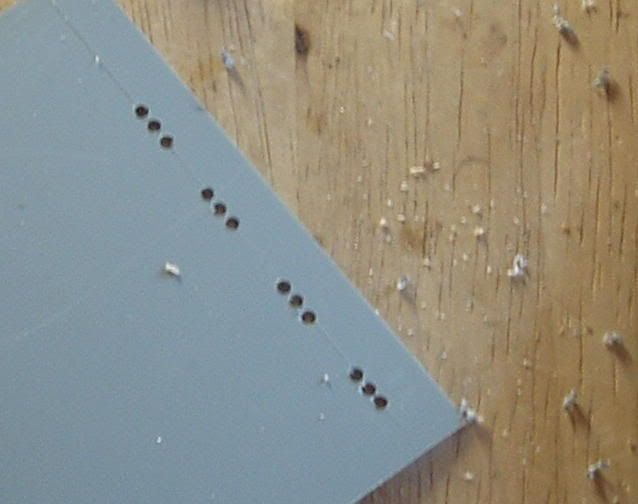
My targets were made from sheet styrene drilled for the lights.

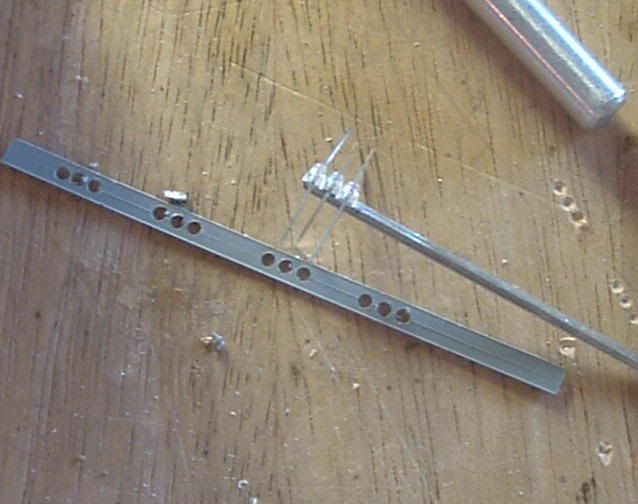
The wire leads were soldered to the LEDs then color coded for later under table installation. The wires were then carefully glued down the side of each mast, then tested. Then the targets were installed and the lights tested again. Note the dime just behind it for size comparison.
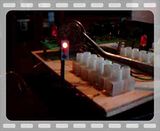
Several coats of paint insulates the whole assembly. The circuit is installed and wired under the layout. Yes, I use Micro Machines cars...placed there especially for rivet counters and Tony Koester.

I've found the extra set of lights are a good diagnostic tool as the lights are in series with each other somewhat. I'm sure a more experienced electronics wizard would be able to simplify the wiring somehow to reduce the number of wires.
At about 3/8" x 3/16", the signals are much nicer than what is currently available. The rail makes them quite sturdy and the wires are hardly noticeable at all, even when viewed up close. And, at $15 total and about 7 hours work from start to finish, are a good bit easier on the wallet.
If there is any one improvement I wish I had the foresight for, it would be to place a piece of shim brass between each LED on the mast. At our bird's eye views, the colors tend to bleed into the upper lenses, making it appear to be two green or two yellow lights going. Near ground level it's fine. I'm stilled tickled I pulled it off, I'll just keep that in mind when I do my 3 light railroad signals.
Glad to see some faces I still recognize and I hope to drop by more rather than lurk in the shadows.
These are my N scale traffic lights I just finished. The price of "scale" traffic lights being absurd---the flasher unit is $35, the lights run $10 or more apiece---I felt there was something that could be cobbled together from this>>> FK148 Traffic Light Kit, with 12 LEDs
At $9, it certainly was worth a try. I deviated from the instructions by wiring the LED portions of the circuit with appropriate colored wire, then ran them to buss strips for each light. In my case, it was for a 3-way intersection so the remaining lights were wired into place, then the whole assembly was tested.
My masts were made from lengths of C70 rail. My wires are pulled from a salvaged transformer. The wire on a transformer is coated with varnish already, making it perfect for this kind of install. The wire in a coil has to be insulated to work its magic that makes a motor or transformer do what they do. Just a matter of peeling off what you need, being careful not to nick or kink the wire. Soldering it or making a terminal connection requires scraping the ends first. My LEDS are 1.6mm clear red,yellow,green ones glued to the mast.
My targets were made from sheet styrene drilled for the lights.
The wire leads were soldered to the LEDs then color coded for later under table installation. The wires were then carefully glued down the side of each mast, then tested. Then the targets were installed and the lights tested again. Note the dime just behind it for size comparison.
Several coats of paint insulates the whole assembly. The circuit is installed and wired under the layout. Yes, I use Micro Machines cars...placed there especially for rivet counters and Tony Koester.
I've found the extra set of lights are a good diagnostic tool as the lights are in series with each other somewhat. I'm sure a more experienced electronics wizard would be able to simplify the wiring somehow to reduce the number of wires.
At about 3/8" x 3/16", the signals are much nicer than what is currently available. The rail makes them quite sturdy and the wires are hardly noticeable at all, even when viewed up close. And, at $15 total and about 7 hours work from start to finish, are a good bit easier on the wallet.
If there is any one improvement I wish I had the foresight for, it would be to place a piece of shim brass between each LED on the mast. At our bird's eye views, the colors tend to bleed into the upper lenses, making it appear to be two green or two yellow lights going. Near ground level it's fine. I'm stilled tickled I pulled it off, I'll just keep that in mind when I do my 3 light railroad signals.
Glad to see some faces I still recognize and I hope to drop by more rather than lurk in the shadows.

") :-D:-D
:-D:-D