

Banana PC jr. 6000 - Alpha Build
- Thread starter DJPinter
- Start date
You are using an out of date browser. It may not display this or other websites correctly.
You should upgrade or use an alternative browser.
You should upgrade or use an alternative browser.
Case Back - Bottom
Interior.pdf - pages 10 & 11

Bottom Interior


Glue B.1.9 to the corrugated cardboard and trim.

Bottom Exterior


Glue B.0.8 to the opposite side of the corrugated cardboard. Glue Rubber Feet to the circles on B.0.8.


Glue B.0.8 to the opposite side of the corrugated cardboard.


Cut crosses as indicated through the B.0.10, corrugated cardboard and B.1.9.


Interior.pdf - pages 10 & 11
B.1.9
Exterior - Apple/Banana/Veidt.pdf - pages 4 & 5B.0.8
Paper Box - CorrugatedBottom Interior
Glue B.1.9 to the corrugated cardboard and trim.
Bottom Exterior
Glue B.0.8 to the opposite side of the corrugated cardboard. Glue Rubber Feet to the circles on B.0.8.
Glue B.0.8 to the opposite side of the corrugated cardboard.
Cut crosses as indicated through the B.0.10, corrugated cardboard and B.1.9.
Last edited:

I figured out why this is taking me so long. There's 197 parts.
Case Back - Side Walls

- Left Inner Wall
- B.3.4 Interior.pdf - pages 1,7 & 8
- B.2.3 Exterior - Apple/Banana/Veidt.pdf - pages 2 & 3
- Left Outer Wall
- B.1.10 Interior.pdf - pages 13, 14 & 15
- B.0.9 Exterior - Apple/Banana/Veidt.pdf - pages 20 & 21
- Right Inner Wall
- B.3.5 Interior.pdf - pages 7,8 & 13
- B.2.4 Exterior - Apple/Banana/Veidt.pdf - pages 8 & 9
- Right Outer Wall
- B.1.11 Interior.pdf - pages 1, 2 & 3
- B.0.10 Exterior - Apple/Banana/Veidt.pdf - pages 5 & 6


- Apr 5, 2013
- 13,876
- 10,215
- 228
Banana PC, For those who may not know, anything that rips on Apple is cool, in my view:
Link = https://avoision.com/2010/11/04/the_banana_jr_6000_lives.php

Link = https://avoision.com/2010/11/04/the_banana_jr_6000_lives.php
Not really a rip. More of a tribute. Besides, here's the real inspiration.Banana PC, For those who may not know, anything that rips on Apple is cool, in my view:
Link = https://avoision.com/2010/11/04/the_banana_jr_6000_lives.php
View attachment 164560


Last edited:
- Apr 5, 2013
- 13,876
- 10,215
- 228
Not really a rip. More of a tribute.
It's a double edged sword, rip or tribute, depending on who wields the sword.
")
Side Wall Assembly
Left Side Wall Parts
B.1.11 | B.0.9
B.3.4 | B.2.3
Right Side Wall Parts
B.1.10 | B.0.10
B.3.5 | B.2.4
Align parts using the vents and the angle inside of B.3.4 and B.3.5.


I'm not sure I like the warping. Thinking of using cardboard on interior, which would send me back to Rhino for the pattern. Suggestions anyone?
Left Side Wall Parts
B.1.11 | B.0.9
B.3.4 | B.2.3
Right Side Wall Parts
B.1.10 | B.0.10
B.3.5 | B.2.4
Align parts using the vents and the angle inside of B.3.4 and B.3.5.
I'm not sure I like the warping. Thinking of using cardboard on interior, which would send me back to Rhino for the pattern. Suggestions anyone?
Back Wall

Part - Page
B.0.1. - Exterior - Apple/Banana/Veidt.pdf - pages 13 & 14
B.0.11, B.0.12, B.0.13 - Exterior - Apple/Banana/Veidt.pdf - page 1
B.1.1 - Interior.pdf - pages 9 & 10
B.2.1 - Interior.pdf - pages 5 & 6
B.3.1 - Interior.pdf - page 4


Part - Page
B.0.1. - Exterior - Apple/Banana/Veidt.pdf - pages 13 & 14
B.0.11, B.0.12, B.0.13 - Exterior - Apple/Banana/Veidt.pdf - page 1
B.1.1 - Interior.pdf - pages 9 & 10
B.2.1 - Interior.pdf - pages 5 & 6
B.3.1 - Interior.pdf - page 4
Last edited:
- Apr 5, 2013
- 13,876
- 10,215
- 228
Side Wall Assembly
Left Side Wall Parts
B.1.11 | B.0.9
B.3.4 | B.2.3
Right Side Wall Parts
B.1.10 | B.0.10
B.3.5 | B.2.4
Align parts using the vents and the angle inside of B.3.4 and B.3.5.
View attachment 164897 View attachment 164898
I'm not sure I like the warping. Thinking of using cardboard on interior, which would send me back to Rhino for the pattern. Suggestions anyone?[/QUOTEUsing cardboard everywhere except the vent holes would be prudent. This looks really good. Really, it's coming out great!!
Using Cardboard,cutting out squares for the vents would be prudent, and make for a stiffer models, maybe even add some formers!!
")
Last edited:
Yes, Z. That's what I'm thinking of doing. I'll be on vacation for a week, so I'll probably have fun updating my model in Rhino with a inner cardboard layer.
The back wall, however, is coming along nicely. I'm using very little Elmer's Glue All; only enough to provide tackiness between parts. Align the parts on the cutouts. Lift up a edge and then use Scotch Super 77 as the final adhesive. Then press the hell out of it.
B.0.1 & B.1.1


B.2.1 glued to B.1.1

B.3.1 glued to B.2.1


Some of the Scotch spray glue got on the printed side of B.0.1. I was able to rub off the glue without taking any color off. I'm not sure how I feel about that.
Adding in the badges; B.0.11, B.0.12, B.0.13

Got that great two-level effect the Knights Who-Formerly-Said-Ne wanted.


Looks like I have to fix B.0.12's (name badge) dimensions.

The back wall, however, is coming along nicely. I'm using very little Elmer's Glue All; only enough to provide tackiness between parts. Align the parts on the cutouts. Lift up a edge and then use Scotch Super 77 as the final adhesive. Then press the hell out of it.
B.0.1 & B.1.1
B.2.1 glued to B.1.1
B.3.1 glued to B.2.1
Some of the Scotch spray glue got on the printed side of B.0.1. I was able to rub off the glue without taking any color off. I'm not sure how I feel about that.
Adding in the badges; B.0.11, B.0.12, B.0.13
Got that great two-level effect the Knights Who-Formerly-Said-Ne wanted.
Looks like I have to fix B.0.12's (name badge) dimensions.
Last edited:
- Apr 5, 2013
- 13,876
- 10,215
- 228
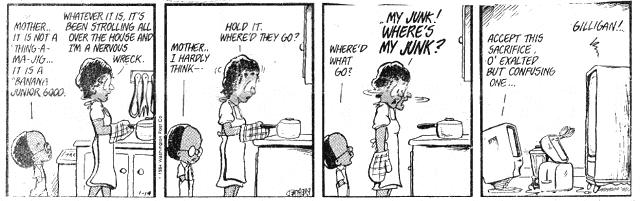
Not really a rip. More of a tribute. Besides, here's the real inspiration.
View attachment 164929
View attachment 164924
I forgot to mention, I loved these comic strips you posted, they are hilarious. I also Love this model you are making. It will definitely become a classic, and since I do build computers (I've never purchased a "ready made" computer, always built them from scratch. I would be interested in building my next one with your template as a reference . I have a small machine shop, and a sheet metal brake, so it would be easy for me to make this out of steel or aluminum, probably easier than the paper one!!
Excellent progress and subject matter. Extremely Impressive............though now that I know you too are a Rhino user, I will keep reminding you that we know that you are "One of us, One of us, Gooboo Gabba, one of us"!!!! (Excellent movie by the way!
Using Cardboard,cutting out squares for the vents would be prudent, and make for a stiffer models, maybe even add some formers!!
<headdesk>Used too much Elmer's Glue All...water based...of COURSE it'll warp.</headdesk> The back wall turned out perfect, so I think I've got the method down; use just enough Elmer's to be tacky, put pieces together, lift corner and spray Super 77 between parts.
Still need to make minor mods, though. I was concerned with weight. That's why B.1.10 & B.1.11 look that way. That design decision definitely contributed to the B.0.9 & B.0.10 looking wavy.
I can have cardboard pieces shaped like B.3.4 & B.3.5 which will solve issues with attaching the case front to the back and increases the glueing surface for all the joints in the case back.
So close the holes in B.1.10 & B.1.11 and add pattern for cardboard pieces.
Cool. Just make sure it doesn't walk off.I forgot to mention, I loved these comic strips you posted, they are hilarious. I also Love this model you are making. It will definitely become a classic, and since I do build computers (I've never purchased a "ready made" computer, always built them from scratch. I would be interested in building my next one with your template as a reference .
BTW check out http://toastytech.com/guis/banana.html
God, I hope so.I have a small machine shop, and a sheet metal brake, so it would be easy for me to make this out of steel or aluminum, probably easier than the paper one!!
Thanks and agree on Freaks. Back in the dark days of the first DVD my wife and I would harass video store clerks by asking about three films; Freaks, The Terror of Tiny Town and Wizards. That was fun while it lasted.Excellent progress and subject matter. Extremely Impressive............though now that I know you too are a Rhino user, I will keep reminding you that we know that you are "One of us, One of us, Gooboo Gabba, one of us"!!!! (Excellent movie by the way!
- Apr 5, 2013
- 13,876
- 10,215
- 228
There are many B&W movies that would just scare the pants off of people who think they can see anything. The thing is, these old movies come back to in your dreams, and everyone dreams in Black and White!!!
I’ve got the cardboard bulkhead parts designed, papakuraed & PDFed. I’m going to build the Banana base to see if my design can handle the extra weight.
Yeah, I think my design has a leg to stand on.
2.5lbs. and an old Jolt Cola can.

It even supports the current MacBook Pro!

2.5lbs. and an old Jolt Cola can.
It even supports the current MacBook Pro!
Last edited: