

ANSWER - PT 109 Build
- Thread starter B-Manic
- Start date
You are using an out of date browser. It may not display this or other websites correctly.
You should upgrade or use an alternative browser.
You should upgrade or use an alternative browser.
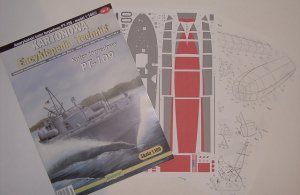


Hull Plates
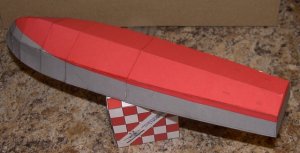
The hull plates started out very well. However by the time I got to the stem there were significant alignment problems and I had to use some of the scrap colour pieces to cover the stem. (The similarity between this boat and the problems I have experienced with ANSWER aircraft kits is starting to show).
The hull plates started out very well. However by the time I got to the stem there were significant alignment problems and I had to use some of the scrap colour pieces to cover the stem. (The similarity between this boat and the problems I have experienced with ANSWER aircraft kits is starting to show).
Attachments
Well, despite the fitting problems, it is looking really good! You must be doing something right.")
Keep at it, mate, this looks like it will be a very nice model when done.
Cheers!
Jim
Keep at it, mate, this looks like it will be a very nice model when done.
Cheers!
Jim
Just a thought if you start from the bow and then from the stern it's easier to fix any fitting problems in the middle usually a straight cut.
barry said:Just a thought if you start from the bow and then from the stern it's easier to fix any fitting problems in the middle usually a straight cut.
Thanks, that makes sense I'll try it next time. I planned to fill all the gaps etc with modelling putty, sand and repaint the hull. So the alignment problems only result in more sanding. :roll:
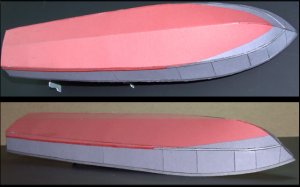
Well, I decided to stick with the paper hull. I redesigned the pieces so they fit (bottom piece is now a single part). It turned out pretty good.
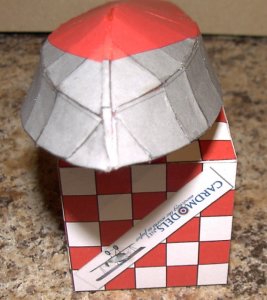
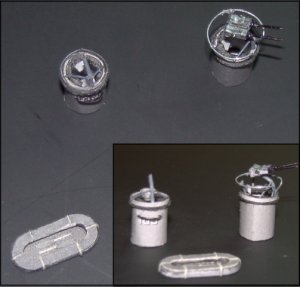
In between trial and error test fits I have been working on the gun tubs and finished the carley float.
In between trial and error test fits I have been working on the gun tubs and finished the carley float.
Attachments
I agree. The hull may have thrown you a curve intially, but you got an A+ from me for a great save. That looks pretty clean to me.
Looks really good! Amazing how much effort we will put into an area that is rarely seen afterwards.
By the way, did this kit happen to come with an engraved Coconut? lol
By the way, did this kit happen to come with an engraved Coconut? lol
Excellant build! The Revell version of this kit was one of the 1st I saved up for when I was a kid.
cmdrted said:Excellant build! The Revell version of this kit was one of the 1st I saved up for when I was a kid.
I built the Revell kit as a kid as well. This kit has much more detail. I doubt that I will blow this one up with a fire cracker. That was the eventual fate of the plastic kit. LOL
I'll post pix as I progress. I have about six builds on the go. I switch from one to another as frustration dictates. :roll:
I think that was the fate of mine too! The other plan about having multiprojects on the go sounds pretty good. There are tons of times when frustration stalls me out, I'll have to try your strategy! Thanks for the pics.
Fishcarver
Active Member
Vote me in on your save of the hull!!
That is a GREAT job!!
Model building is a great way of taking BIG challenges and solving them in miniature, using thought and patience.
Keep on buildin', mate!!
Jim
That is a GREAT job!!
Model building is a great way of taking BIG challenges and solving them in miniature, using thought and patience.
Keep on buildin', mate!!
Jim
Hi, I am also building this model as you can see in the two german foruns Kartonist.de and kartonbau.de.
I am more avanced in the build and I almost dont have problems until now. For me this is a great model. No problem.
I am more avanced in the build and I almost dont have problems until now. For me this is a great model. No problem.
tino said:Hi, I am also building this model as you can see in the two german foruns Kartonist.de and kartonbau.de.
I am more avanced in the build and I almost dont have problems until now. For me this is a great model. No problem.
tino - could you provide a direct link to your build? Thanks . . .
I measured the hull bottom pieces from my insecurance scan of the parts pages. The port & stbd sides were not exactly symetrical. The variance was small but resulted in a noticeable misalignment. This could be a printing problem, who knows. I agree, it is a great model.
At the risk of making it seem like there is an echo in here...great save on the hull! hull...hull...hull.:grin:
Seriously, really well done...and those gun tubs look great too!
Keep at it, mate!
Cheers!
Jim
BTW here are the links to Tito's build:
http://www.kartonbau.de/wbb2/thread.php?threadid=10594
http://www.kartonist.de/wbb2/thread.php?threadid=657&sid=b7decc0c92861371bcfa7e9c3f5ec950
Seriously, really well done...and those gun tubs look great too!
Keep at it, mate!
Cheers!
Jim
BTW here are the links to Tito's build:
http://www.kartonbau.de/wbb2/thread.php?threadid=10594
http://www.kartonist.de/wbb2/thread.php?threadid=657&sid=b7decc0c92861371bcfa7e9c3f5ec950
Thanks for the many comments on the hull.
The link to tino's build is appreciated, it looks GOOD
The link to tino's build is appreciated, it looks GOOD
Fishcarver
Active Member
Carry on! You are doing a great job!
And remember: the Party is vatchink you!
Your neighbour
Jim
And remember: the Party is vatchink you!
Your neighbour
Jim